Introduction & Use Case:
You’ve deployed your sensors through Azure IoT Hub and onboarded your telemetry to a Log Analytics Workspace, but you’re a ninja and know there’s more to defending your shinobi dojo’s IoT infrastructure… Enter the Defender for IoT Operational Technology (OT) sensor!
In this Post We Will:
- 🥷 Define D4IoT and the Operational Technology (OT) Sensor
- 🥷 Why deploy D4IoT and an Operational Technology (OT) Sensor?
- 🥷 Onboard your subscription to Defender for IoT
- 🥷 Deploy an Operational Technology (OT) Sensor on a Virtual Appliance
- 🥷 Defend your IoT Dojo like a Ninja!

Define D4IoT and the Operational Technology (OT) Sensor
Microsoft Defender for IoT OT Sensor is a component of the Microsoft Defender for IoT system designed to provide broad coverage and visibility from diverse data sources. It’s essentially a network sensor that discovers and continuously monitors network traffic across your network devices (the network cap feature makes it perfect to for LoRaWAN deployments). These sensors are purpose-built for OT/IoT networks and connect to a SPAN port or network TAP. They use OT/IoT-aware analytics engines and Layer-6 Deep Packet Inspection (DPI) to detect threats, such as fileless malware, based on anomalous or unauthorized activity.

💡 Pro-Tip: The standalone Enterprise IoT Sensor has been decommissioned in favour of leveraging the Defender for Endpoint agents to cover Enterprise IoT Devices such as VoIP systems, smart TVs and printers etc. so you no longer need to deploy it manually, just integrate Defender for Endpoint in Endpoint settings and again in Defender for IoT.
Why deploy D4IoT and an Operational Technology (OT) Sensor?
The Defender for IoT OT Sensor is a great way to complete our sensor deployment if you’ve been reading and following my prior Sentinel Integrated Soil Sensor articles for my peppers, as it enhances the security of an IoT Hub deployment by providing additional layers of visibility, threat detection, and analysis, thereby implementing a Zero Trust security strategy:
⏱ 1. Real-time Information Extraction: Azure Defender for IoT uses passive monitoring and Network Traffic Analysis (NTA) combined with patented, IoT/OT-aware behavioral analytics to extract detailed IoT/OT information in real-time.
🔌 2. Agentless Security: It delivers agentless security for continuously monitoring OT networks in industrial and critical infrastructure organizations. This is particularly useful for existing devices that might not have built-in security agents.
⚡ 3. Deployment Flexibility: You can deploy these capabilities fully on-premises without sending any data to Azure, which can be ideal for locations with low bandwidth or high-latency connectivity.
☁ 4. Cloud Connectivity: When configured as cloud-connected sensors, all data that the sensor detects is displayed in the sensor console, but alert information is also delivered to Azure, where it can be analyzed and shared with other Azure services.
Onboard your subscription to Defender for IoT
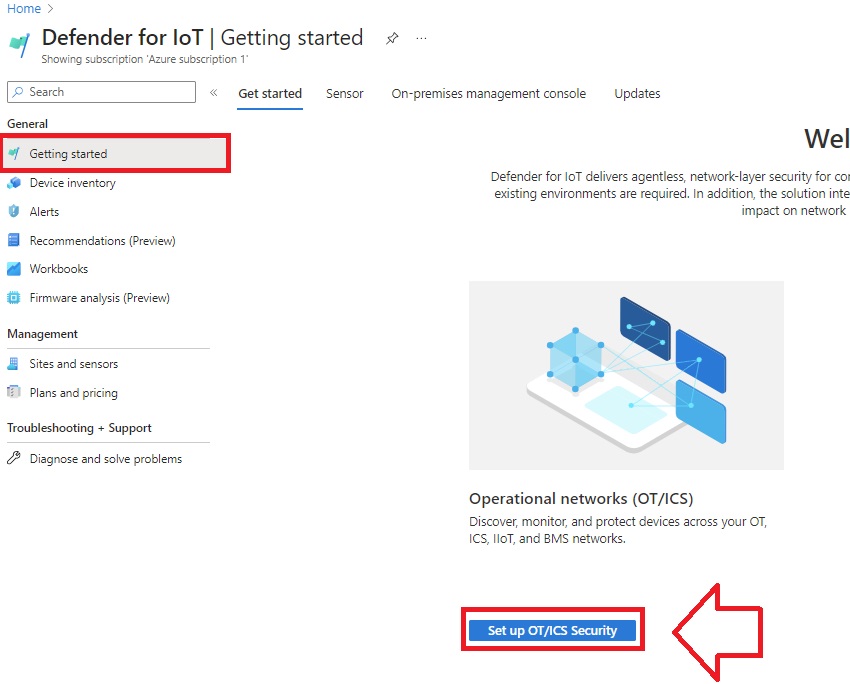
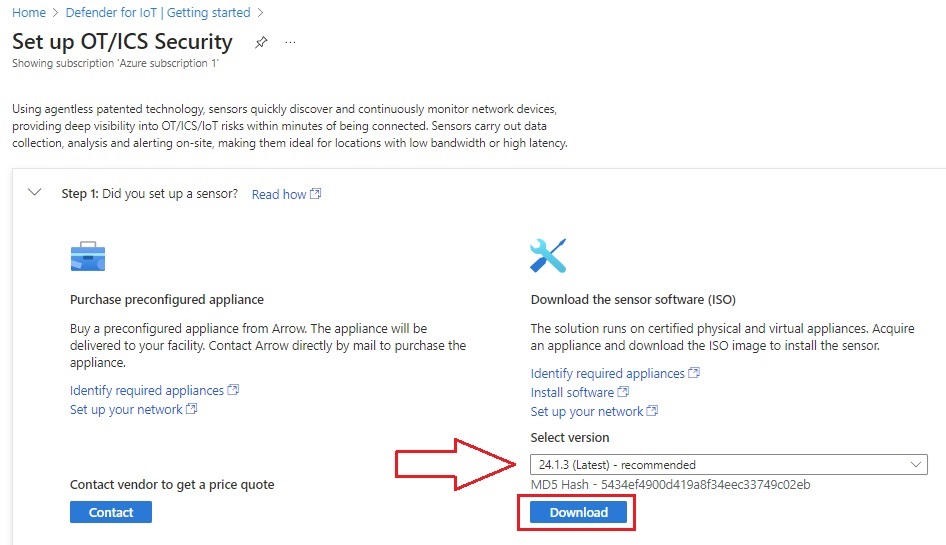
- Open Defender for IoT in the Azure portal, select Getting Started, then Setup OT/ICS Security
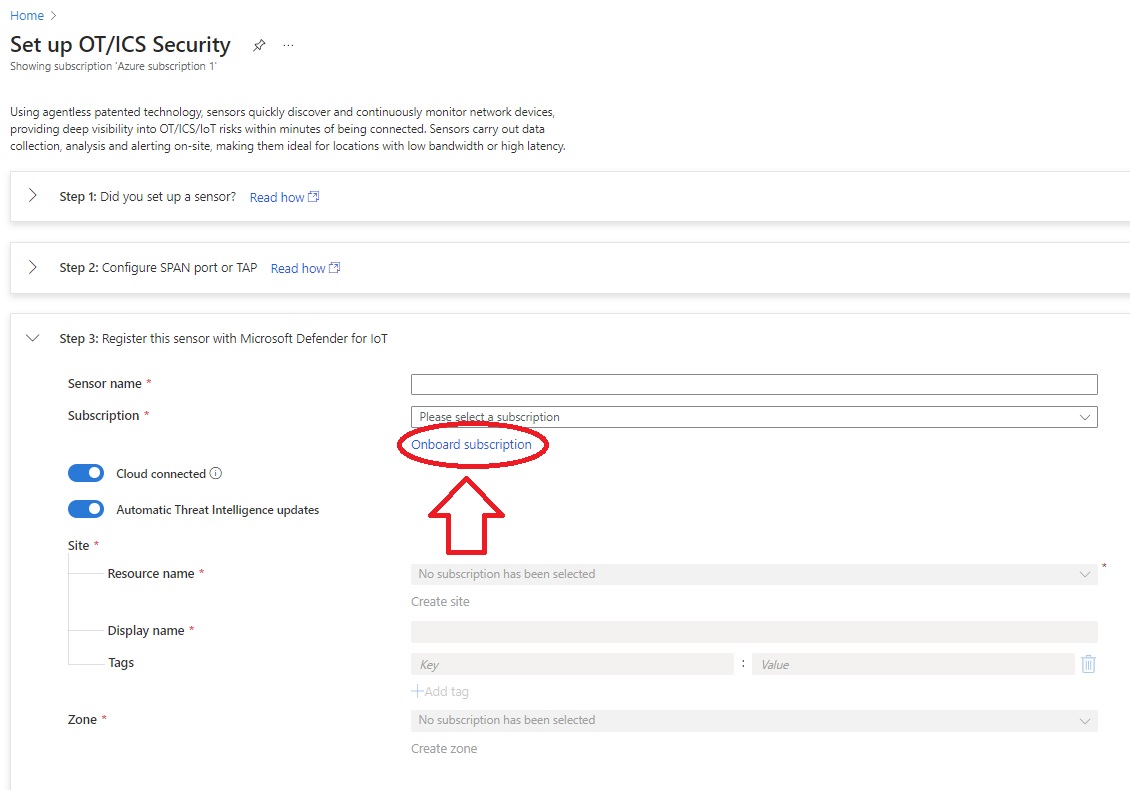
- Scroll down to Register and select Onboard Subscription
-
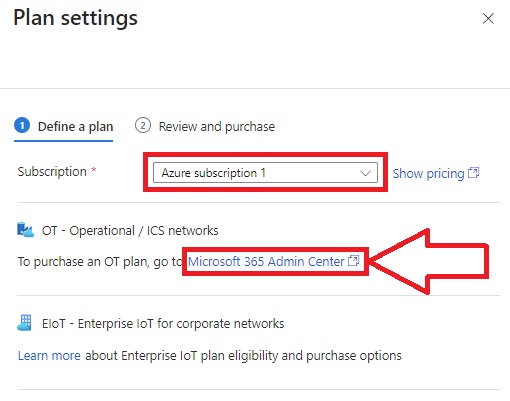
The Price plan value is updated automatically to read Microsoft 365, reflecting your Microsoft 365 license.
-
Select the Subscription you want to onboard and purchase the plan that’s right for you:
-
Select Next and review the details for your licensed site. The details listed on the Review and purchase pane reflect your license.
-
Select the terms and conditions, and then select Save.
Your new plan is listed under the relevant subscription on the Plans and pricing > Plans page. For more information, see Manage your subscriptions.
💡 Pro-Tip: You can use the above steps to spin up a trial too, if you’d like to take it for a test drive first.
Once the Sub has been onboarded and billing has been sorted out, you can download the registration package; go back to the Getting Started blade and select Setup OT/ICS Security again, then look for the registration packet in Step 3. Hang onto this for later.
Next, to download the software ISO, expand Step 1 to select the latest version and download the OT Sensor ISO:
Deploy an Operational Technology (OT) Sensor on a Virtual Appliance
The OT Network Sensor supports Hyper-V and VMWare virtual appliances. For this article, I’ve spun up a VM in Hyper-V. Configure how beefy your appliance needs to be according to the minimum requirements listed here. Since this is a lab environment, I went with the L100 hardware profile.
⚡ 1. Create the virtual machine using Hyper-V:
-
On the Actions menu, create a new virtual machine.
-
Enter a name for the virtual machine.
-
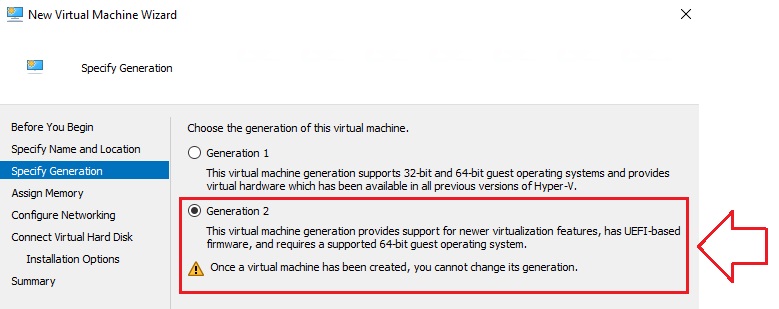
Select Generation and set it to Generation 2, and then select Next:
-
Specify the memory allocation according to your organization’s needs, in standard RAM denomination (I chose the minimum: 8192MB). Don’t enable Dynamic Memory.
-
Allocate CPU resources according to your organization’s needs.
-
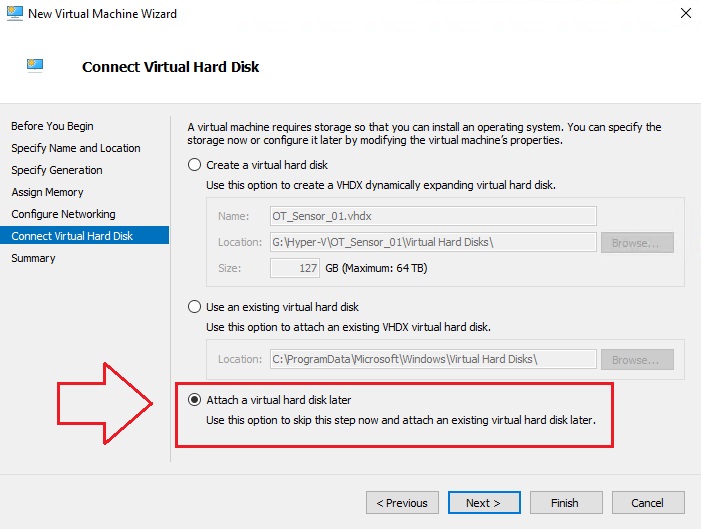
Do not configure a virtual disk for storage (yet).
-
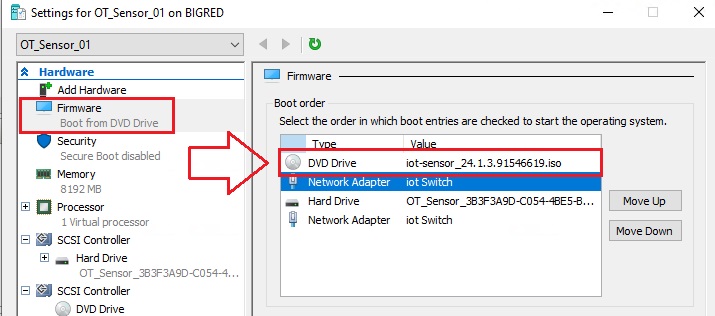
Connect the OT Sensor software ISO image to a virtual DVD drive.
-
Select Firmware, in Boot order move DVD Drive to the top of the list, select Apply and then select OK.
⚡ 2. Configure Networking:
-
You’ll need to configure at least two network adapters on your VM: one to connect to the Azure portal, and another to connect to traffic mirroring ports.
-
Network adapter 1, to connect to the Azure portal for cloud management.
-
Network adapter 2, to connect to a traffic mirroring port that’s configured to allow promiscuous mode traffic. If you’re connecting your sensor to multiple traffic mirroring ports, make sure there’s a network adapter configured for each port.
-
Right-click on the new virtual machine, and select Settings.
-
Select Add Hardware, and add a new network adapter.
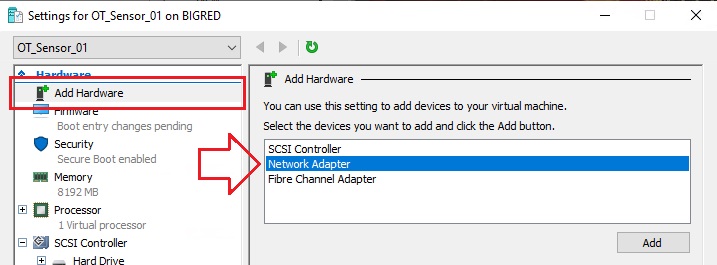
-
Select the virtual switch that connects to the sensor management network.
-
Configure the network adaptor according to your server network topology. Under the “Hardware Acceleration” blade, disable “Virtual Machine Queue” for the monitoring (SPAN) network interface.
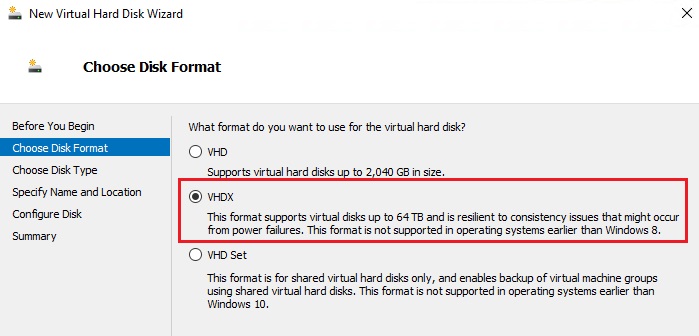
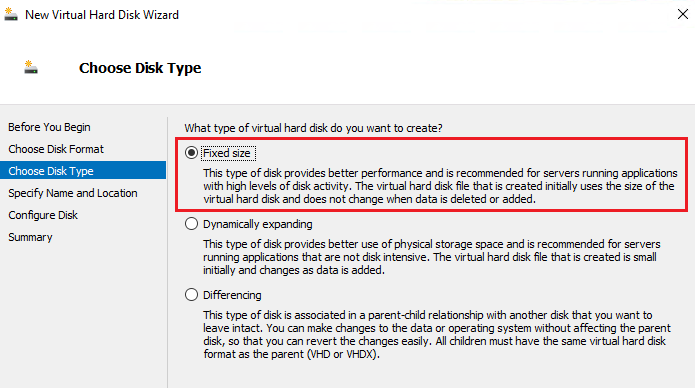
⚡ 3. Create a virtual disk in Hyper-V Manager (Fixed size, as required by the hardware profile).
- Select format = VHDX.
-
Enter the name and location for the VHD.
-
Enter the required size according to your organization’s needs (select Fixed Size disk type).
- Review the summary, and select Finish.

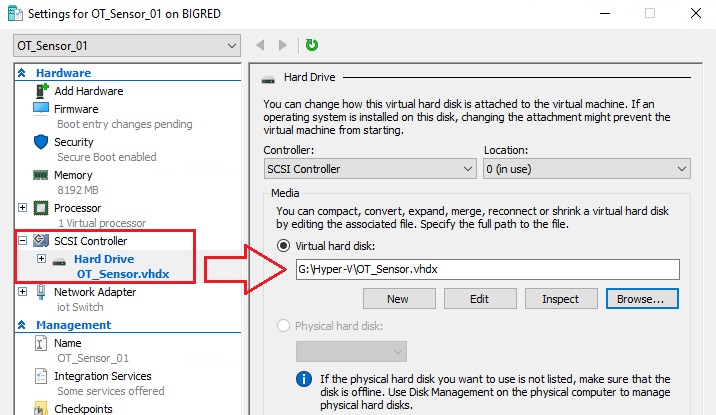
- Connect the VHDX to your virtual machine:
⚡ 4. Install & Register OT Network Sensor software.
-
Start the virtual machine.
- When the installation boots, you’re prompted to start the installation process. Either select the Install iot-sensor-<.version number> item to continue, or leave the wizard to make the selection automatically on its own:
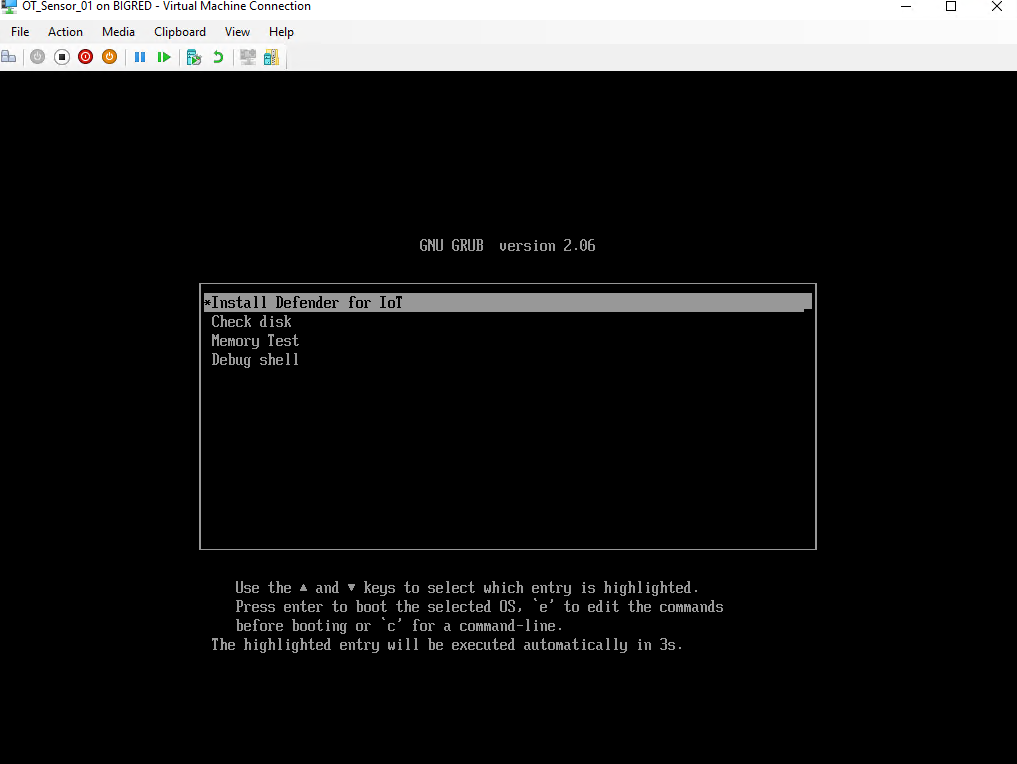
💡 Pro-Tip: The wizard automatically selects to install the software after 30 seconds of waiting.
- If you’ve configured your NICs to an external vSwitch for connectivity, it will prompt you with an IP address you can use to activate your sensor via browser:
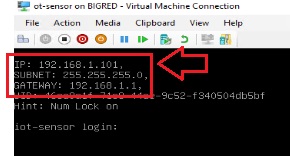
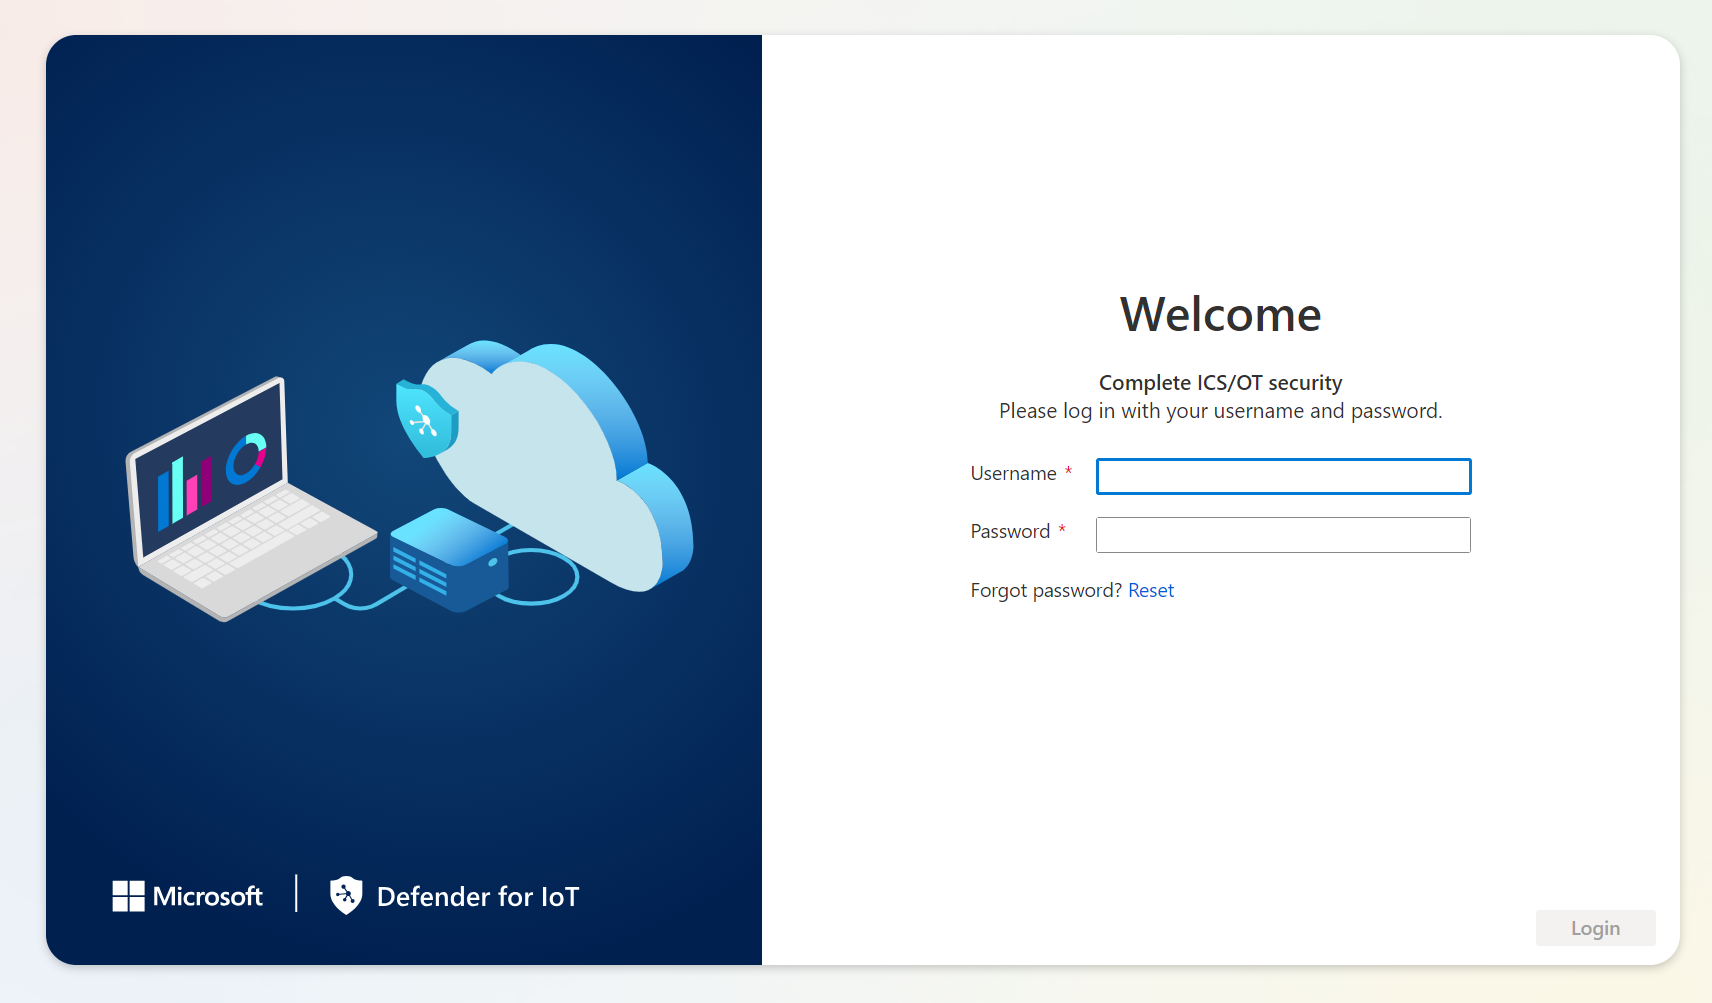
- Navigate to that IP address ending in .101 and sign in with admin/admin to change the default password and complete the deployment.
-
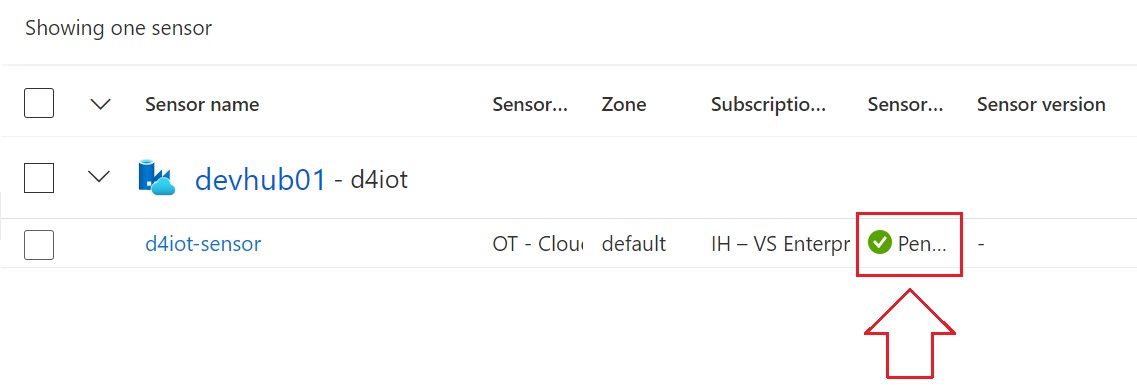
While logged in via browser, navigate to the Register tab and upload the registration file from earlier.
-
Your sensor will stay in “Pending” state until it’s registered:
Defend your IoT Dojo like a Ninja!
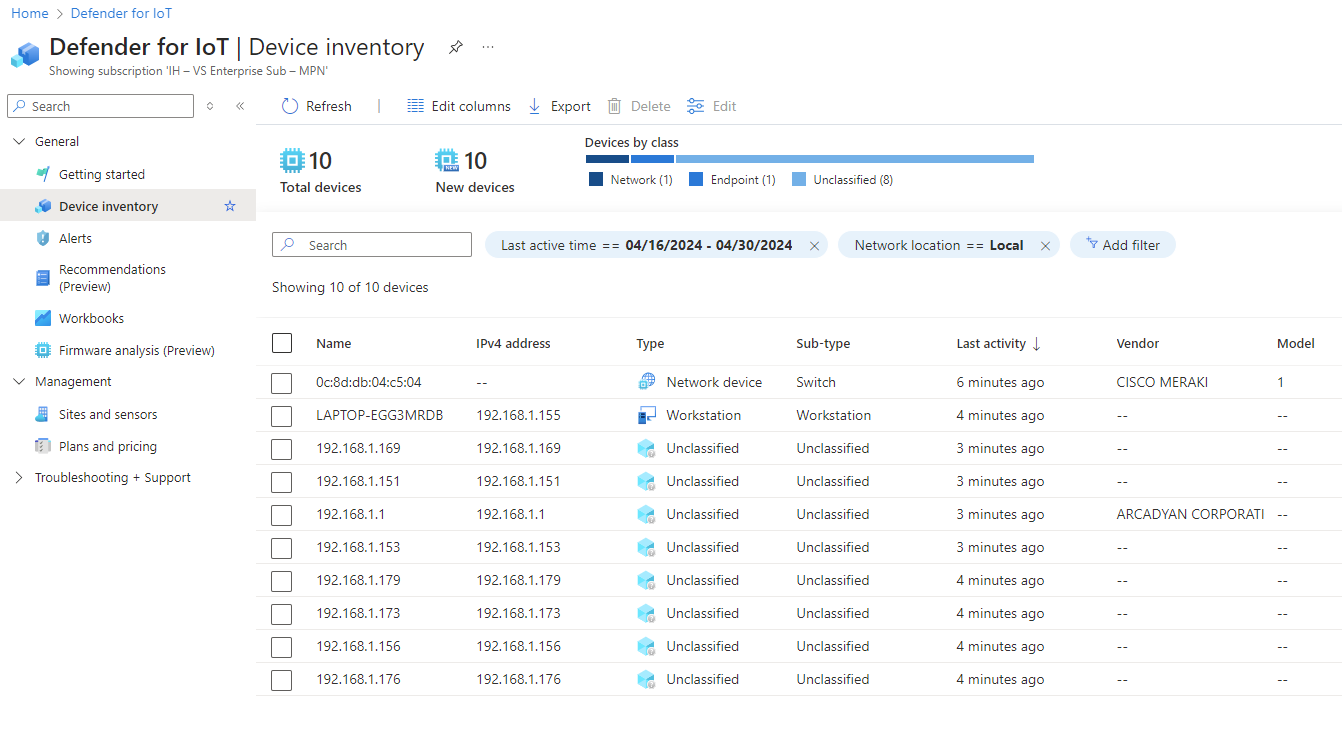
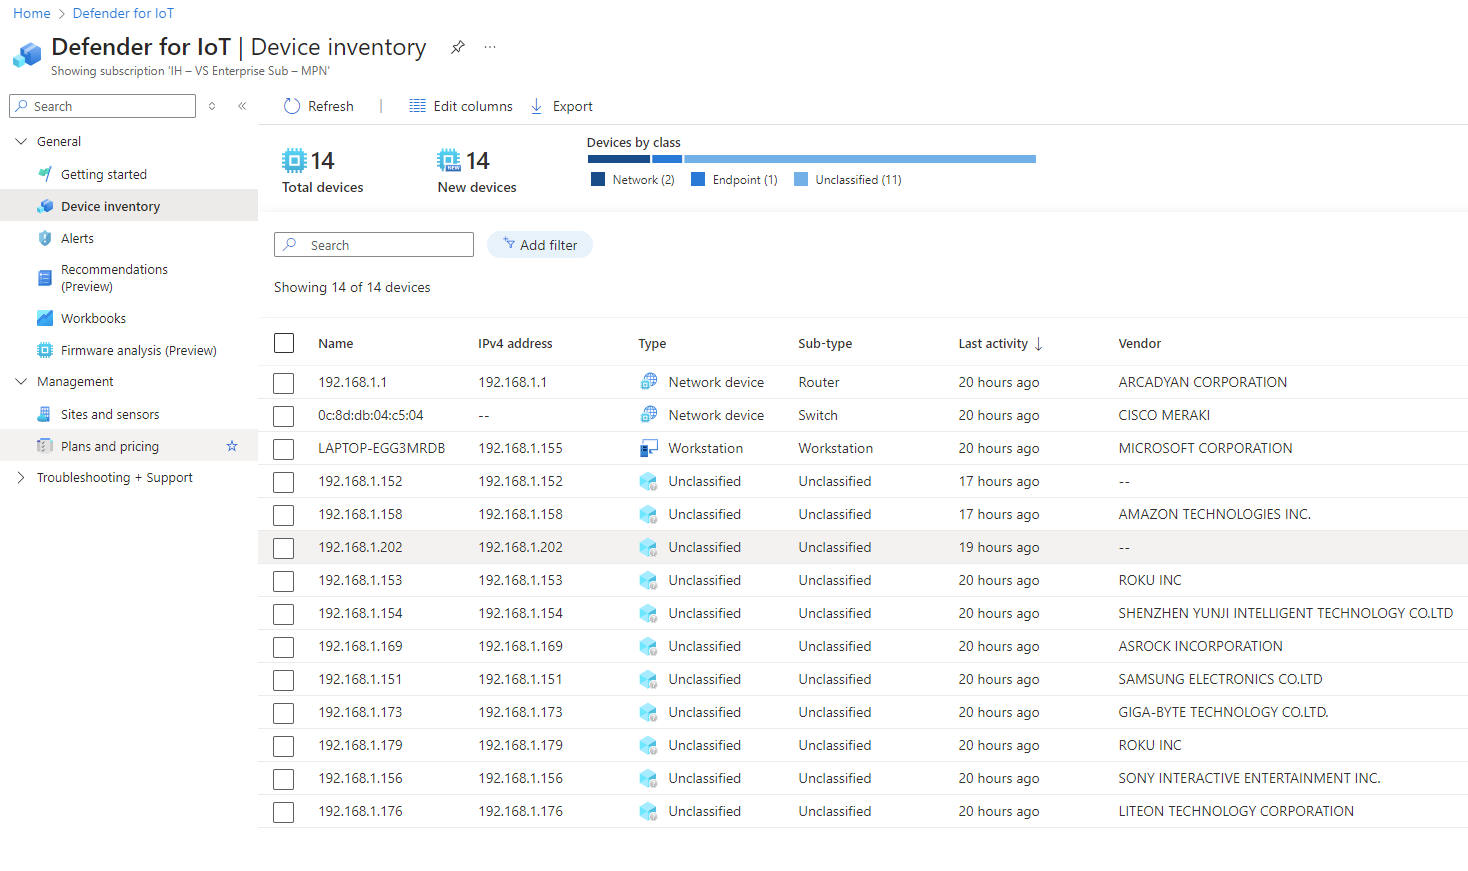
The Defender for IoT Azure portal will start populating with devices the OT Sensor sees on the network. It will start out slow, but the more time and thus additional network packets for it to inspect and it will continue to learn more about the devices it sees. Compare the following two screenshots, for example and notice the additional vendor information it was able to pull.
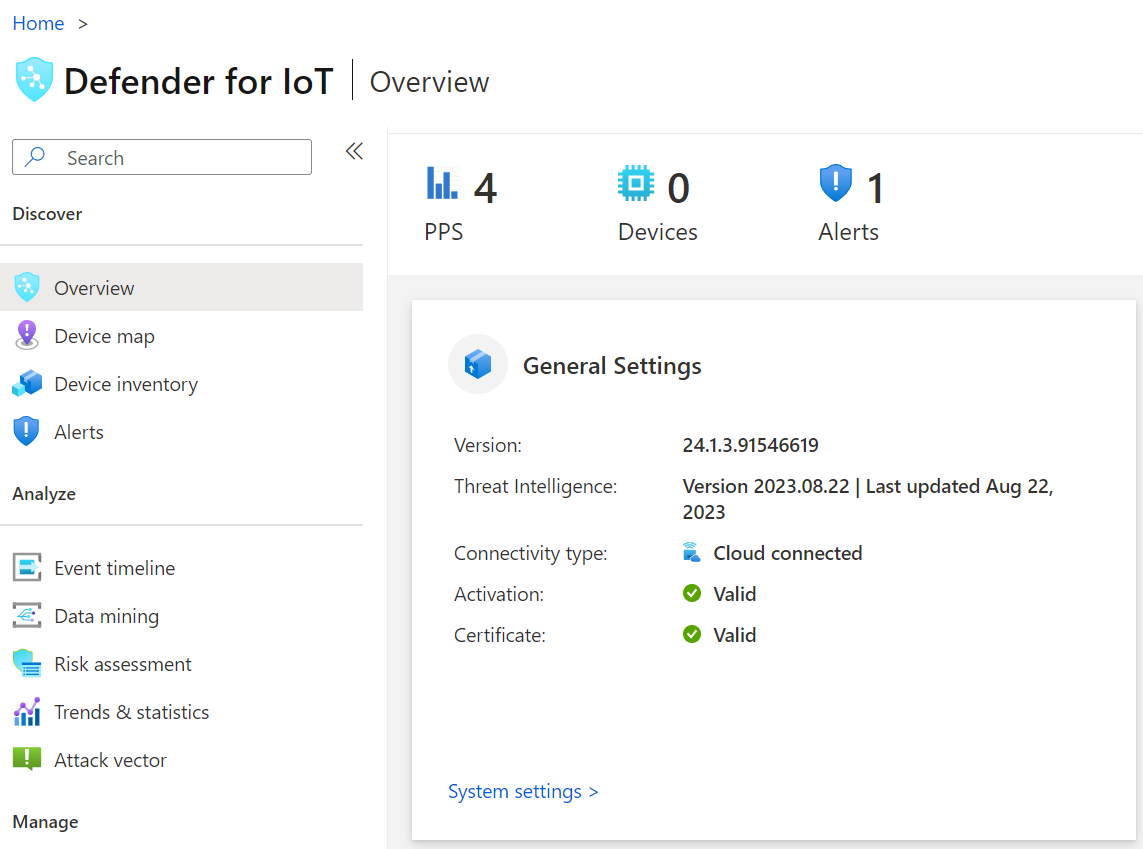
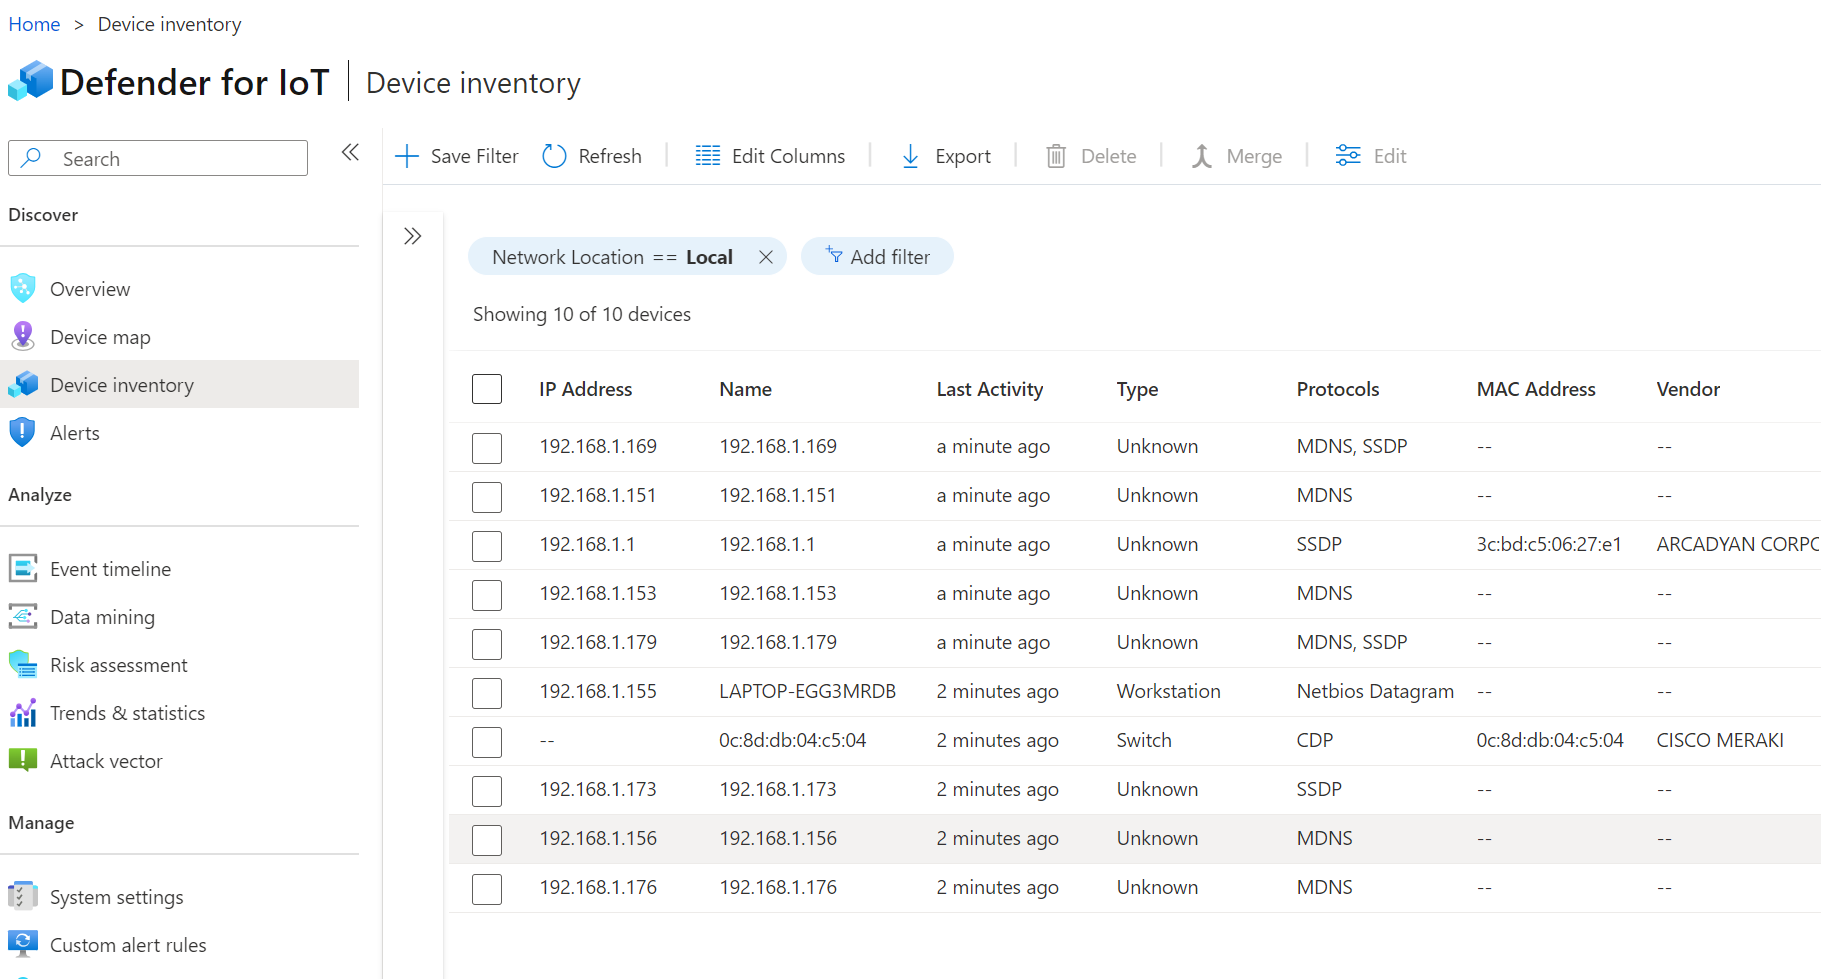
You can also look on the sensor directly by logging in on a browser over the network:
Ian’s Insights:
So it looks like the OT Network Sensor Appliance runs BullseyeOS under the hood, which is a Debian Linux Distro used to operate Raspbery Pi boards, illustrated below.
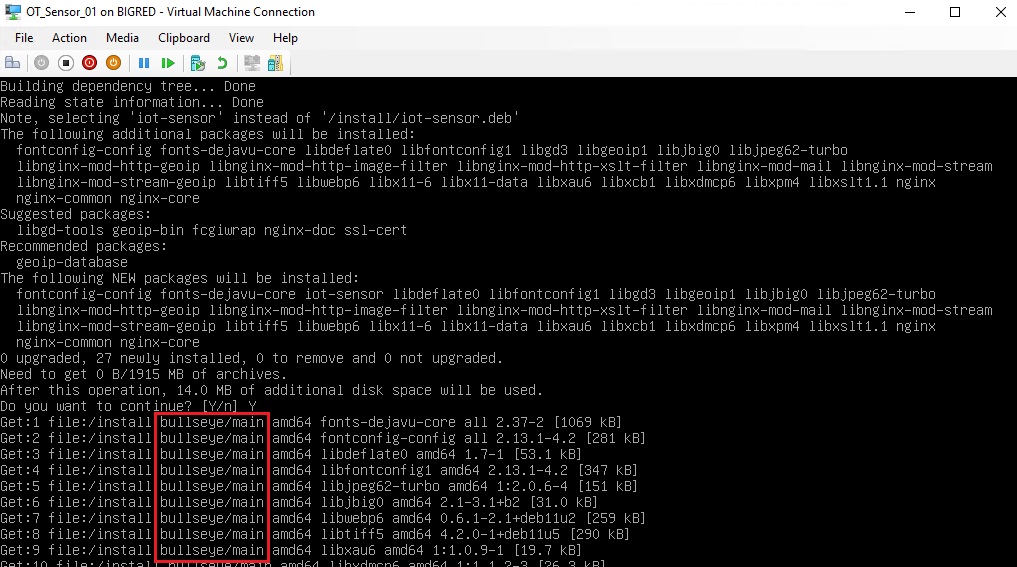
💡 BullsEye OS has many known security CVEs that were plugged up with the release of the newer Bookworm OS. Check out my earlier blog article that discusses the security upgrades included with Bookworm that are still unresolved in BullsEye here. Here’s one such example known as Dirty Pipe (aka CVE-2022-0847) that’s applicable to BullsEye OS.
📚 Want to go deeper?
My Toolbox books turn real Microsoft security telemetry into defensible operations:
🧰 PowerShell Toolbox Hands-On Automation for Auditing and Defense
🛠️ KQL Toolbox: Turning Logs into Decisions in Microsoft Sentinel
📖 Ultimate Microsoft XDR for Full Spectrum Cyber Defense
Real-world detections, Sentinel, Defender XDR, and Entra ID — end to end.
Helpful Links & Resources:
-
https://learn.microsoft.com/en-us/azure/defender-for-iot/organizations/ot-deploy/ot-deploy-path
-
https://learn.microsoft.com/en-us/azure/defender-for-iot/organizations/onboard-sensors
-
https://learn.microsoft.com/en-us/azure/defender-for-iot/organizations/getting-started?tabs=wizard
-
https://learn.microsoft.com/en-us/azure/defender-for-iot/organizations/ot-virtual-appliances
