Introduction and Use Case:
This post follows up on a couple of previous posts where we deployed a raspberry pi headlessly and onboarded syslog and auth logs (for security) to a log analytics workspace, then added an I2C soil moisture & temperature sensor and streamed the sensor data to the workspace too. Today, we will address several NEW security updates and improvements to the original processes described.
Security Updates - What’s New?
Since the release of Bullseye OS for Raspberry Pi, the default ‘pi’ account has been removed. This account was the most likely to be abused when malicious actors figured out it’s enabled by default on all deployments. Reducing our attack surface area with this simple change is a welcome feature. However, as the case with most things security related, it can come at a cost if you don’t know what you’re doing.
Another important feature that has since been added, is the ability to encrypt your sensitive information. The older method I’ve used relied on hard-coding wifi keys etc. in plain text (yuck!🤔) to a WPA_supplicant.conf file for example. This is no longer the case (huzzah😻)!
Lastly, ARM based architecture such as Raspbery Pi boards were not previously supported without the added overhead of installing Ruby and FluentD, which required the workspaceID to be hard-coded to another config file (gross🤢).
Now you can streamline your workflow and improve your overall productivity, safely and securely! 😎
The benefits don’t stop there - by leveraging Azure IoT Hub, you’ll be able to ditch the old combination of FluentD and Ruby, saving you time ⏱, energy ⚡, and reducing your overal attack surface area 🔐. So why wait? Dive into this blog post and learn how to optimize your Raspberry Pi IoT setup today! 💪
In this Post We Will:
- 👉 Review Security Updates
- 👉 Review Hardware Changes and Pre-Requisites
- 👉 Perform the New “Headless” Raspberry Pi Setup (Latest “Bookworm” OS)
- 👉 Configure an I2C Capacitive STEMMA Soil Sensor
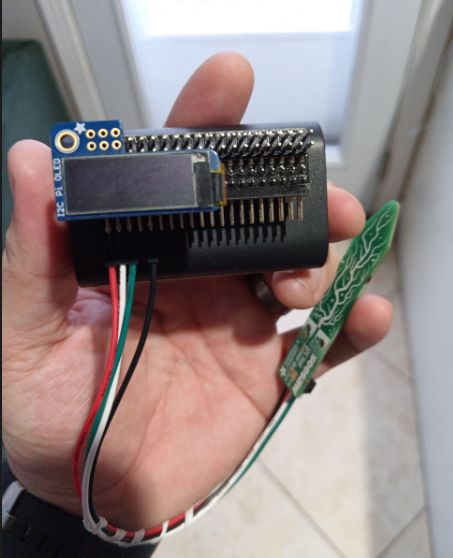
- 👉 Configure an OLED Display to Output Sensor Readings in Real Time
- 👉 Test and Confirm Hardware
- 👉 Create an IoT Hub in Azure
- 👉 Onboard Raspberry Pi to IoT Hub
- 👉 Accomplish something AWESOME today x2! 😎
Hardware Details:
Click to learn more about each component…
- I2C OLED Display
- Raspberry Pi Zero W (but any Pi should work)
- I2C Soil Moisture & Temperature Sensor
- GPIO Splitter (smaller form factor than previous prototype)
- JST PH 2mm 4-Pin to Female Socket I2C STEMMA jumper cable
Sofware | OS Details:
- These steps have been tested with Raspbian Bookworm OS, the latest Raspberry Pi operating system at the time of this article.

Azure IoT Hub Setup
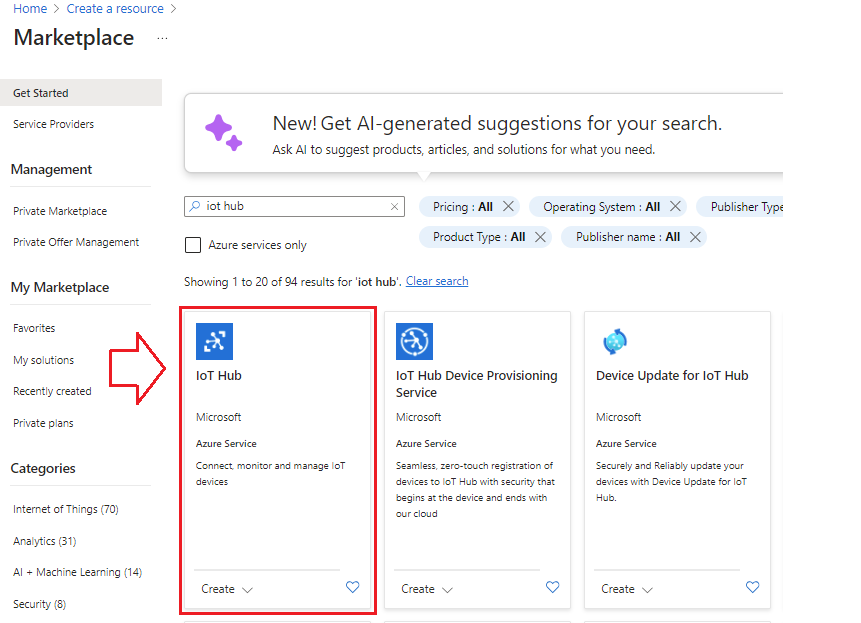
Login to the Azure portal and click +Create a Resource button, then select IoT Hub in the Search the Marketplace field.
-
Select IoT Hub then Create
-
Select your Sub, Resource Group, Region, and Name for your IoT Hub
-
In the Tier section, select Free
Grab the Connection String
-
Navigate to your new IoT Hub and select Devices, then + Add Device
-
Provide a Name for your device and select Save
-
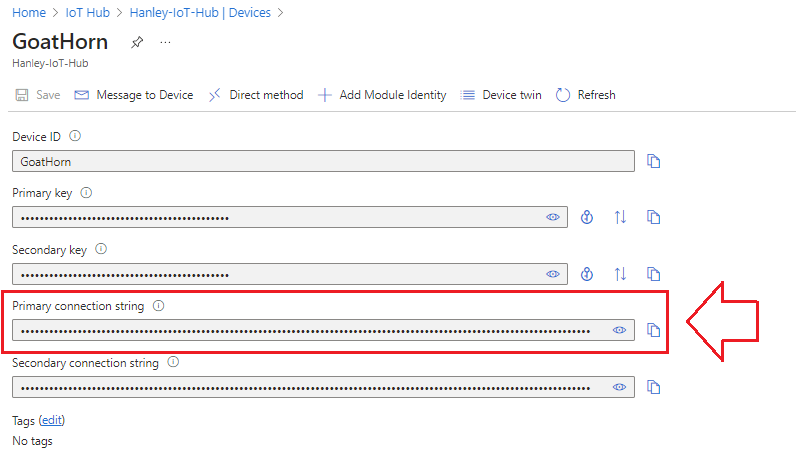
Navigate back to the Devices blade, then to your newly registered device and take note of the Primary connection string
Raspberry Pi Headless Setup (No Dedicated Mouse/Keyboard/Monitor Necessary):
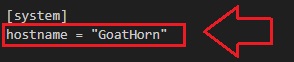
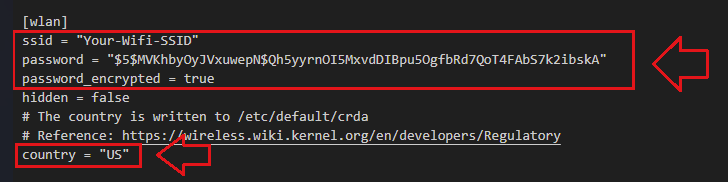
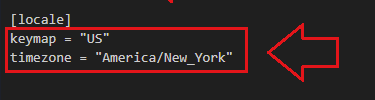
After burning our SD card with the latest Raspbian OS, we need to create a custom.toml file (this replaces the WPA_supplicant.conf file used previously and handles hostname, default account configuration, enables SSH, WLAN config, and Locale). For a breakdown of the new configuration file and which sections you need to update, see below:

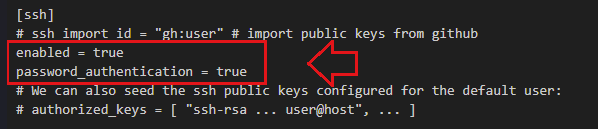
To encrypt your password and generate the encryption key, I used the following command on another linux box with OpenSSL:
openssl passwd -5 'yourPWD'
Copy the output and insert it as your ‘password’ string in the custom.toml file
Once the initial burn is complete (I use Belena Etcher), you can configure your Raspberry Pi to 🌟 automagically 🌟 join the network and enable SSH by dropping your custom.toml file into the boot drive with the following steps:
-
Unplug/plug back in your SD card into your computer after burning the OS
-
Navigate to SD storage / Boot
-
Copy and paste the custom.toml file containing your Hostname, user, SSH, WLAN, and country/region settings.
-
Boot up and wait for it to appear on your network and be available over SSH (this can take up to 10 minutes on first boot, check your router for the IP address).
Raspberry Pi Setup:
- Update your system:
sudo apt-get update && sudo apt-get upgrade
- Expand your storage
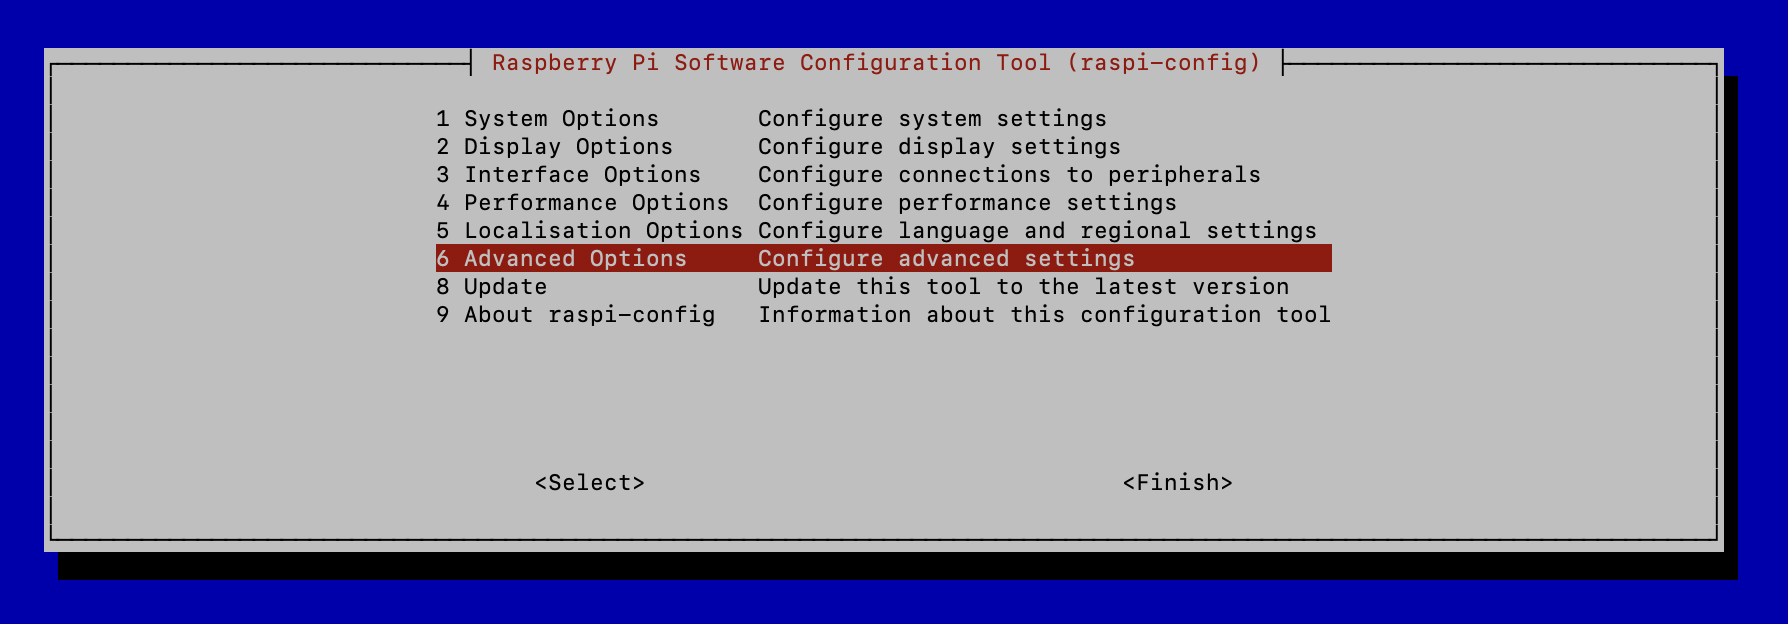
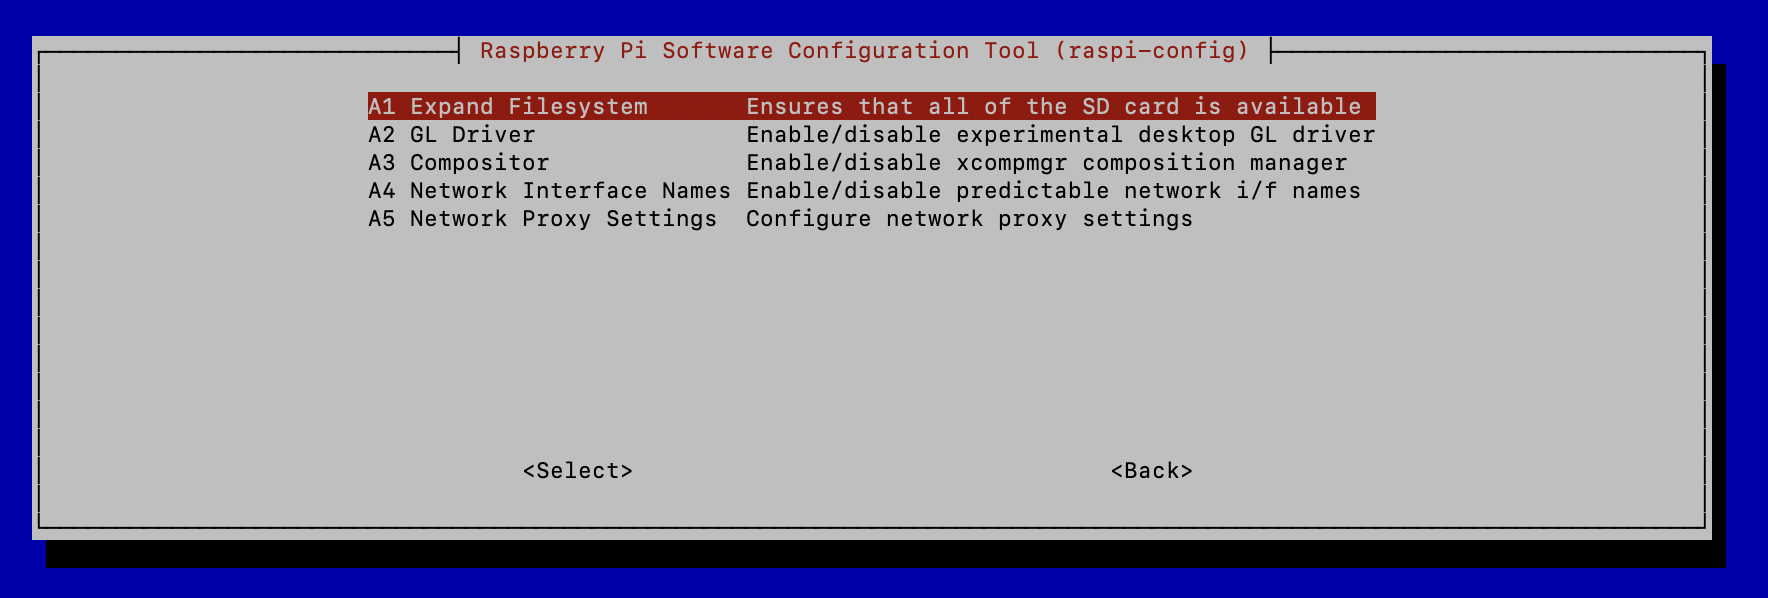
sudo raspi-config
> Advanced Options > Expand FileSystem
- Install Sensor Hardware Dependencies:
sudo apt-get install python3-pip
sudo pip3 install --upgrade setuptools
sudo apt install python3-smbus
sudo apt-get install -y i2c-tools
sudo pip3 install RPI.GPIO
sudo pip3 install adafruit-blinka
sudo pip3 install adafruit-circuitpython-busdevice
sudo apt install git-all
sudo git clone https://github.com/adafruit/Adafruit_CircuitPython_seesaw.git
sudo pip3 install adafruit-circuitpython-seesaw
- Install OLED Hardware Dependencies:
sudo pip3 install adafruit-circuitpython-ssd1306
sudo apt-get install python3-pil
sudo pip3 install requests
- [Optional] Grab and unzip silkscreen font to clean up txt display (smoother font for this type of small OLED display):
wget http://kottke.org/plus/type/silkscreen/download/silkscreen.zip
unzip silkscreen.zip
- Install Azure IoT Hub Dependencies:
sudo pip3 install azure-iot-device
sudo pip3 install azure-iot-hub
Test hardware detection and return hardware addresses:
Here’s the pin-out diagram for connecting your sensor to a raspberry pi zero:
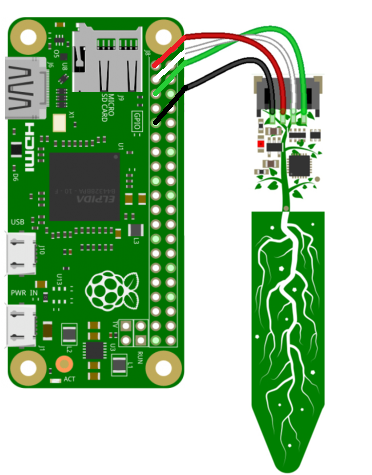
💡 Other Raspberry Pi boards use the same GPIO pin-out, so you can connect this Capacitive I2C STEMMA sensor to any pi by connecting to the same GPIO pins as illustrated above.
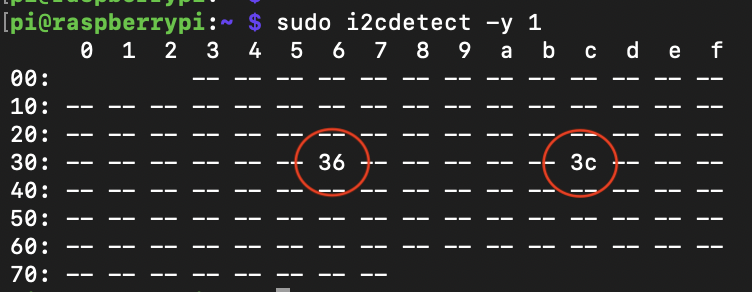
Use the following command to return the hardward addresses for your sensor and/or OLED display:
sudo i2cdetect -y 1
#Soil Sensor should populate on x36
#OLED Display shows up on x3c
Once you run the main.py / OLED script, you should see the display populate as such:
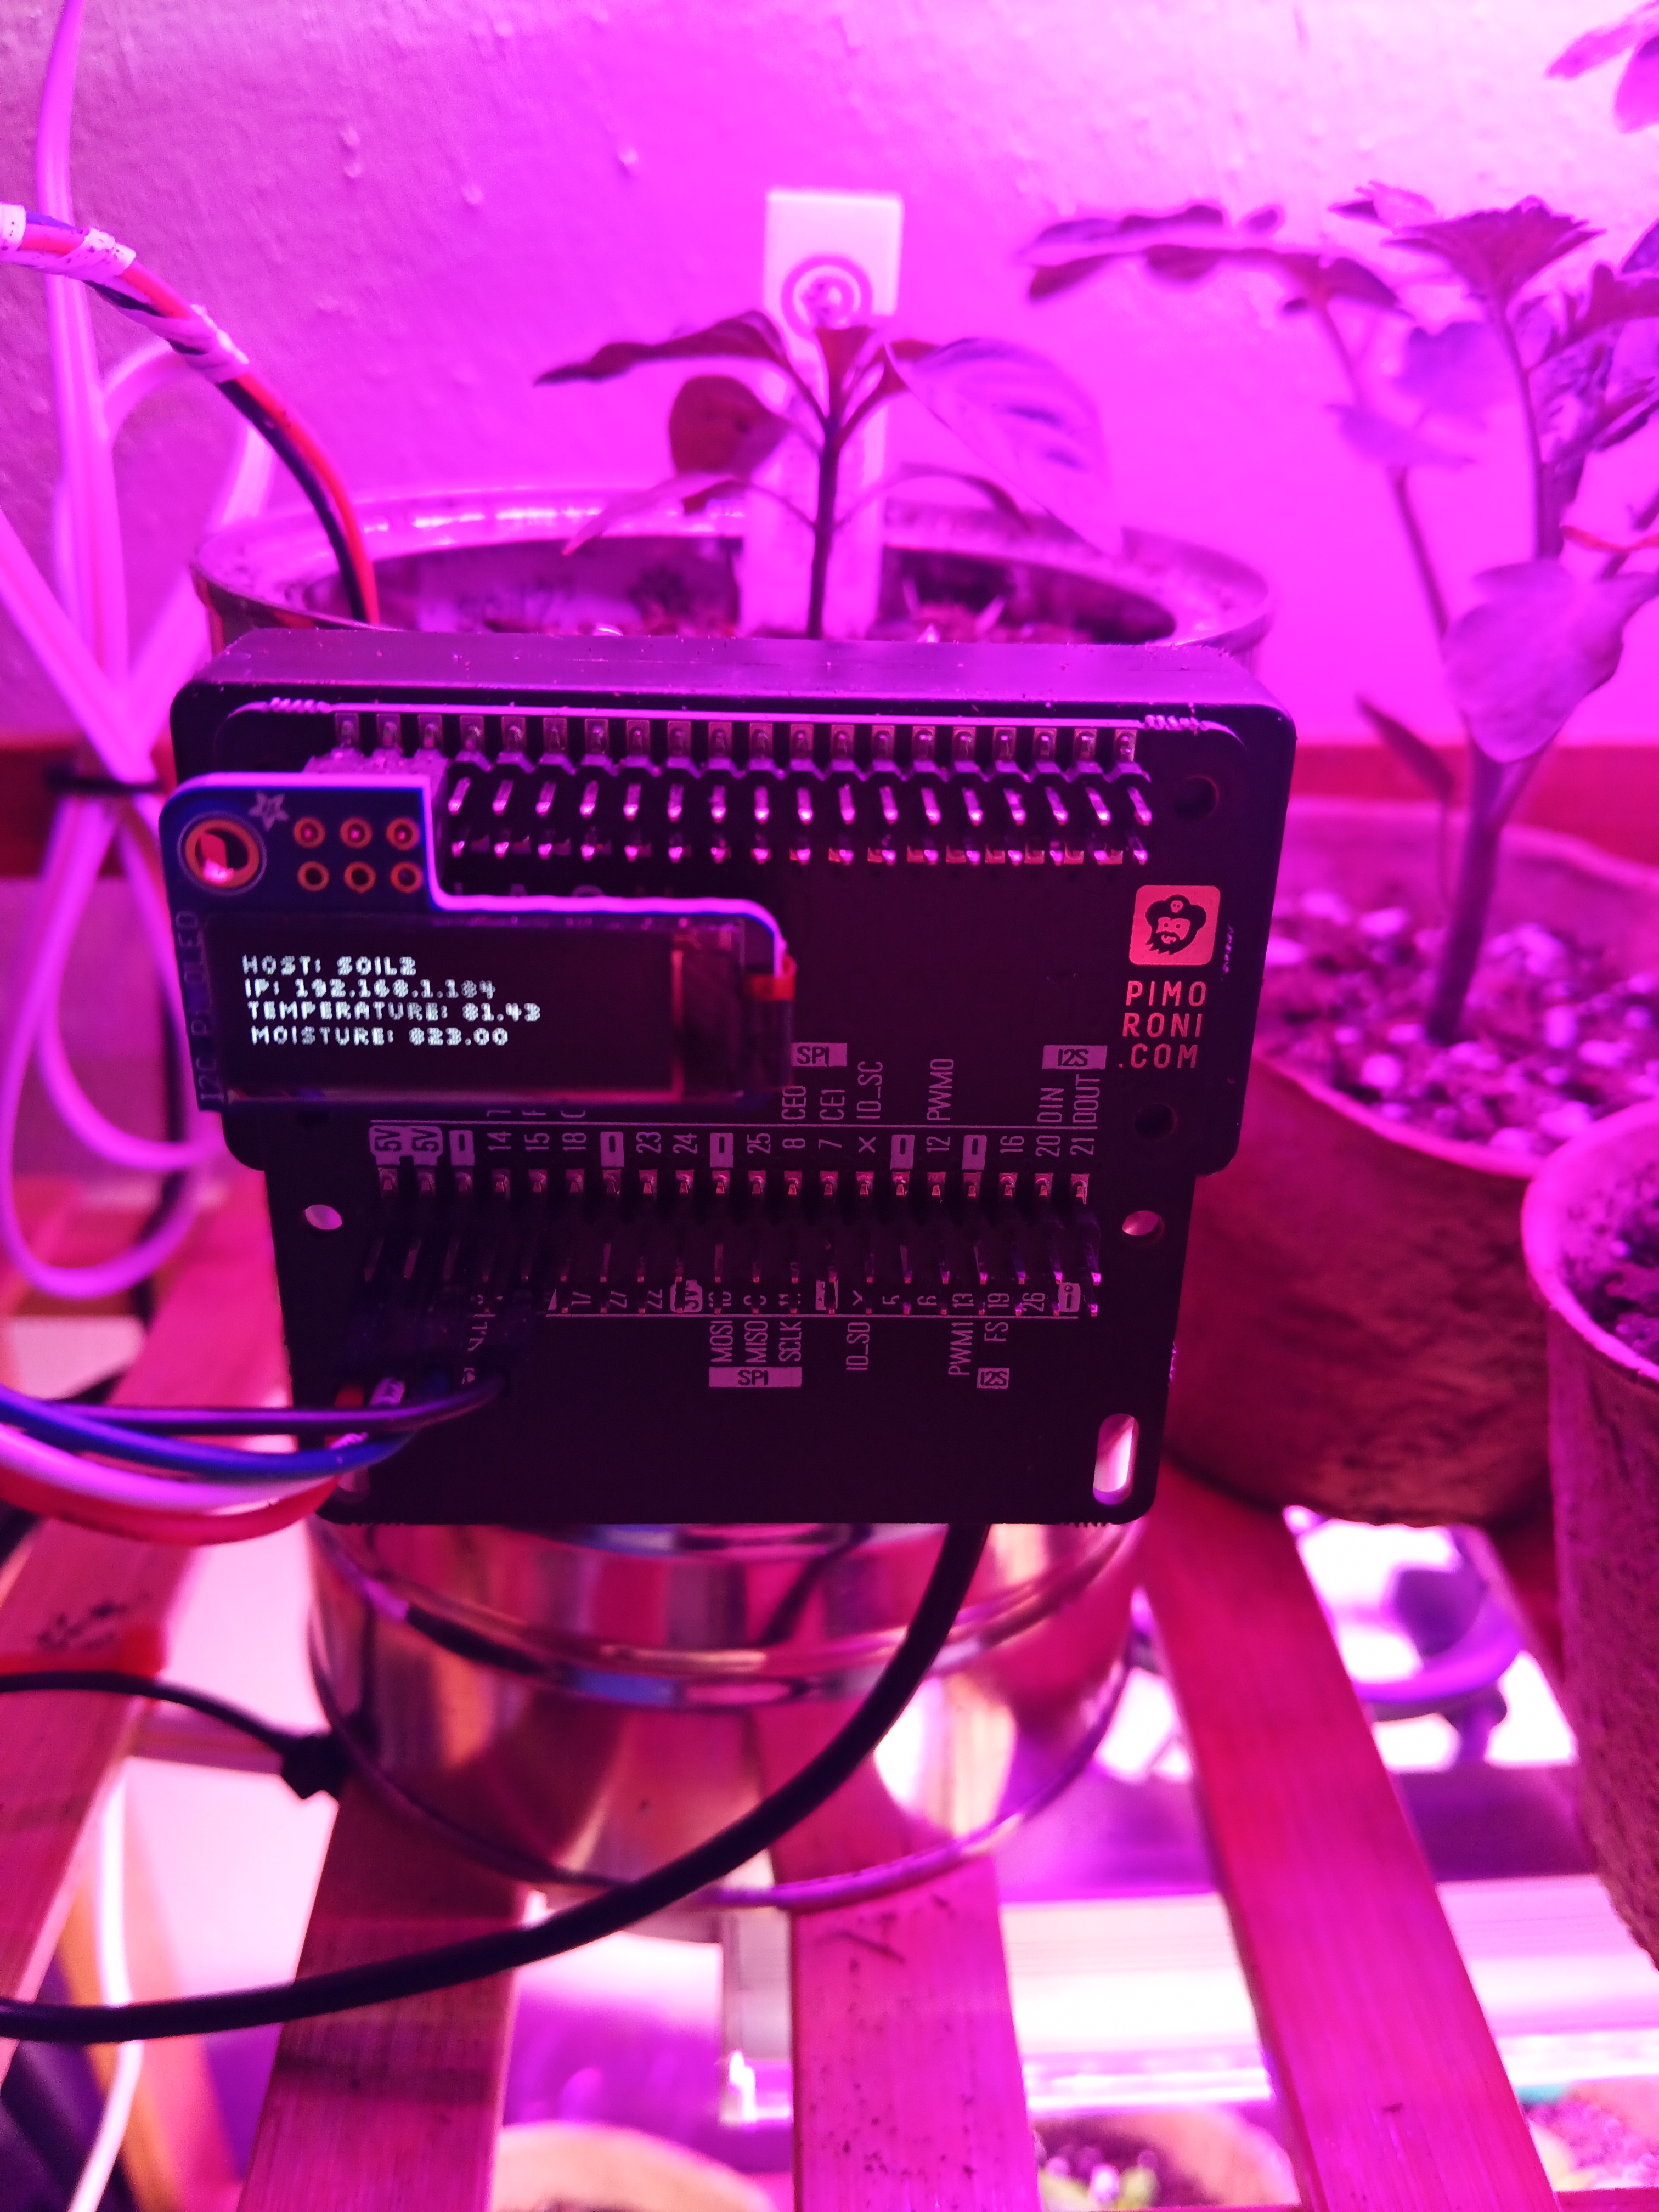
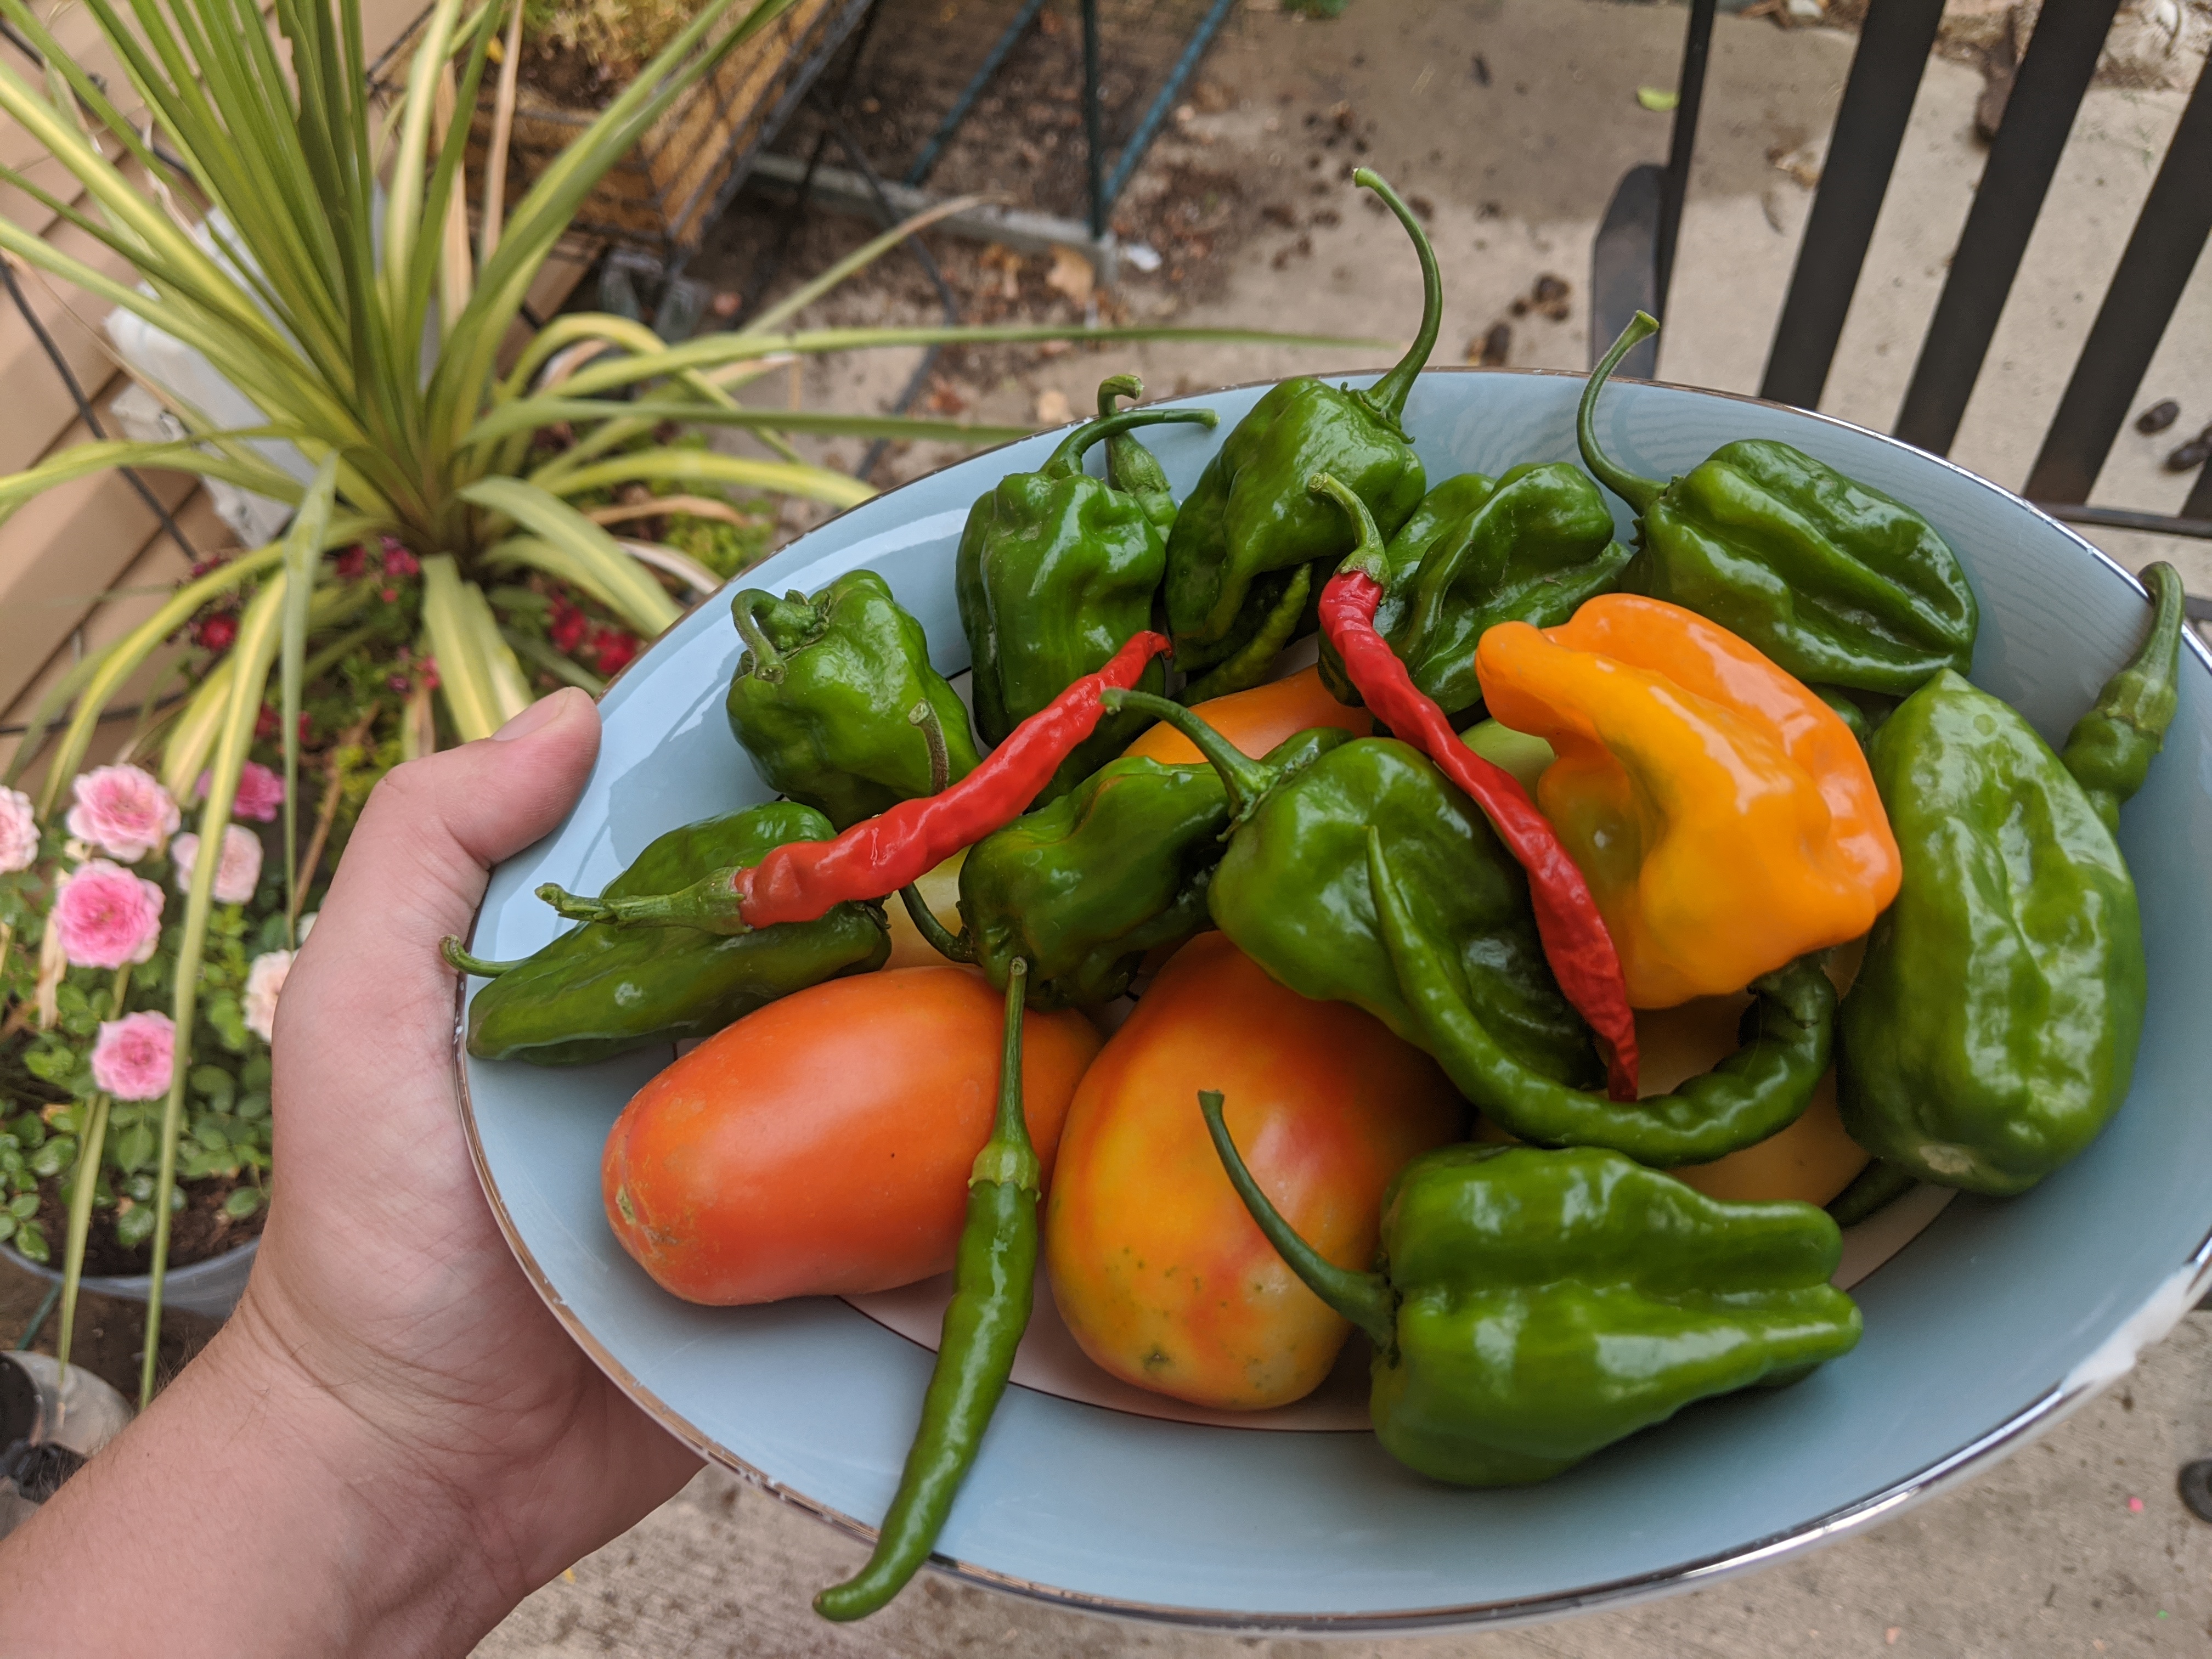
👉 Pro-Tip: If you didn’t change the Hostname to the name of the plant you’re monitoring in the custom.toml file, then edit the /etc/hostname file once you SSH in. I’m using this unit to grow Goat Horn Peppers
Build out your Azure IoT Hub python program
- If you did NOT install an OLED screen, then use the Sensor-2-IoT_Hub.py file
- If you DID install an OLED screen, then use the Sensor-2-IoT_Hub+OLED.py file
- Make sure to swap out the Connection String we noted earlier when registering our sensor device to our IoT Hub
CONNECTION_STRING = "HostName=XXXXXX.azure-devices.net;DeviceId=XXXXXX;SharedAccessKey=XXXXXXXXXXXX"
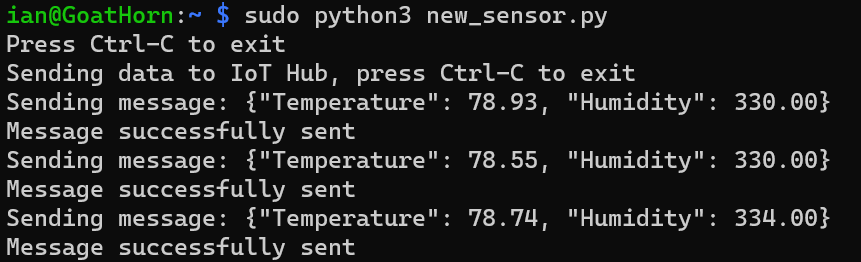
Run it!
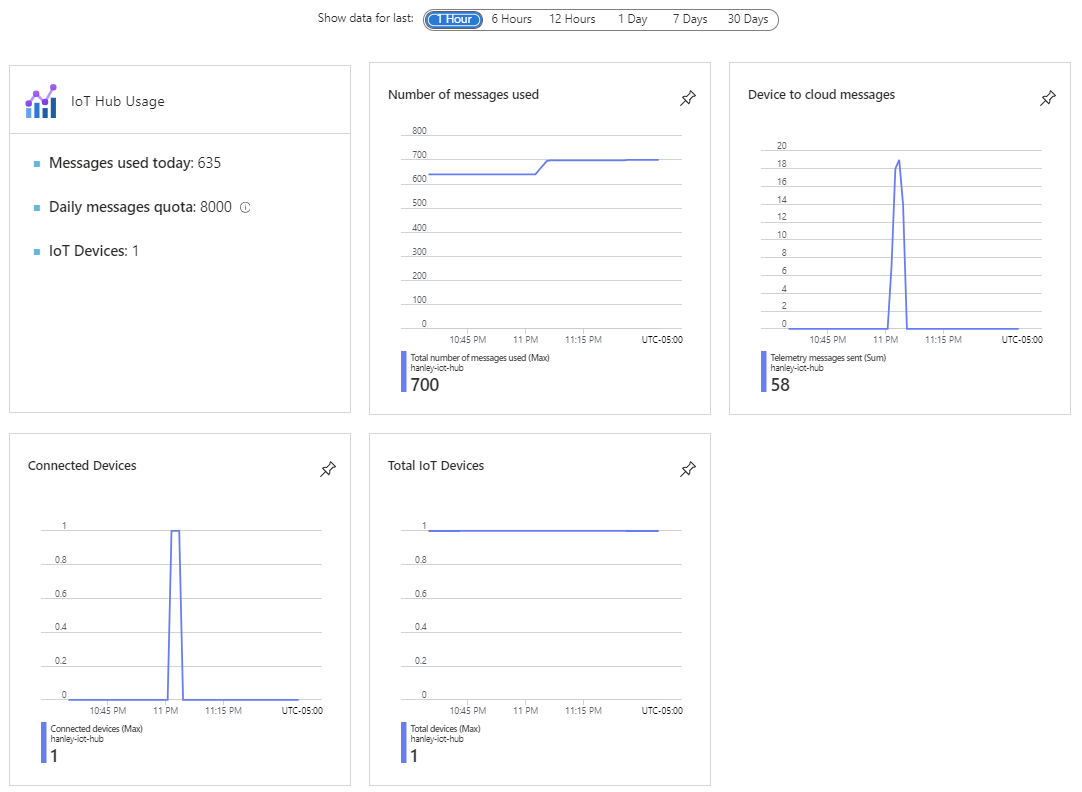
- Confirm messages are flowing in Azure IoT Hub:
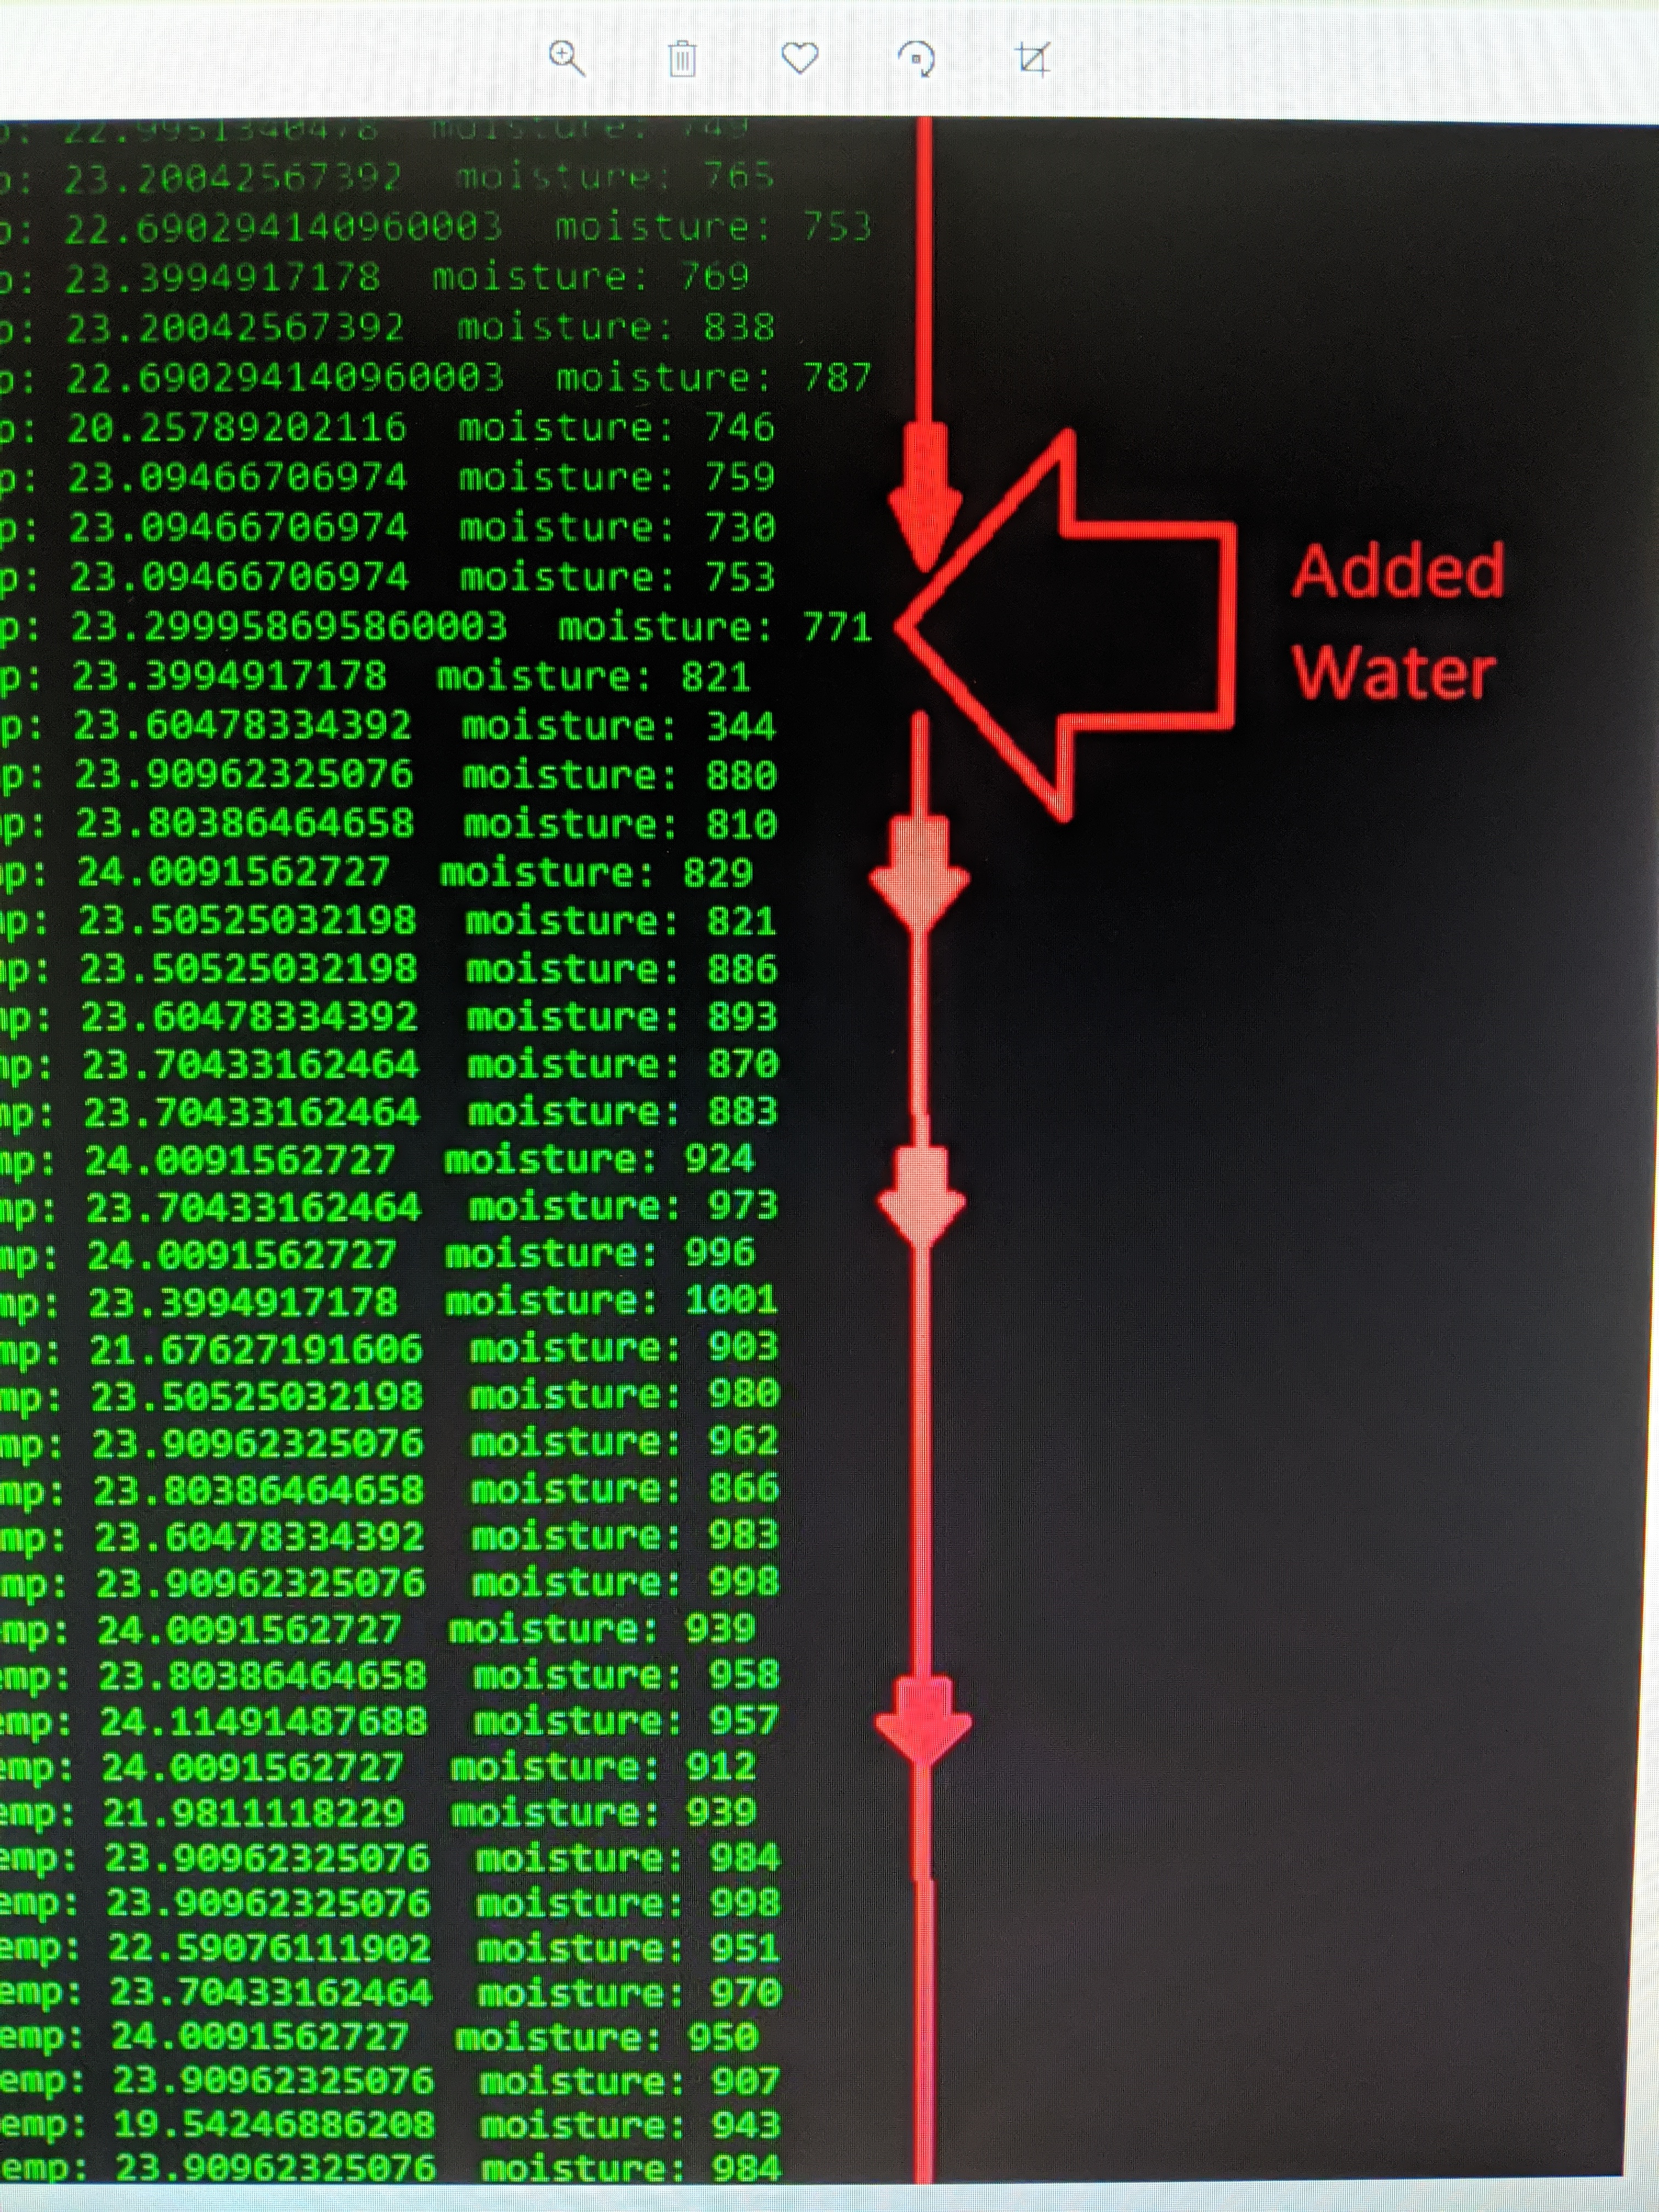
Add Water…
When I add moisture to my soil sample, I can see the moisture reading adjust:
In this Post We:
- 👉 Review Security Updates
- 👉 Review Hardware Changes and Pre-Requisites
- 👉 Perform a “Headless” Raspberry Pi Setup (Latest “Bookworm” OS)
- 👉 Configure an I2C Capacitive STEMMA Soil Sensor
- 👉 Configure an OLED Display to Output Sensor Readings in Real Time
- 👉 Test and Confirm Hardware
- 👉 Create an IoT Hub in Azure
- 👉 Onboard Raspberry Pi to IoT Hub
- 👉 Accomplish something AWESOME today x2! 😎

Recapitulation:
This time around (2.0) we improved upon our previous Headless Raspberry Pi ARM Device onboarding process in the following ways:
-
Encrypted WiFi and User Credentials (no more plain text “secrets.py” hard-coded credentials!)
-
Onboarded Sensor to IoT Hub with Azure Native tools and Transmitted Messages/Sensor Data (No need for 3rd party syslog forwarder (fluentD for example)).