Introduction and Use Case:
Contoso Co. is kicking off a new top-secret project loaded with IP that’s going to give them an edge if they can get to market before the competitors figure out what they’ve got. They’ve code-named this Project AWESOME and need to protect any/all data and communications related to this project inside, and outside the network. Let’s leverage the tools at our disposal included with Microsoft Purview to extract a favourable security outcome.
Pre-Requisites:
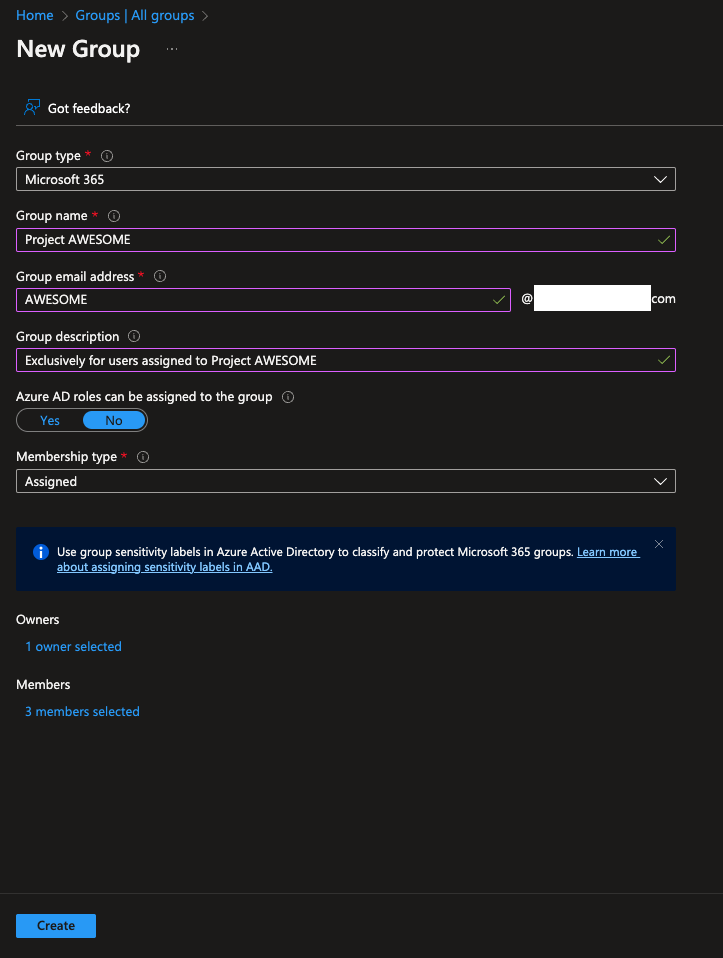
Who’s working on this project? Who do we need to restrict the flow of information to? The best way to facilitate this is to create a Microsoft 365 Group and add employees who will be assigned to Project AWESOME as members. A group Owner will need to be assigned. The owner can add/remove members.
Sensitivity Labels:
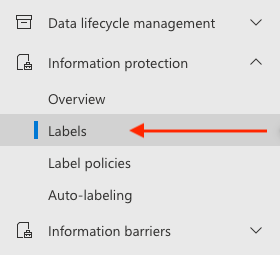
Navigate to and expand the Information protection blade, then select Labels
Create a New Label:
Click on + CREATE LABEL

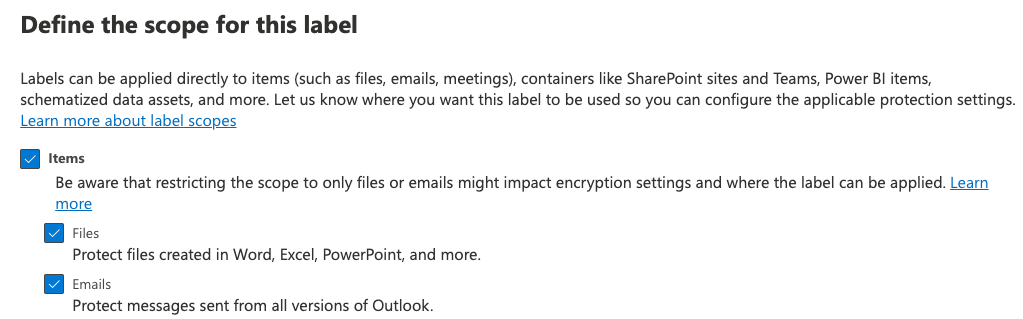
Define Scope:
This is where you define what the label can apply to. In this use-case, we’re going to check all the boxes for maximum coverage.
Choose Protection Settings:
I love these, let’s check both boxes. Any documents that this label is applied to will be automatically encrypted, and also have a custom watermark, header, and/or footer applied. You can get as creative as you like with the header and footer, and even upload an image (think company logo etc. or project insignia, depending on your company’s level of incorporation) for a custom watermark.

Encryption:
This is where you control who can access data with the Project AWESOME label applied, and for how long, whether it’s available for download offline, etc. For this use-case, we’re opting for the following parameters for the following Zero-Trust principles:
Assign Permissions Now or Let Users Decide?
Let’s reduce the exposed surface area for user error by taking the user out of the picture. I like to define permissions rather than let a user do so when they manually apply the label, for example. I don’t trust users and I like to maintain control.

Content Expiry?
We all remember the trope from the Mission Impossible franchise’s classic “…This message will self destruct…” and this is exactly the same premise, just without the “destruct” part. User access is simply cut off after the expiration until another invitation is issued by the owner of the data being shared. In this example, we will allow access for up to 2 weeks before collaborators will need to re-apply for permissions.

Allow Offline Access?
Never. Following the Principle of Least Privilege, they don’t need to download the data to work with it.

Pro-Tip: Following the principle of least privilege, my users are E5 licensed so we can take full advantage of the Microsoft security fabric and guarantee more predictable and thus favourable security outcomes. Consistency is key in this domain.

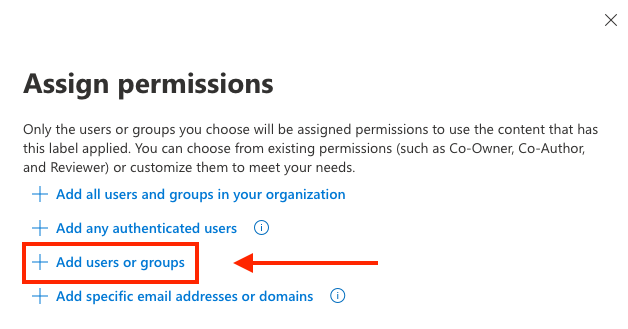
Assign Permissions:
Only the users or groups you choose will be assigned permissions to use the content that has this label applied. You can choose from existing permissions (such as Co-Owner, Co-Author, and Reviewer) or customize them to meet your needs. Select Assign permissions, then + Add users or groups
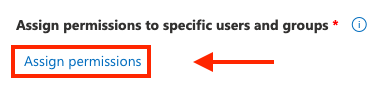
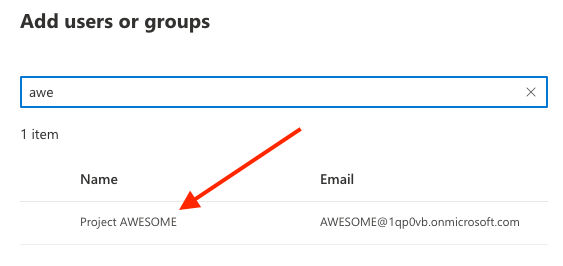
Select the Project AWESOME Microsoft365 group, then SAVE, and NEXT
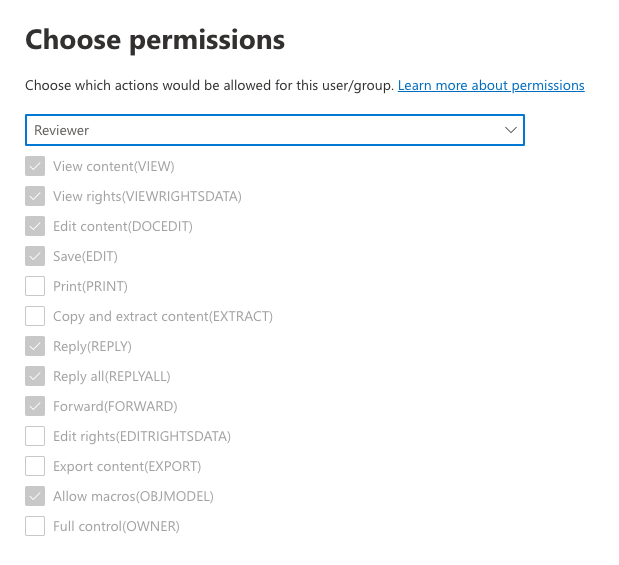
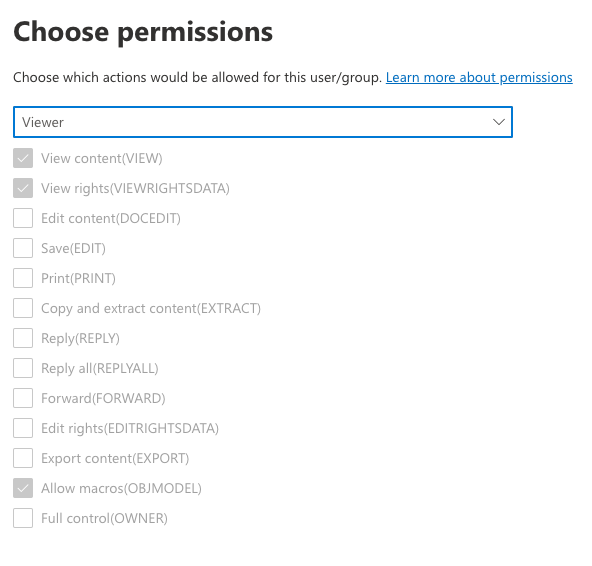
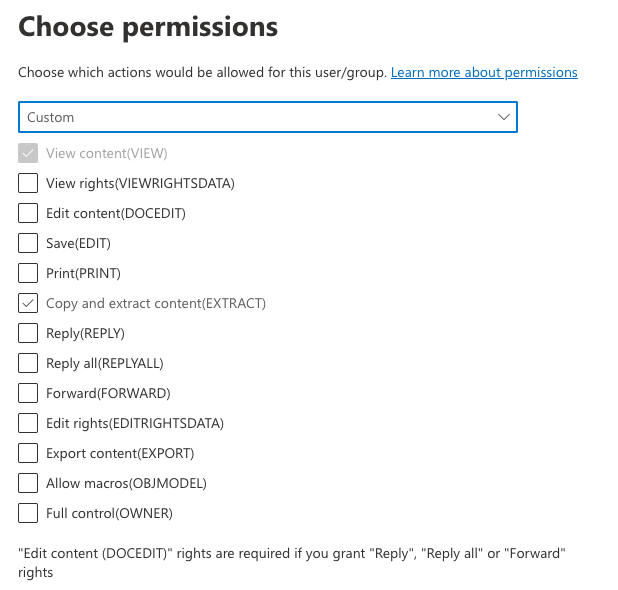
Choose Permissions:
This is where you can granularly determine exactly what members of Project AWESOME can do with project data that has the Project AWESOME label assigned.
Pro-Tip: This can get as deep into the weeds as you want to go. Consider separate labels for tier one operators versus admins or higher tiered resources that may need additional permissions while maintaining the status quo via the “self destruct” and “available offline” parameters for example. The possibilities are endless!
Illustrated below are some examples of pre-configured permissions sets. You can always create a custom set of your own to meet your specific needs.
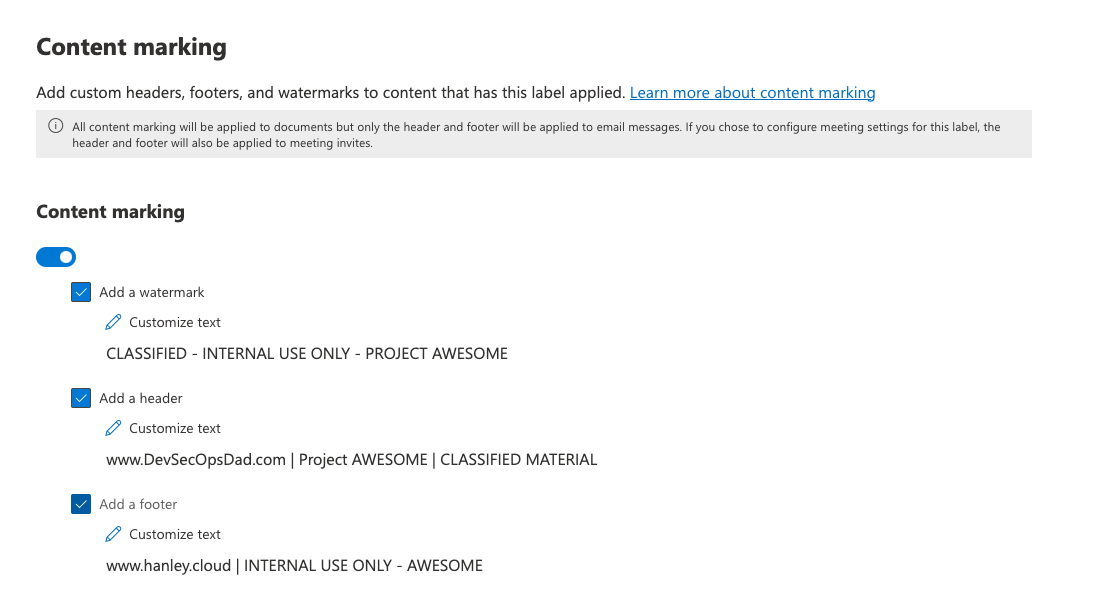
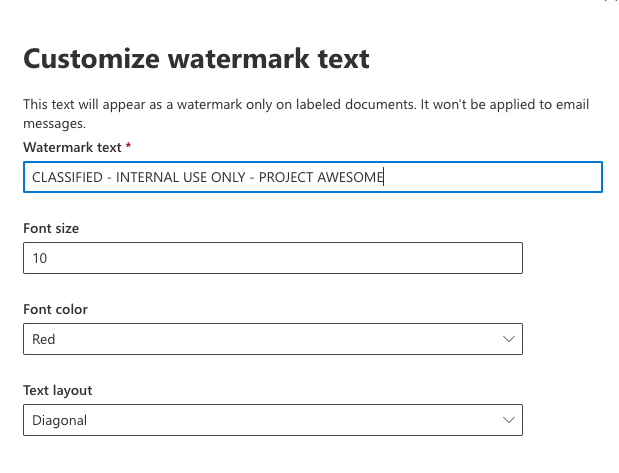
Content Marking:
To add custom headers, footers, and/or watermarks to content that has this label applied, check all the boxes in the next prompt (illustrated below):
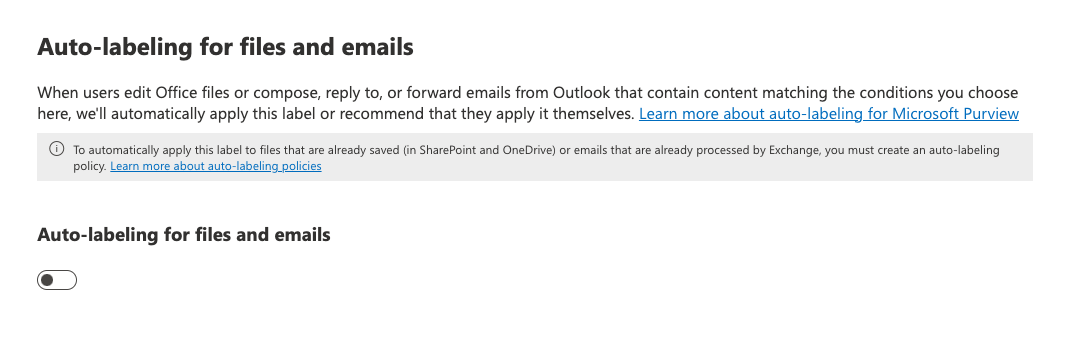
Auto-Labeling for Files and eMails:
Leave this disabled for now.
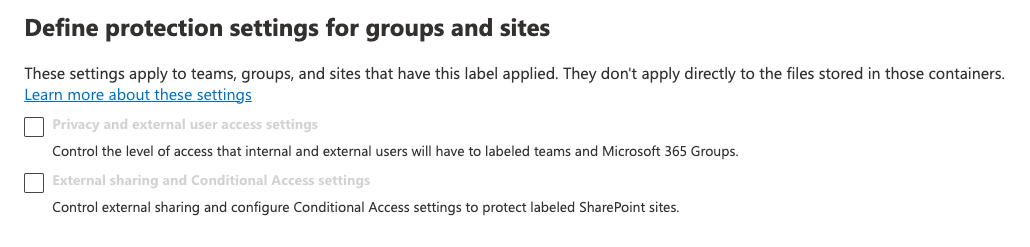
Define Protection Settings for Groups and Sites:
We didn’t configure anything for Groups and Sites, this is a newer feature that does not impact this use-case. These can be left unchecked. Select Next
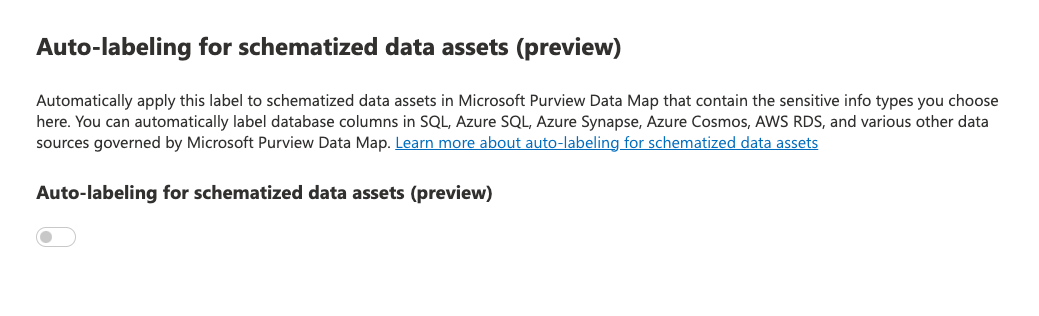
Auto-Labeling for Schematized Data Assets (Preview):
This is still in preview, don’t leverage it in production. Use at your own risk.
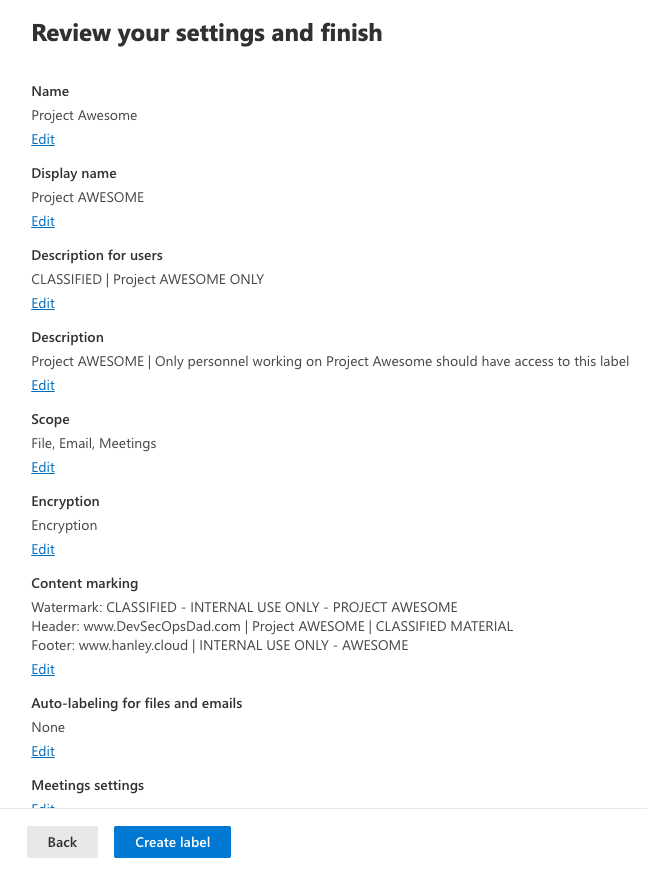
Review & Finish:
Review and select “Save Label” when ready.
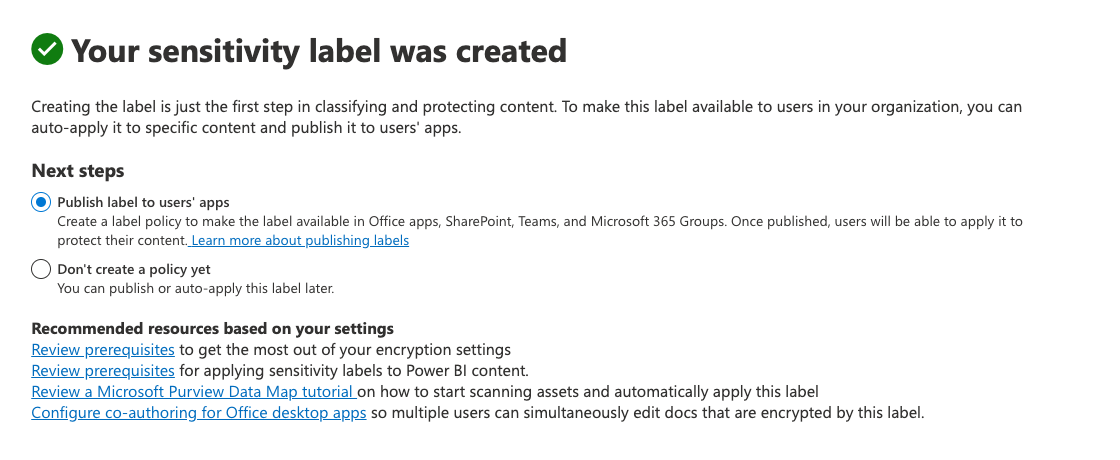
Publishing the Label for Use:
This is super important. Once published, members of the Project AWESOME group will start seeing the CONFIDENTIAL | Project AWESOME sensitivity label available for them to apply to documents in Microsoft Word, Excel, Outlook, etc. It’s imperative that this label is ONLY published the team members intended to know about Project AWESOME. If the Project AWESOME sensitivity label gets published for everybody, then users that are not a part of Project AWESOME will see the label available to them for use and the cat’s out of the bag. You have been warned, plan accordingly.
Confirmation:
Navigate to the Information protection blade, then select Labels to confirm your new sensitivity label.

Summary:
In this post, we leveraged Microsoft Purview to create a Sensitivity Label, keeping the Principle of Least Privilege and Zero Trust mode of thought to improve our security posture and protect against sensitive data leaks, both internal and external. Follow me on Twitter @IanDHanley for more insights into leveraging the Microsoft Security fabric to achieve favourable information security outcomes.
📚 Want to go deeper?
My Toolbox books turn real Microsoft security telemetry into defensible operations:
🧰 PowerShell Toolbox Hands-On Automation for Auditing and Defense
🛠️ KQL Toolbox: Turning Logs into Decisions in Microsoft Sentinel
📖 Ultimate Microsoft XDR for Full Spectrum Cyber Defense
Real-world detections, Sentinel, Defender XDR, and Entra ID — end to end.
Resources and Official Portal URLs:
- More Microsoft Sentinel Use-Cases and KQL Exercises
- Hanley.cloud/DevSecOpsDad on Twitter
- My KQL Repository on GitHub
- Purview Portal
- https://learn.microsoft.com/en-us/purview/purview
- https://learn.microsoft.com/en-us/microsoft-365/compliance/sensitivity-labels?view=o365-worldwide
