Introduction and Use Case:
Have you ever wondered how to take your LLM (Language Model) to the next level? Look no further, because we have got you covered. In this blog post, we will guide you through the process of configuring an LLM with Azure OpenAI Studio, taking your natural language processing capabilities to new heights. With the power of Azure OpenAI Studio, you can easily build and deploy an LLM that can understand the nuances of language like never before. So, fasten your seatbelts, and get ready to explore!
💡 Spinning up your own Chat Bot/LLM is way easier than you might think. Would you believe that the preceding paragraph above was written by one?
⚡ The possibilities are nearly endless; I’ve even used mine to help come up with some complicated KQL queries. Check out my below guide to getting your own up and running quick! 👇
In this post we will:
- 👉Address Pre-Requisites
- 👉Deploy an LLM Model using Azure OpenAI Studio
- 👉Handle the Basics
- 👉Cover Networking
- 👉Touch on Tags
- 👉Fine Tune our Deployment’s Parameters and Deployment Configuration
- 👉Generate Sample Code for App Integration
- 👉Have some Fun with our Deployment 😎
- 👉Discuss Common Issues/Troubleshooting
Pre-Requisites
Join the 1.3 million developers who have been using Cognitive Services to build AI powered apps to date. With the broadest offering of AI services in the market, Azure Cognitive Services can unlock AI for more scenarios than other cloud providers. Give your apps, websites, and bots the ability to see, understand, and interpret people’s needs — all it takes is an API call — by using natural methods of communication. Businesses in various industries have transformed how they operate using the very same Cognitive Services now available to you with an Azure free account.
Get started with an Azure free account today, and learn more about Cognitive Services.
Step-by-Step:
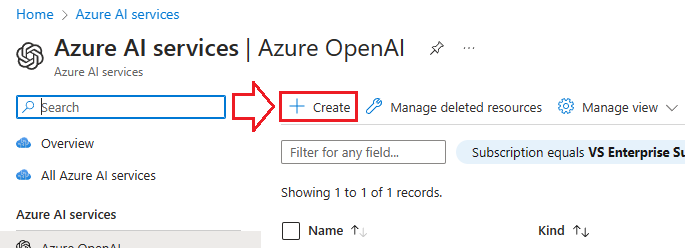
- Log into your Azure Portal and search for Azure Open AI as illustrated below:

- Select +Create
1. Basics
This next window has several fields we need to populate, shown below:
- Select which Subscription you’d like to build this under
- Select an appropriate Resource Group
- Select your Region (I like to keep this the same as your Sub for simplicity)
- Name your Azure OpenAI GPT-3 model
- Select your Pricing Tier

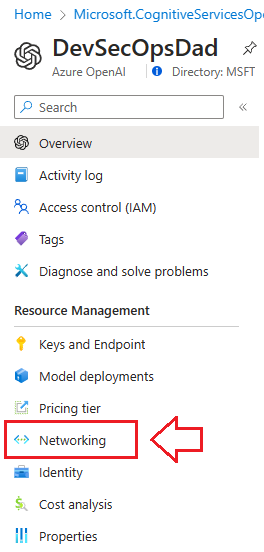
2. Networking
❗ ❗ ❗ This next part is very important from a security perspective: 🔐
- Select All networks, including the internet, can access this resource at your own risk.
- It’s more secure to lock this resource down and create an exception on the firewall for your public IP address.
- Create or Select a virtual network and subnet
- Define your public IP address
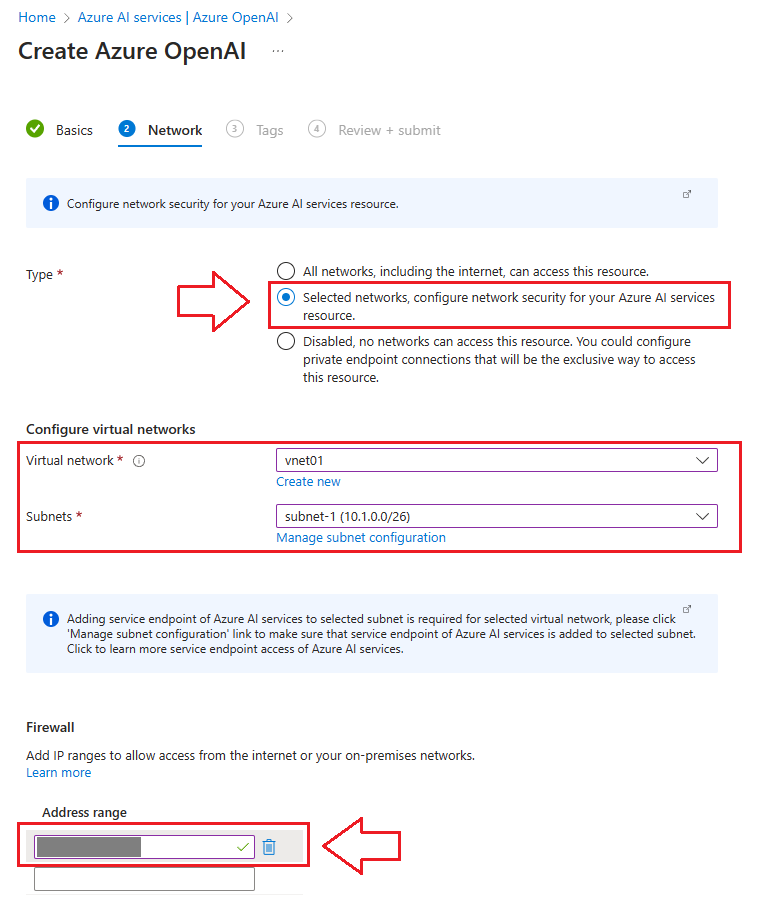
💡 Pro-Tip: Unless you have a persistent public IP address through your ISP, your public IP will change from time to time. When this happens, you will not be able to access your chatbot in Azure OpenAI Studio. You can go to IP Chicken 🐔 to quickly find your public IP address. Refer to the Troubleshooting section below if this happens to you.
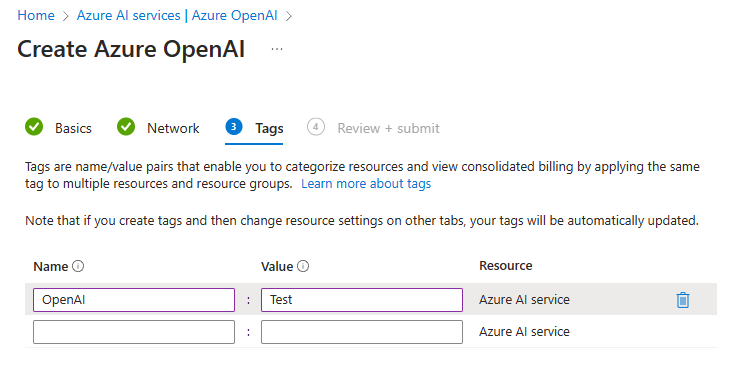
3. Tags (Optional)
This is pretty self-explanatory, use something that makes sense to you. Tags follow a typical json format (Name:Value) and can be leveraged to consolidate billing to categorized/tagged resources. This is awesome for Cost Optimization exercises 💰 💰
4. Review + Submit
Review the Basics, Network, and Tags for typos etc. and make sure to read the fine print, because clicking Create means you agree to all the legal terms and privacy statement(s).🔎
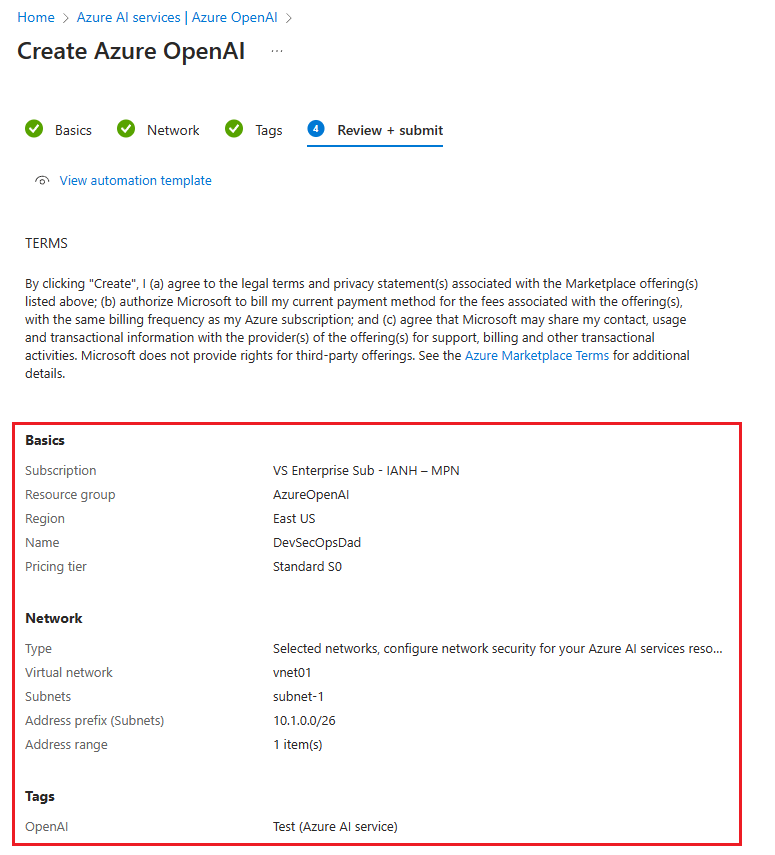
- Click on Create when you’re ready.

⏱ Wait 5 minutes for your deployment to complete:
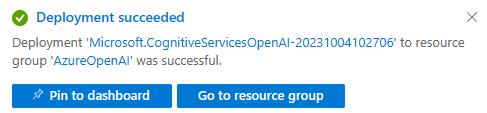
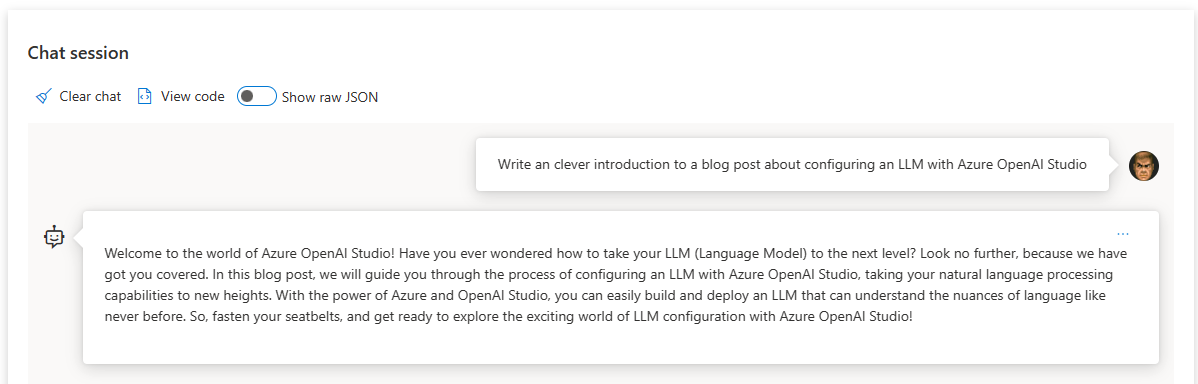
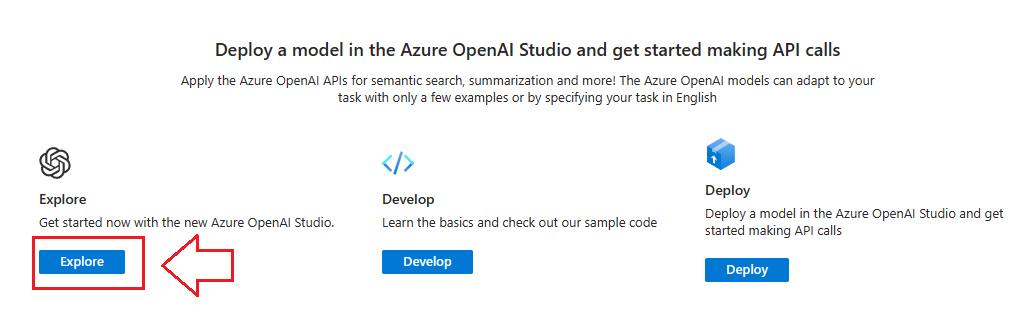
Deployment Complete… What Now?
Lets take it for a test drive! Click on Explore to load the Azure OpenAI Studio.
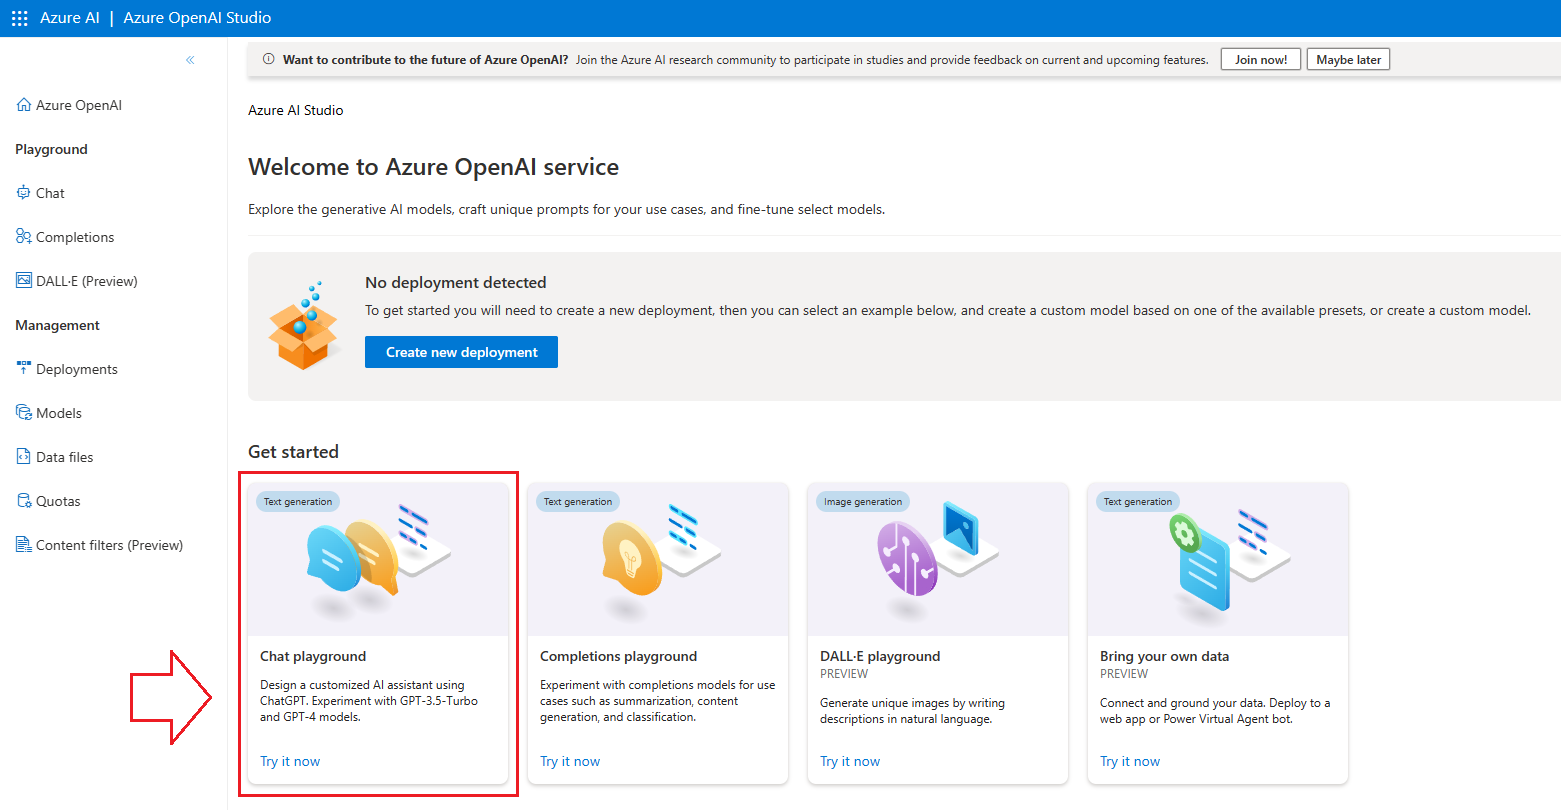
There are several kinds of OpenAI Chat Bots you can deploy:
- Chat Playground is great for generating content (ask it to write something for you)
- DALL-E is still in Preview but is great for generating images
- Completions Playground is great for analyizing and summarizing content you feed it (ie. ‘completing’ it)
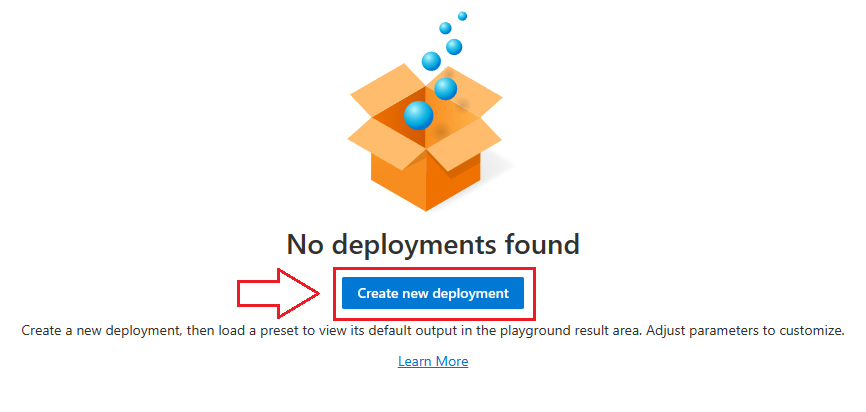
Lets start with Chat Playground:
Select Create New Deployment
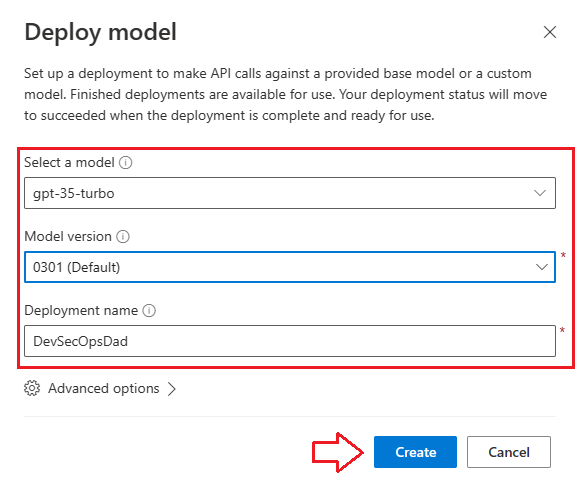
Select a model to use from the dropdown list and give your deployment a unique name:
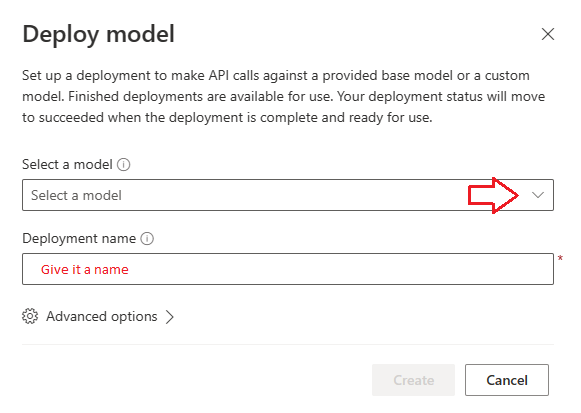
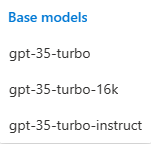
Here are the model options from the dropdown in the above screenshot:
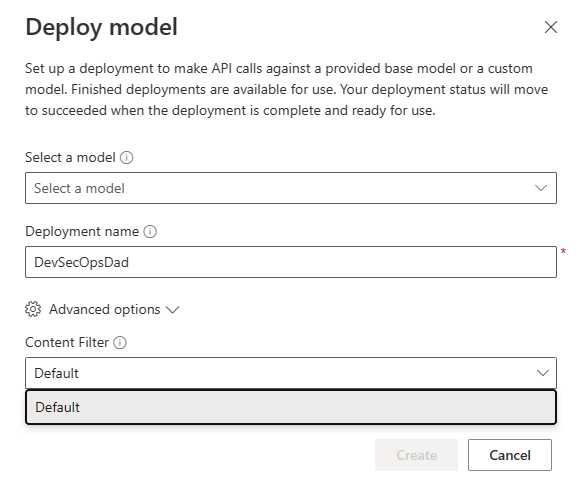
If you select and expand the Advanced options drop down menu, only the Default Content Filter is available at the time of this article, illustrated below:
Once you select a Model, it will ask you for which model version you want to use. I went with the default (0301). Next, select Create
⏱ Wait for your deployment to complete:

Now for the FUN part…
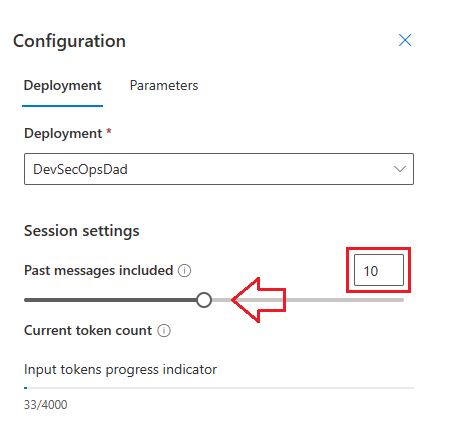
Tailor your deployment to your liking. For example, how many prior messages in the conversation should it remember when generating it’s next response? It’s 10 by default in the Deployment Configuration tab.
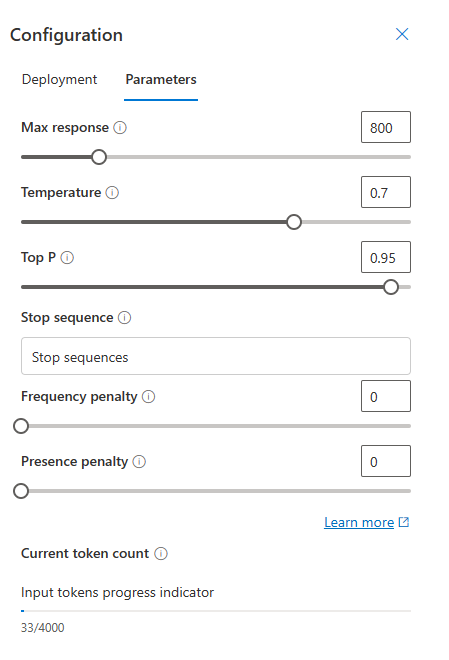
Moving over to the Parameters Configuration tab, you can flavour your ChatBot’s response:
-
Max Response: Set a limit on the number of tokens per model response. The API supports a maximum of 4000 tokens shared between the prompt (including system message, examples, message history, and user query) and the model’s response. One token is roughly 4 characters for typical English text.
-
Temperature: Controls randomness. Lowering the temperature means that the model will produce more repetitive and deterministic responses. Increasing the temperature will result in more unexpected or creative responses. Try adjusting temperature or Top P but not both.
-
Top P: Similar to temperature, this controls randomness but uses a different method. Lowering Top P will narrow the model’s token selection to likelier tokens. Increasing Top P will let the model choose from tokens with both high and low likelihood. Try adjusting temperature or Top P but not both.
-
Stop Sequence: Make the model end its response at a desired point. The model response will end before the specified sequence, so it won’t contain the stop sequence text. For ChatGPT, using <|im_end|> ensures that the model response doesn’t generate a follow-up user query. You can include as many as four stop sequences.
-
Frequency Penalty: Reduce the chance of repeating a token proportionally based on how often it has appeared in the text so far. This decreases the likelihood of repeating the exact same text in a response.
-
Presence Penalty: Reduce the chance of repeating any token that has appeared in the text at all so far. This increases the likelihood of introducing new topics in a response.
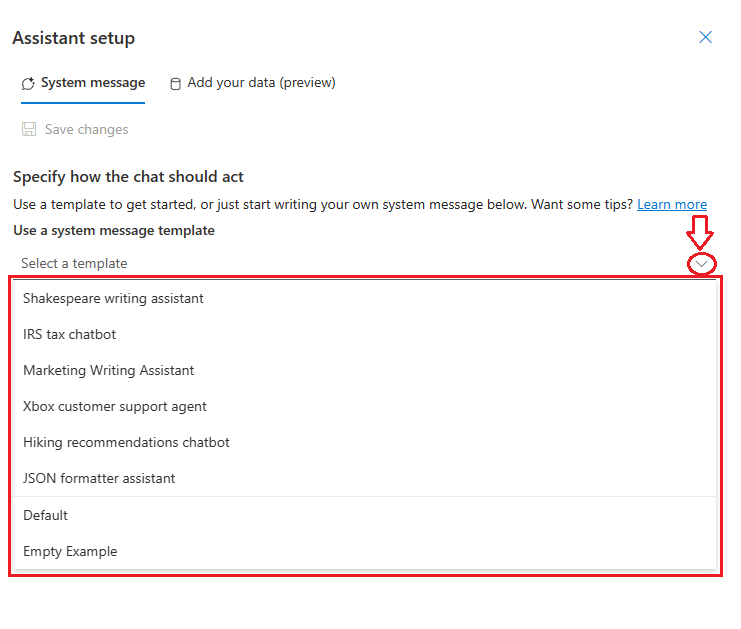
Here’s a fun one, you can choose between different pre-defined purposes. Writing a screenplay? Try the Shakespeare writing assistant! Working on your taxes? Try the IRS tax chatbot (but definitely don’t rely solely on this when filing your taxes, you’ve been warned! 🤑 )
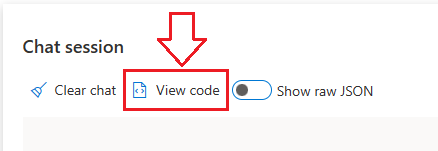
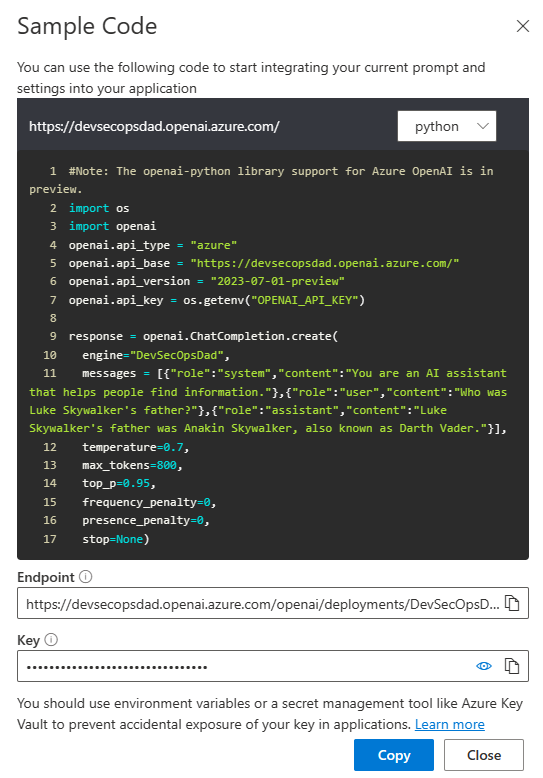
The next step is making the deployment available. Click on the View Code button to view sample python integration code you can use to start integrating your current prompt and settings into your application:
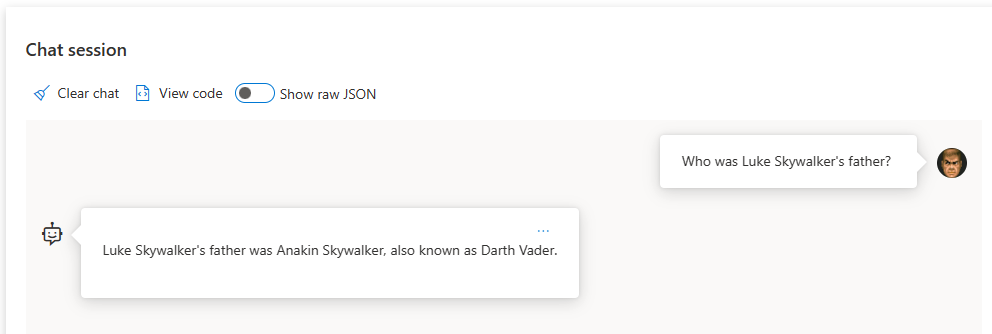
Have FUN with it!
Ask general trivia:
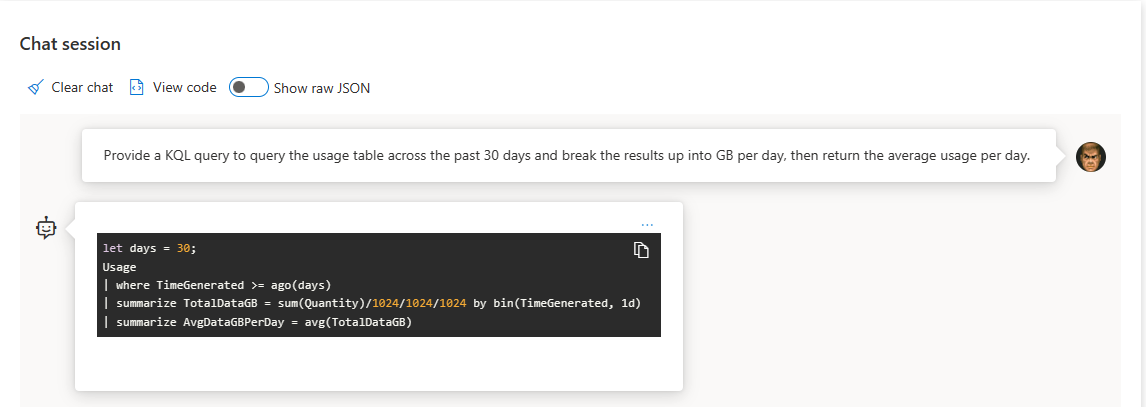
Use it to help build useful KQL queries:
If you’ve set it to remember your last inquiry, you can build on top of it like this:
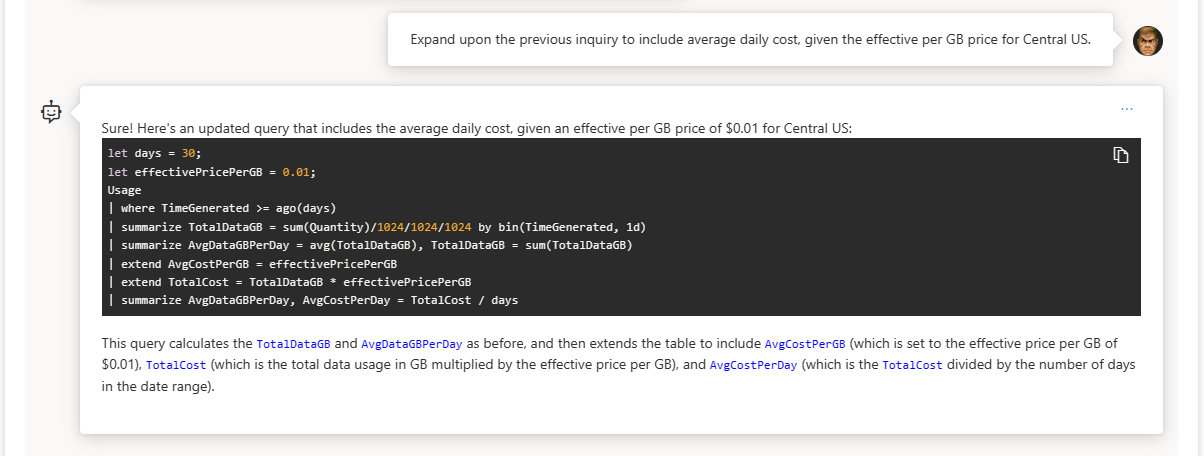
💡 Pro-Tip: The effective cost per GB rate isn’t $0.01 / GB for any commitment tier in the Central US region. This is an easy fix though, just look up your effective cost per GB based on your region and commitment tier here and plug it in. It should be noted that I didn’t give it enough information to infer which commitment tier, so it gave me an example.
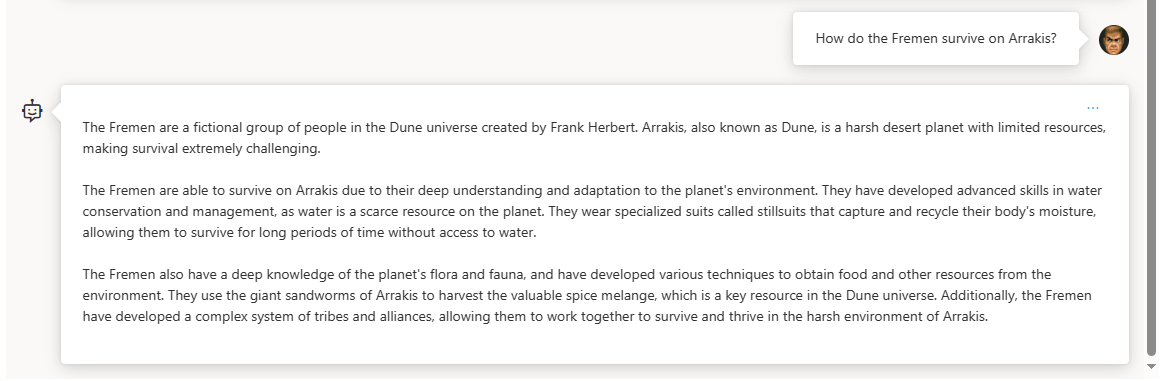
Maybe you completely forgot to read that book for book club, and don’t have time to catch the movie adaptation, try asking your new assistant for key points:
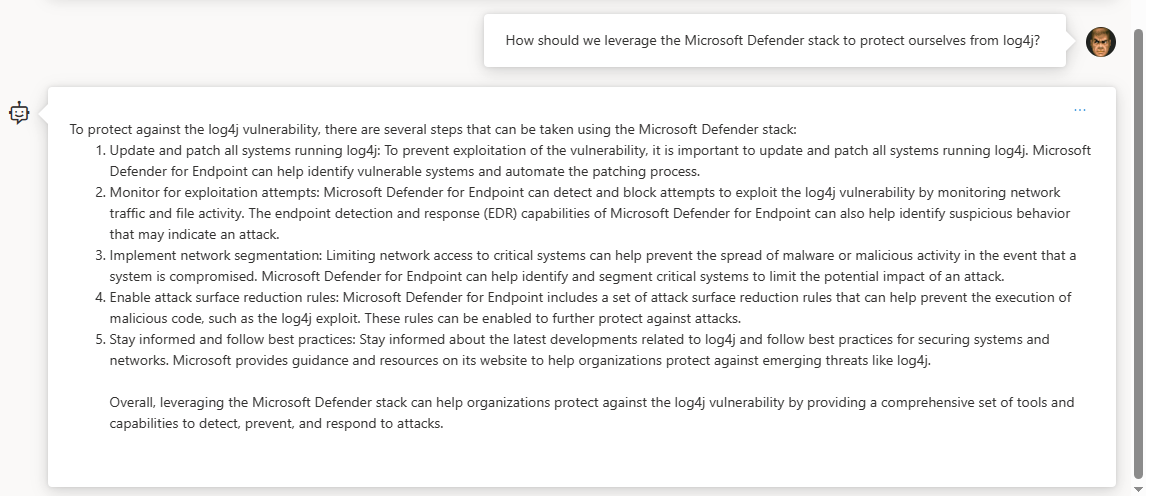
Maybe you’re new to the SOC and need to come up with a plan to protect your organization against that pesky log4j some of us lost sleep over a while back…
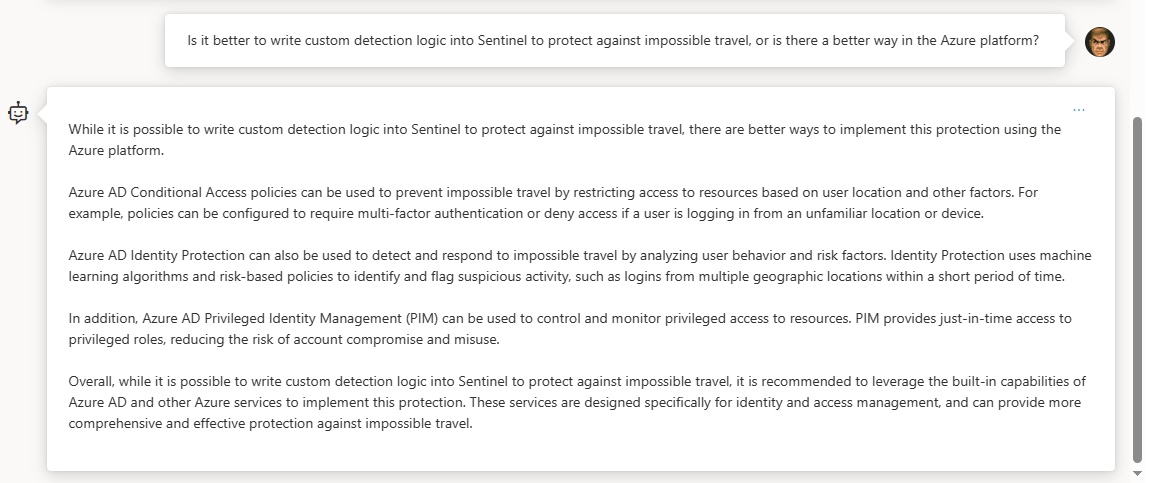
Maybe you caught an engineer wasting time on a logic app for a specific client request that could be solved more efficiently another way using existing tools…
💡 Pro-Tip: Take whatever answers it gives you with some restraint. It’s an LLM chat bot after all… it’s not a person capable of simple fact/logic checking. It can just as easily provide a counter argument to an argument it just gave you, totally contradicting itself. It’s given me some goofy answers to some pretty straight forward prompts sometimes too, so you can’t rely on it but you can use it to get a step ahead of the game if used with caution.
Troubleshooting
🛠 If you can get into Azure OpenAI Studio and open the chat interface, but your inquiries are refused, check your Public IP and update the settings in the Networking blade under your new OpenAI resource in the Azure portal

🛠 If you are unable to make any changes to your networking settings and receive the following type of error:
Cannot modify resource with id '/subscriptions/xxxxxxxx-xxxx-xxxx-xxxx-xxxxxxxxxxxx/resourceGroups/OpenAI/providers/Microsoft.CognitiveServices/accounts/testai001' because the resource entity provisioning state is not terminal. Please wait for the provisioning state to become terminal and then retry the request.
…then your most effective, time-saving approach is to just nuke your deployment and start over (it really doesn’t take that long). There are alternative methods available to reset the provisioning state listed here: https://learn.microsoft.com/en-us/azure/networking/troubleshoot-failed-state
In this post we:
- 👉Addressed Pre-Requisites
- 👉Deployed an LLM Model using Azure OpenAI Studio
- 👉Handled the Basics
- 👉Covered Networking
- 👉Touched on Tags
- 👉Fine Tuned our Deployment’s Parameters and Deployment Configuration
- 👉Generated Sample Code for App Integration
- 👉Had some Fun with our Deployment 😎
- 👉Discussed Common Issues/Troubleshooting
📚 Want to go deeper?
My Toolbox books turn real Microsoft security telemetry into defensible operations:
🧰 PowerShell Toolbox Hands-On Automation for Auditing and Defense
🛠️ KQL Toolbox: Turning Logs into Decisions in Microsoft Sentinel

📖 Ultimate Microsoft XDR for Full Spectrum Cyber Defense
Real-world detections, Sentinel, Defender XDR, and Entra ID — end to end.
Resources:
-
https://azure.microsoft.com/en-us/blog/start-building-with-azure-cognitive-services-for-free/
-
https://learn.microsoft.com/en-us/azure/networking/troubleshoot-failed-state
