Introduction and Use Case:
As the agricultural industry continues to evolve and embrace new technologies, cost-effective and reliable IoT devices such as Raspberry Pi-based soil sensors have emerged as critical tools for farmers and growers. These sensors provide real-time data on soil conditions, enabling both large scale farmers and small-time growers to make informed decisions about irrigation, fertilization, and other key processes. However, as the use of IoT devices increases, so does the need for enhanced security and automation.
In this blog article, we will explore how to build and onboard a Raspberry Pi-based soil sensor to Microsoft Sentinel, a cloud-native security information and event management (SIEM) system, in order to improve both security and operations with enhanced scalability, automation, and peace of mind knowing that valuable data is protected and can be easily monitored, analyzed, and acted upon.
In this Post We Will:
- 👉 Review Hardware and Pre-Requisites
- 👉 Perform a “Headless” Raspberry Pi Setup
- 👉 Configure an I2C Capacitive STEMMA Soil Sensor
- 👉 Configure an OLED Display to Output Sensor Readings in Real Time
- 👉 Test and Confirm Hardware
- 👉 Create a Log Analytics Workspace
- 👉 Send Sensor Data to Microsoft Sentinel
- 👉 Query custom logs for operations, security, and soil data
- 👉 Automate/Configure Start on Boot
- 👉 Accomplish something AWESOME today! 😎
Hardware Details:
Click to learn more about each component…
- I2C OLED Display
- Raspberry Pi Zero W (but any Pi should work)
- I2C Soil Moisture & Temperature Sensor
- GPIO Splitter
- JST PH 2mm 4-Pin to Female Socket I2C STEMMA jumper cable
Sofware | OS Details:
- I used the last RaspiOS that supported this kind of headless setup (Buster or earlier) for this build.
- I know, I know… I’ll cover a more modern “headless” setup for the latest RaspiOS (“Bookworm”, at the time of this article) in a separate blog article and link back here. 😅
Raspberry Pi Headless Setup (No Dedicated Mouse/Keyboard/Monitor Necessary):
After burning your SD card with Raspbian OS, you can configure it to automagically join the network and enable SSH with the following steps:
- Unplug/plug back in your SD card into your computer after burning the OS
- Navigate to SD storage
- Create blank file (no extension) named “SSH” (this file is detected and deleted on boot, and SSH is enabled)
- Copy and paste the WPA_supplicant.conf file containing your country/region, wireless SSID and Key
- Boot up and wait for it to appear on your network and be available over SSH
Raspberry Pi Setup:
- Update your system:
sudo apt-get update
sudo apt-get upgrade
- (Optional) If either of the above complete but with errors, try again with:
sudo apt-get update --fix-missing
sudo apt-get upgrade --fix-missing
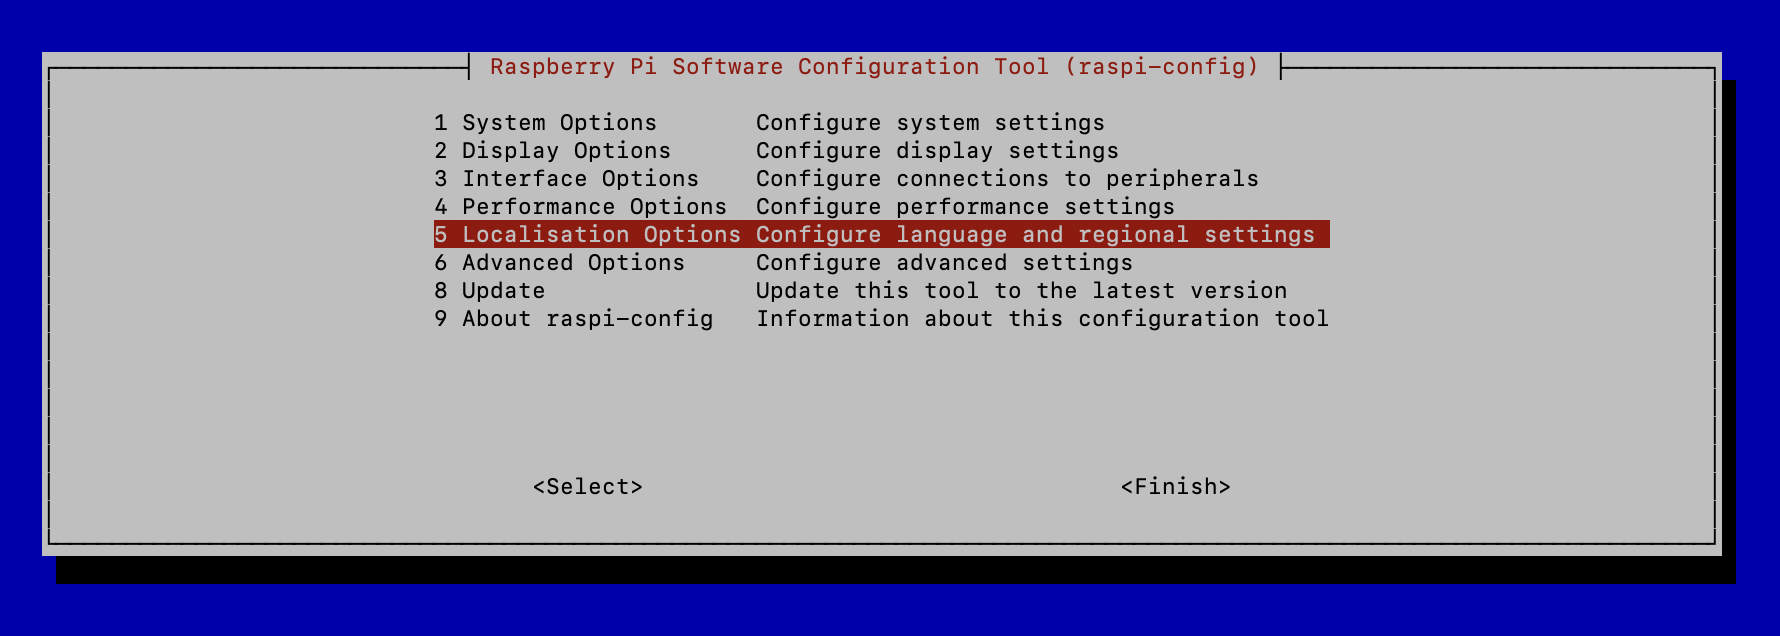
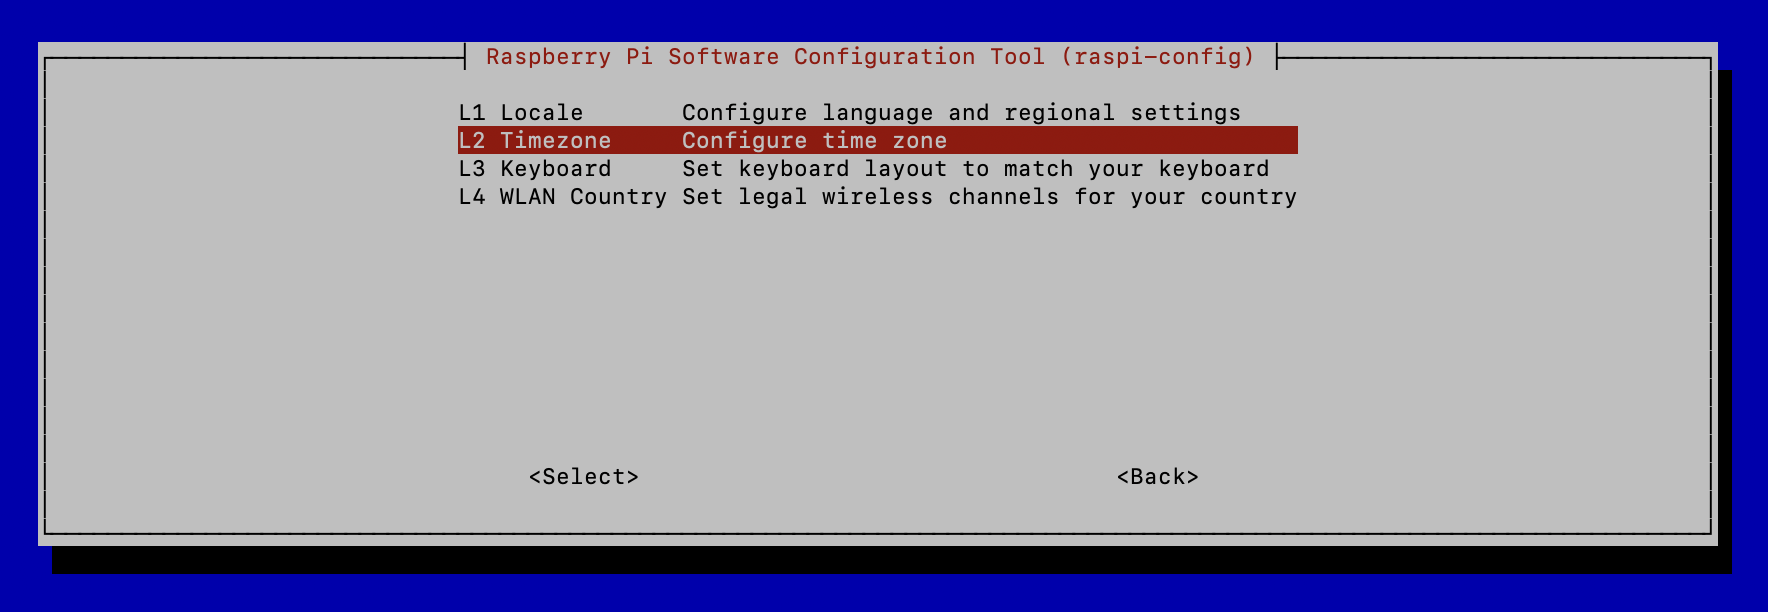
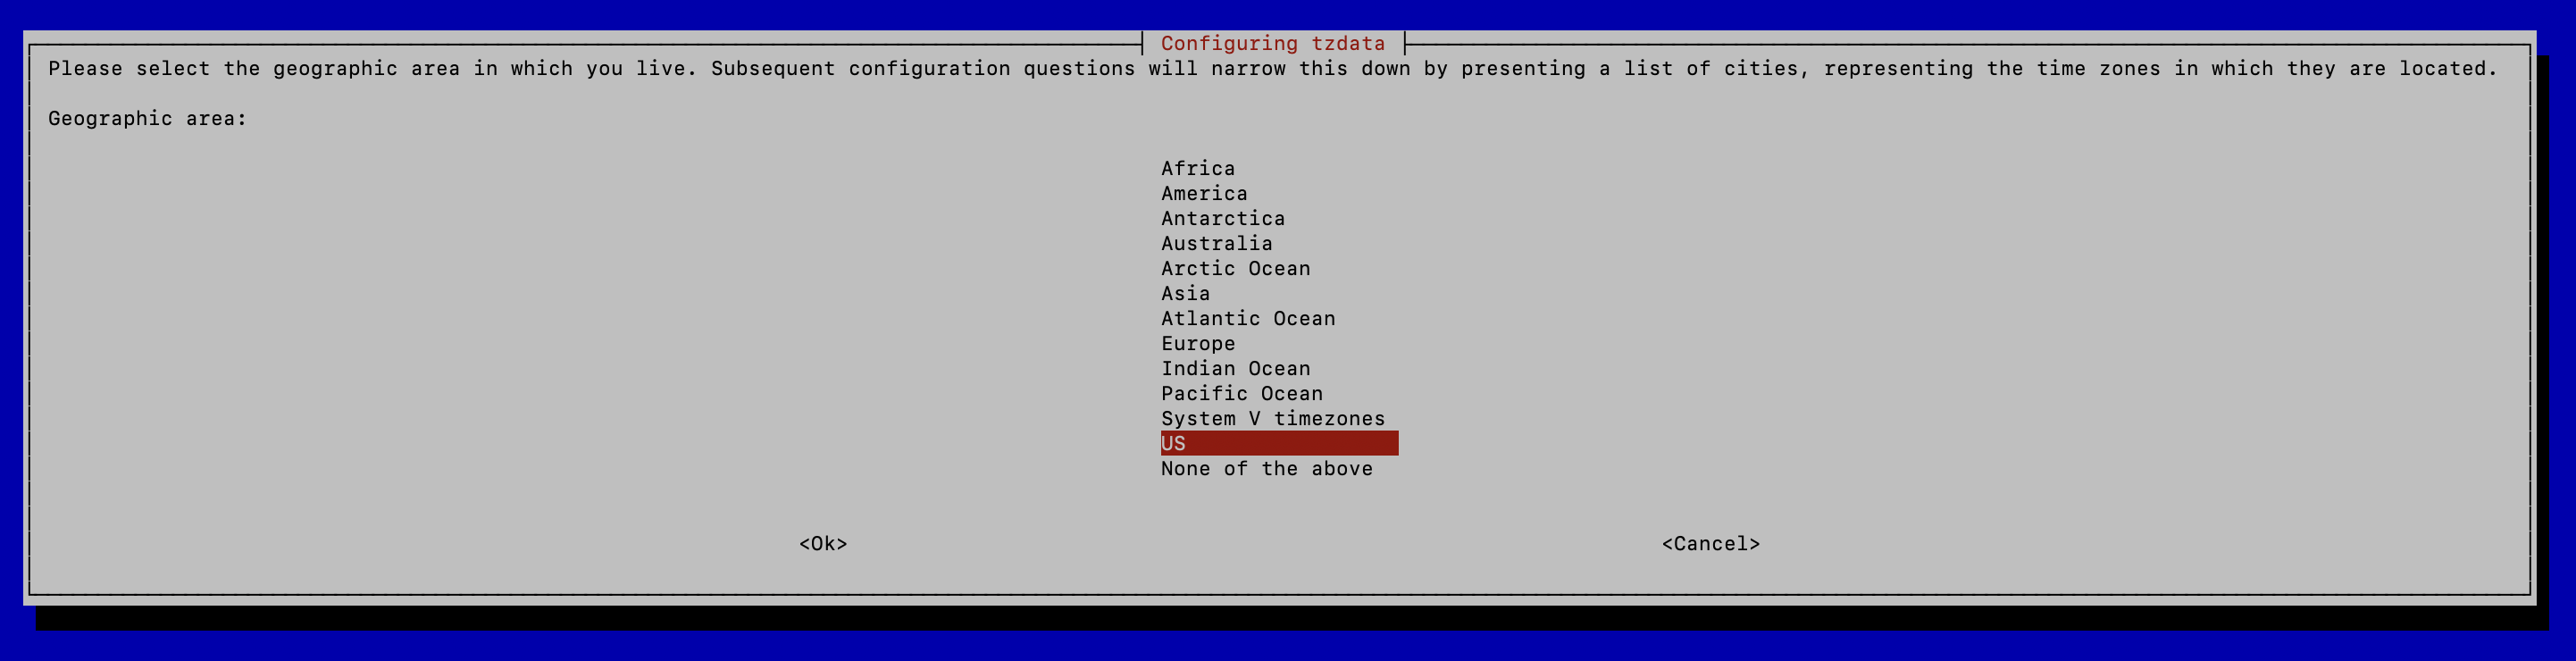
- Set Localisation Options:
sudo raspi-config
  > Localisation Options > TimeZone > US > Eastern > OK
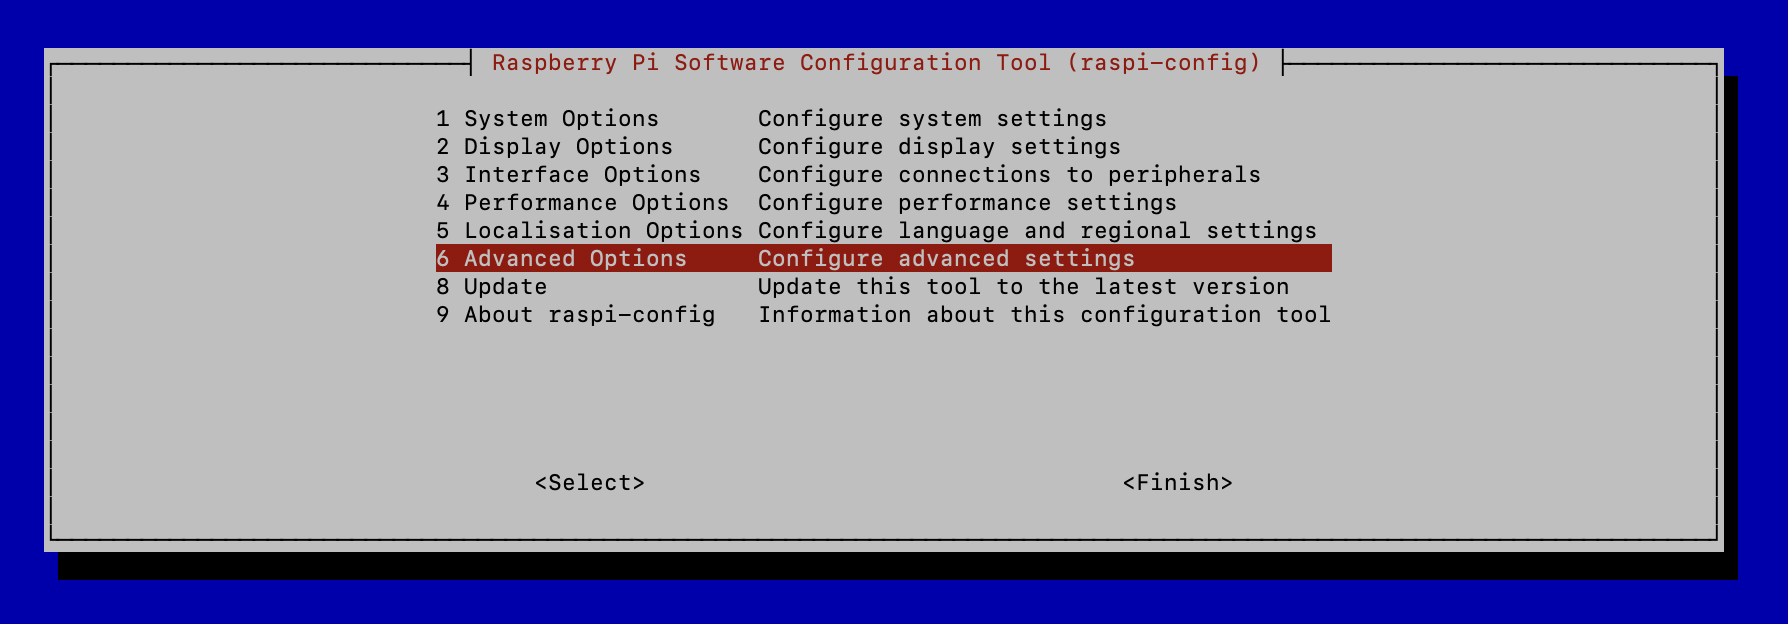
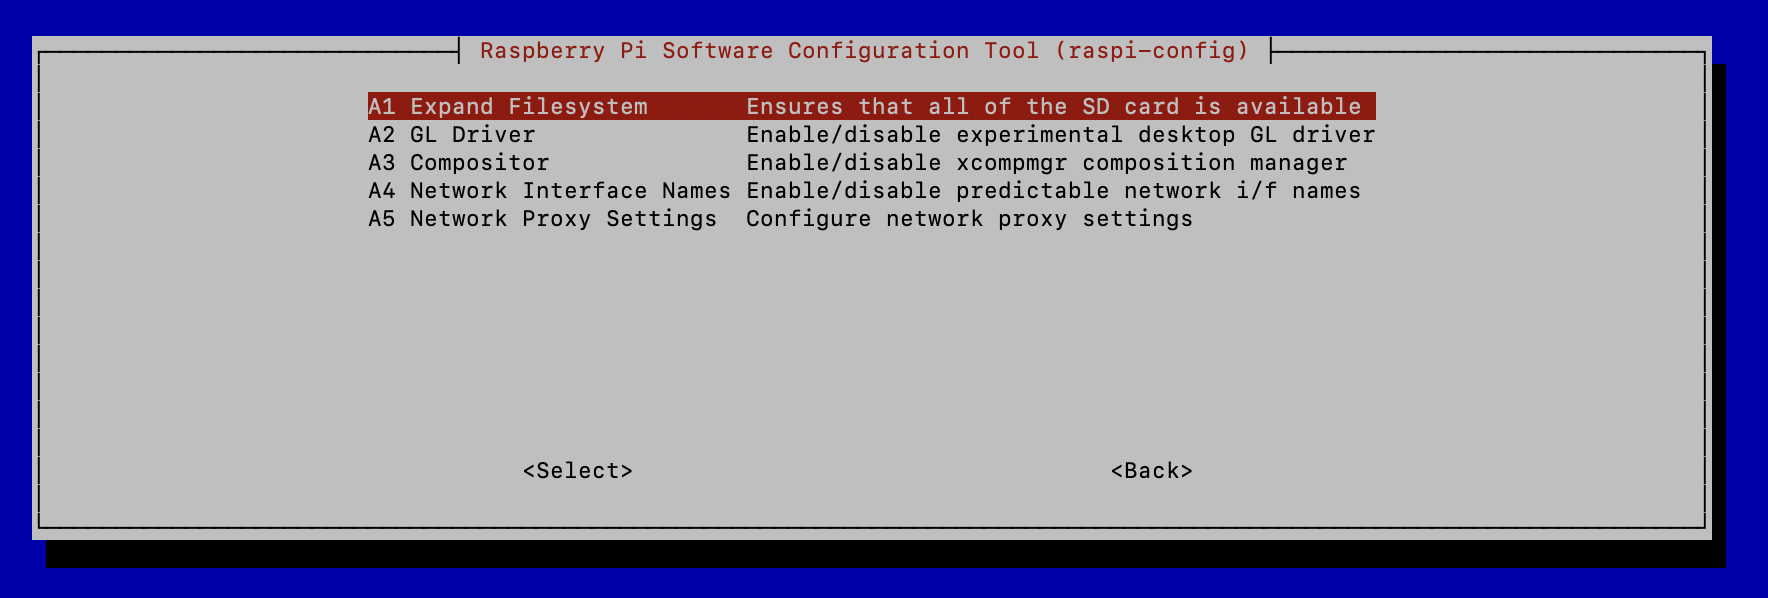
- Expand your storage
sudo raspi-config
> Advanced Options > Expand FileSystem
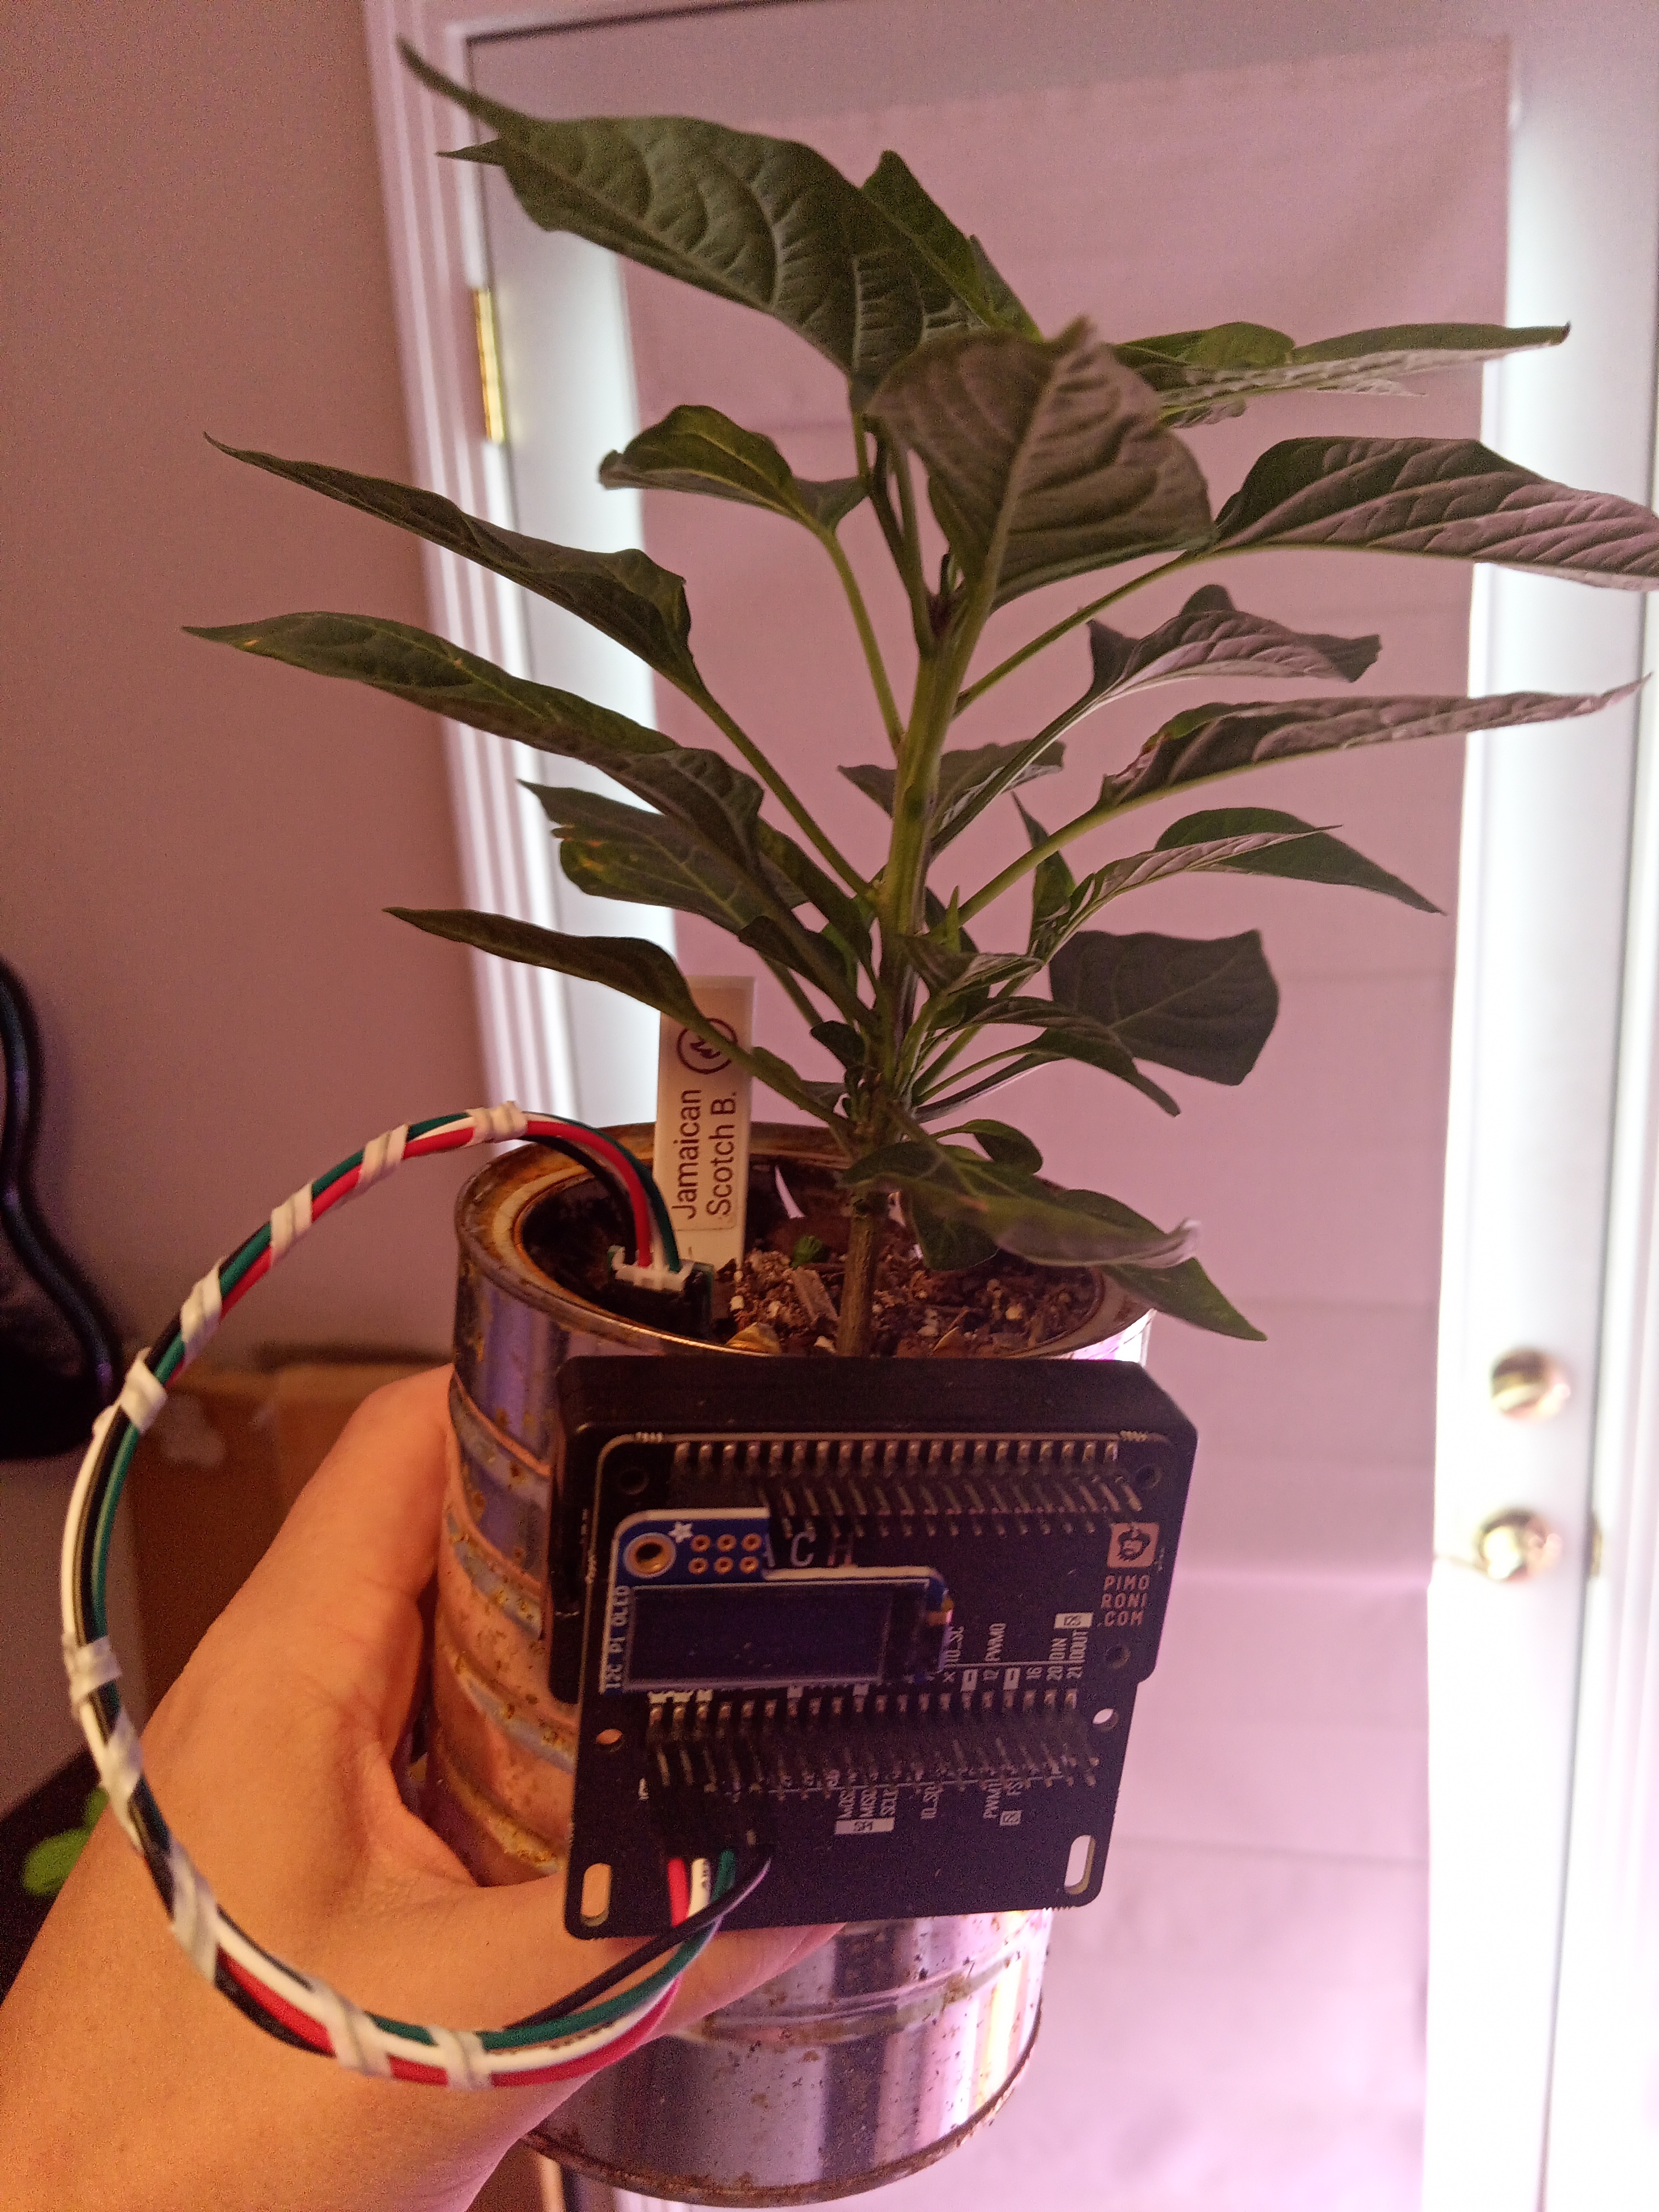
Soil Sensor Setup:
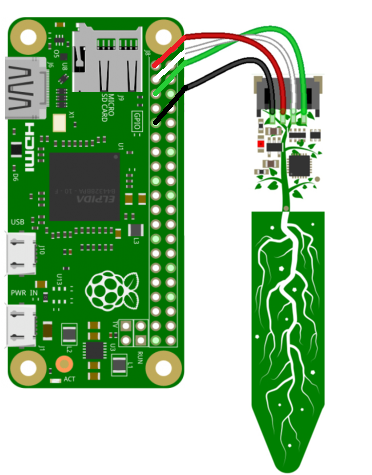
- Connect the sensor according to the following pin-out diagram:
- Soil Sensor Setup:
sudo apt-get install python3-pip
sudo pip3 install --upgrade setuptools
sudo apt-get install -y python-smbus
sudo apt-get install -y i2c-tools
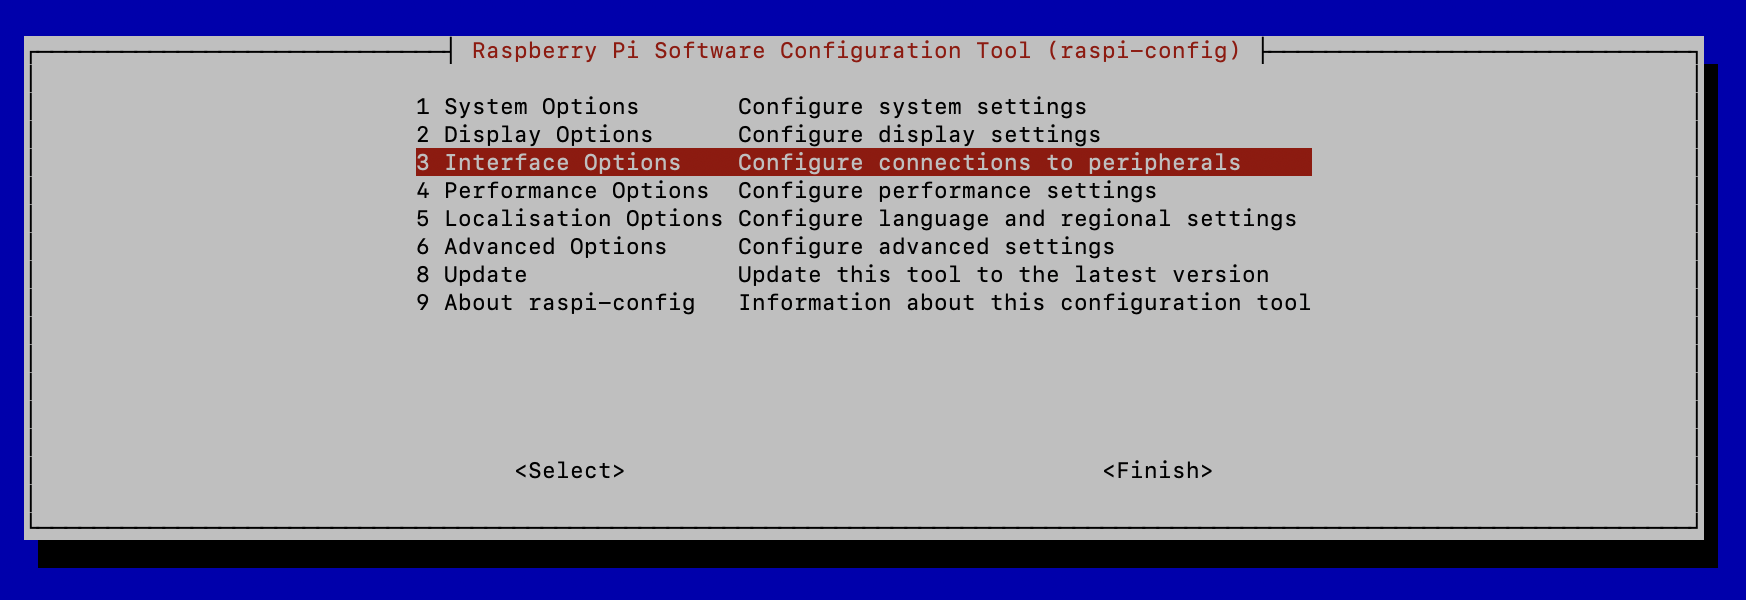
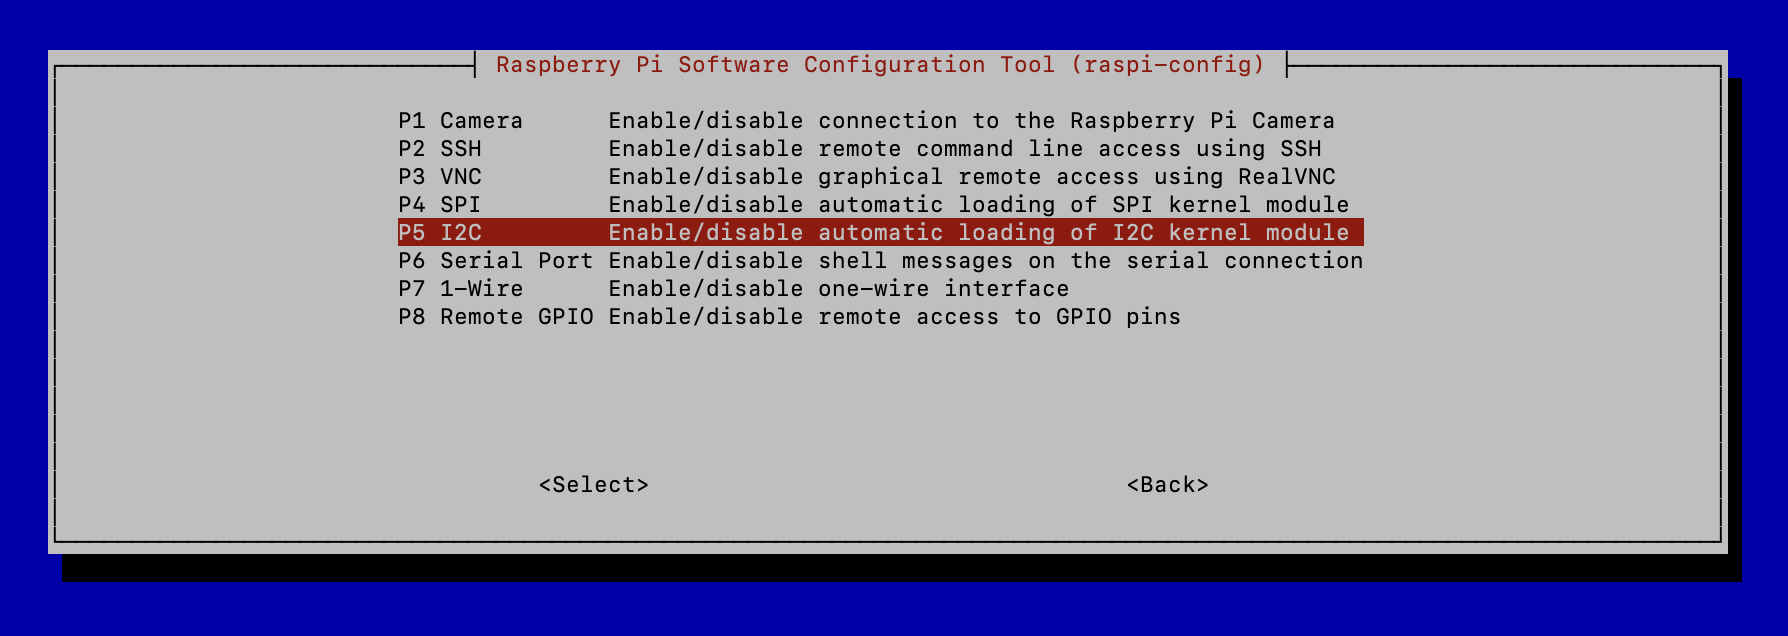
- Enable i2c interface (reboot first!):
sudo reboot -n
sudo raspi-config
  > Interfacing Options > I2C > Enable > OK
sudo pip3 install RPI.GPIO
sudo pip3 install adafruit-blinka
sudo pip3 install adafruit-circuitpython-busdevice
sudo apt install git-all
sudo git clone https://github.com/adafruit/Adafruit_CircuitPython_seesaw.git
sudo pip3 install adafruit-circuitpython-seesaw
OLED Screen Install:
If you have a GPIO splitter, you can connect the OLED screen and sensor at the same time!
- Install the following packages:
sudo pip3 install adafruit-circuitpython-ssd1306
sudo apt-get install python3-pil
sudo pip3 install requests
- [Optional] Grab and unzip silkscreen font to clean up txt display (cleaner font for this type of small OLED display):
wget http://kottke.org/plus/type/silkscreen/download/silkscreen.zip
unzip silkscreen.zip
- Build your main.py file
sudo nano main.py👉 …This program will run the Sensor as well as the OLED Display. This is because separate .py files for sensor reading and OLED output through a GPIO splitter will inevitably cause a collision sooner or later. Coding both functions into the same program will force them to initiate sequentially and thus, never collide.
- Run this file when you want to start the display along with the sensor with one command:
sudo python3 main.py
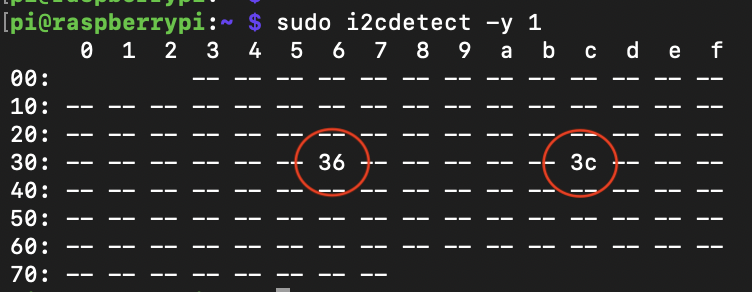
Test hardware detection and return hardware addresses:
sudo i2cdetect -y 1
#Soil Sensor should populate on x36
#OLED Display shows up on x3c
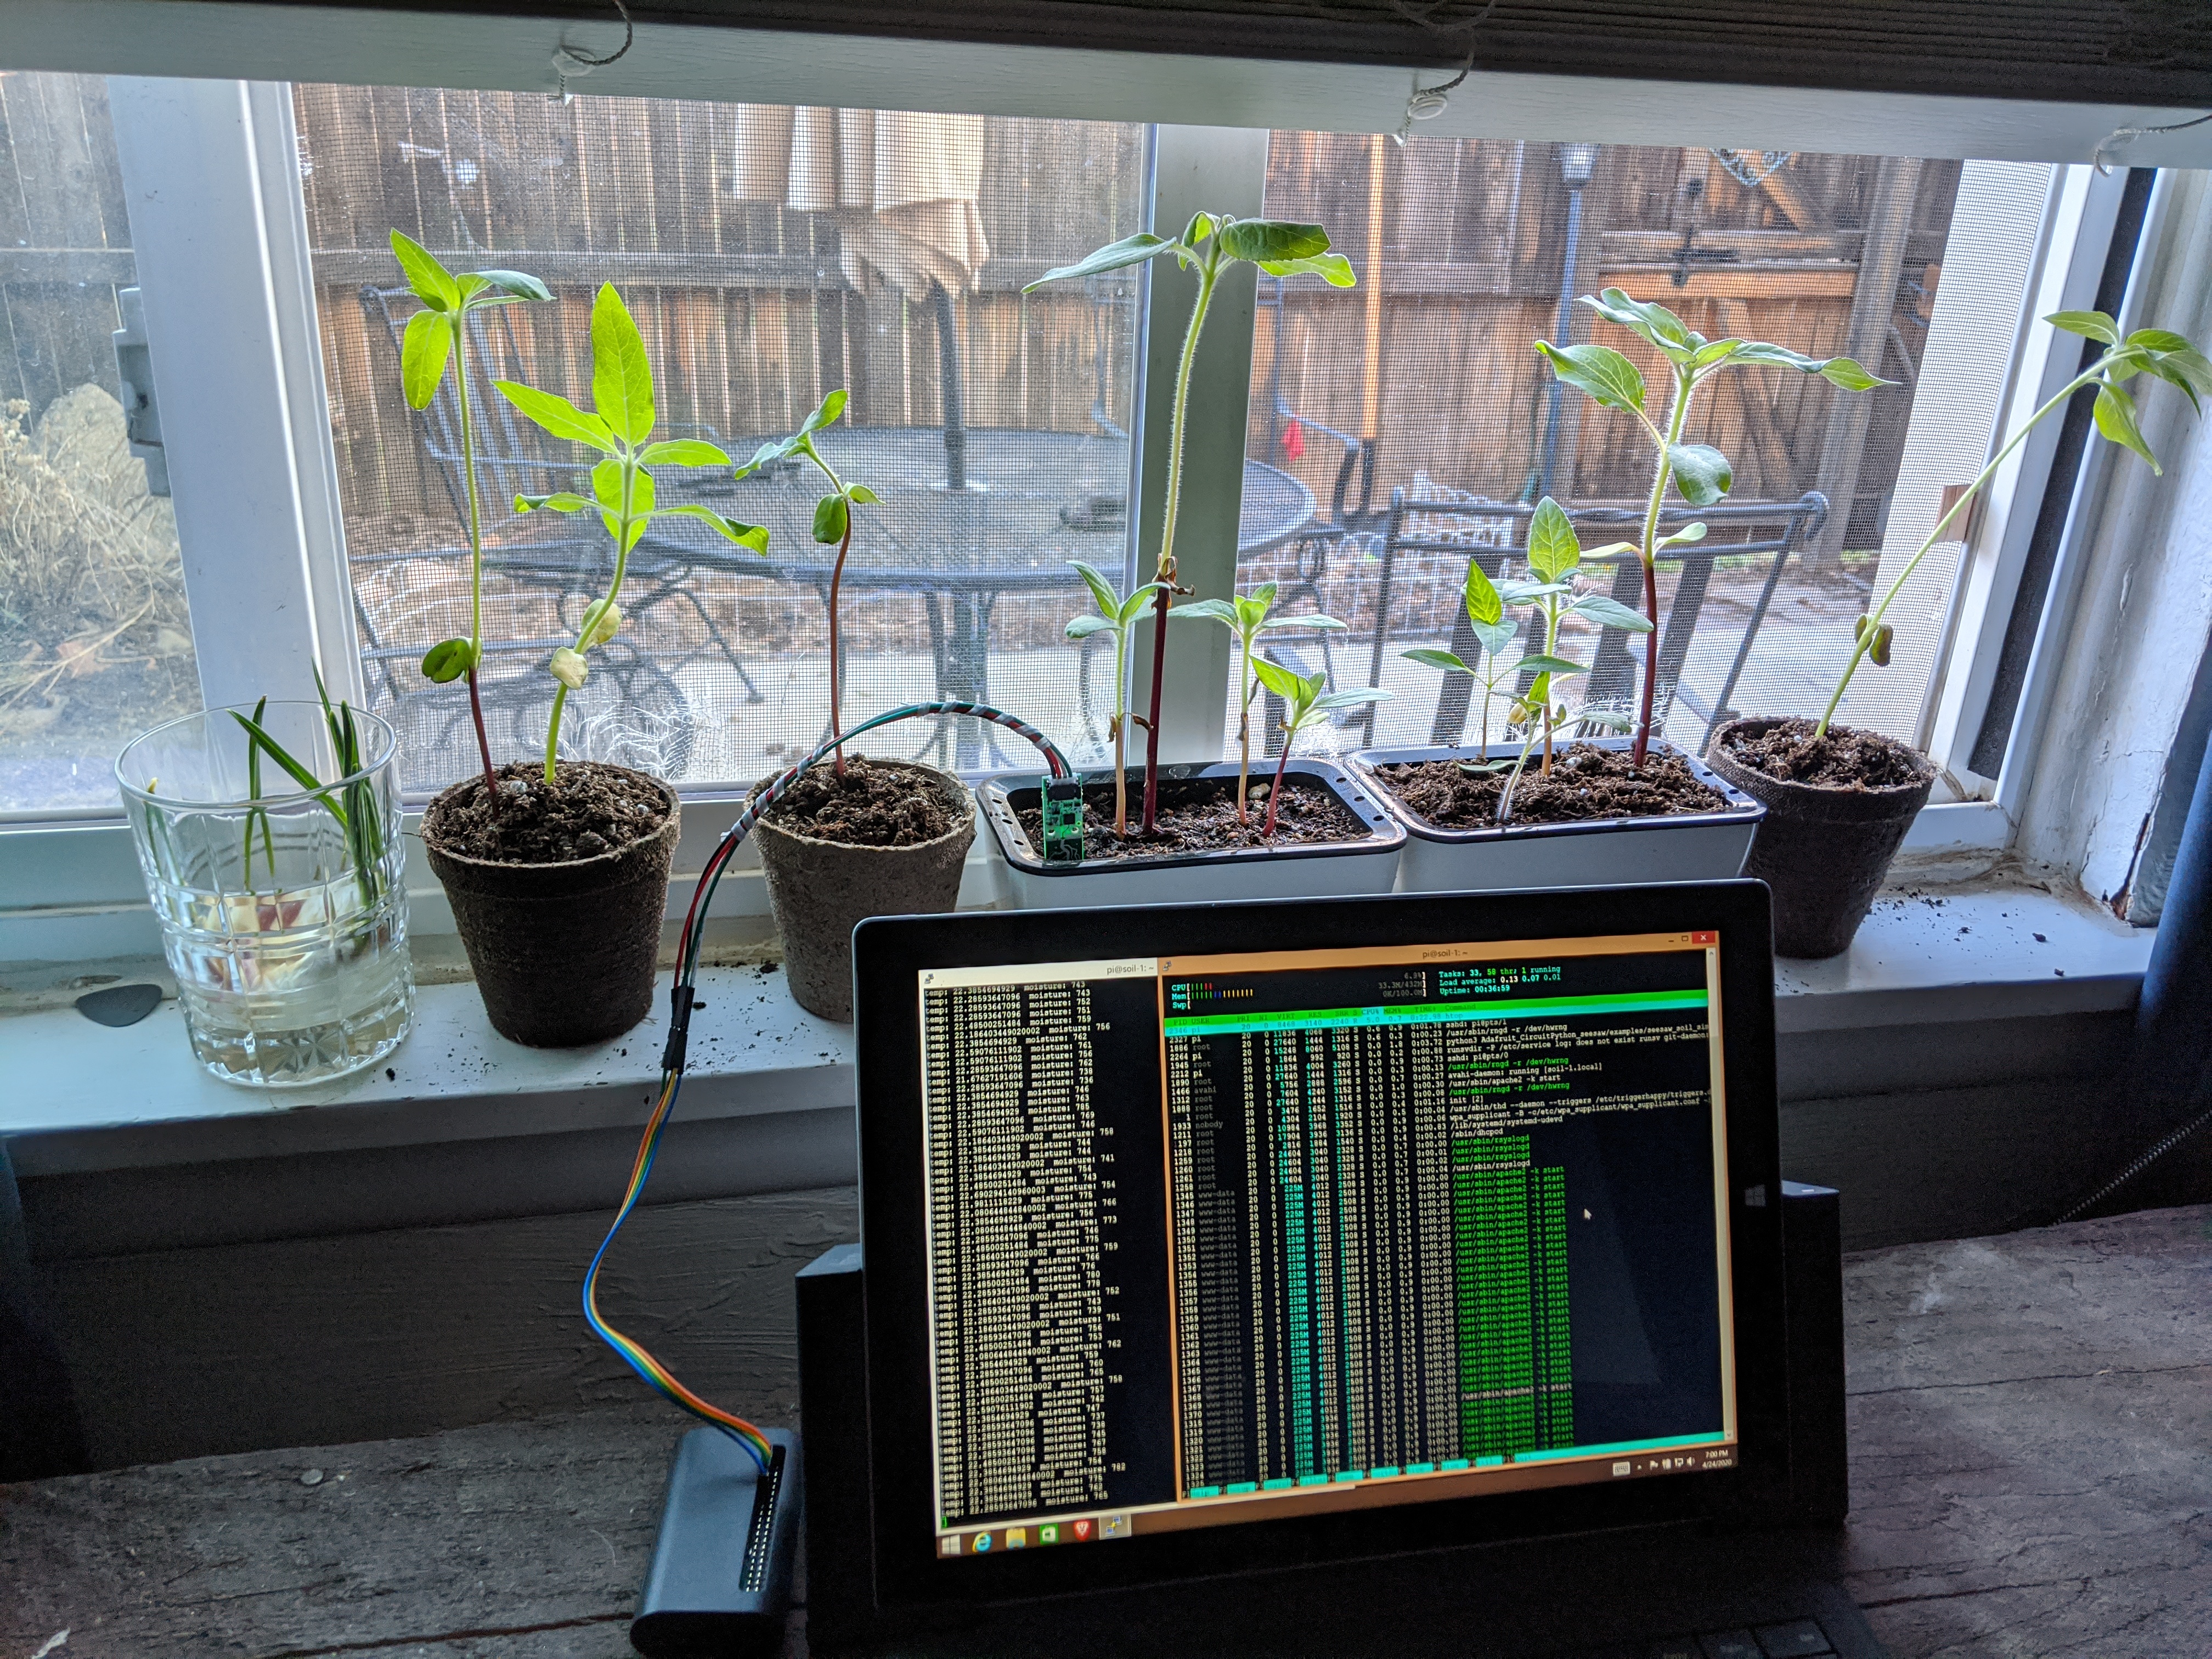
Once you run the OLED script, you should see the display populate as such:
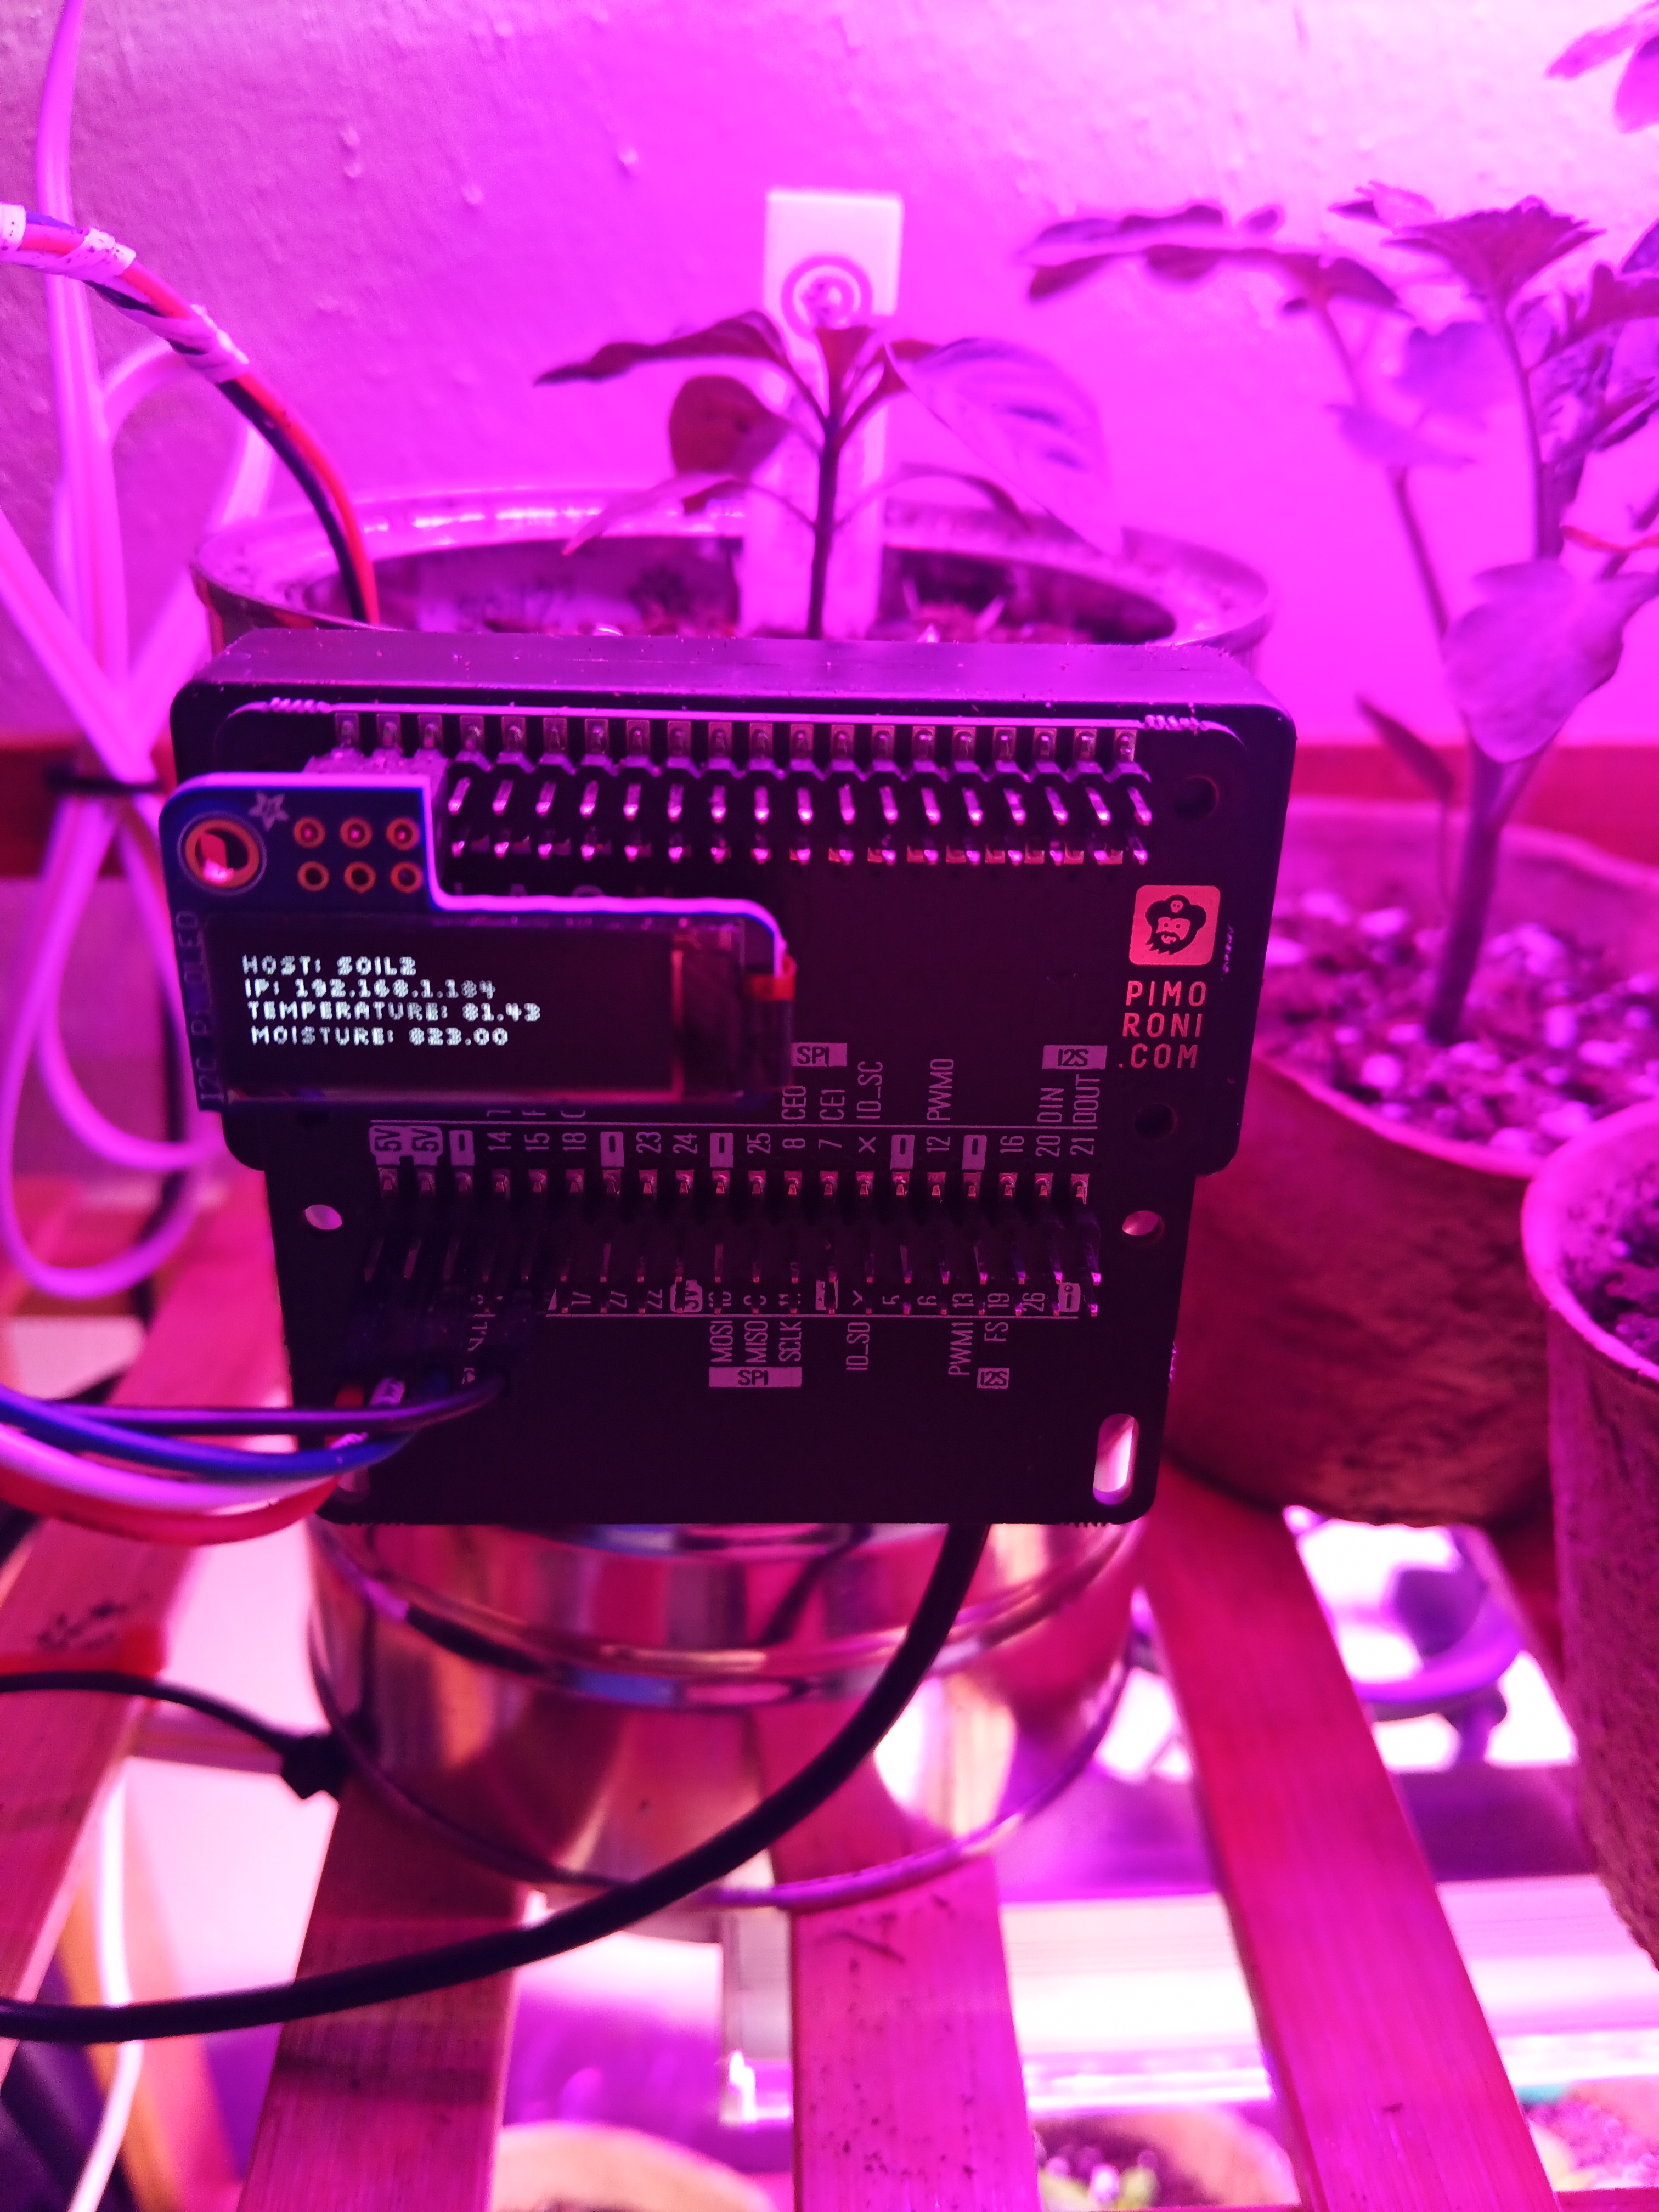
👉 Pro-Tip: Change the Hostname of the Raspberry Pi in the /etc/hostname file to the name of the plant you’re monitoring
FluentD Configuration:
- Install Ruby
sudo aptitude install ruby-dev
- Check/Confirm Ruby Version:
ruby --ver
- Install FluentD Unified Log Aggregator & Plugin
sudo gem install fluentd -v "~> 0.12.0"
sudo fluent-gem install fluent-plugin-td
- Install FluentD Plugn for Azure Log Analytics
sudo fluent-gem install fluent-plugin-azure-loganalytics
- Click here to learn more about FluentD
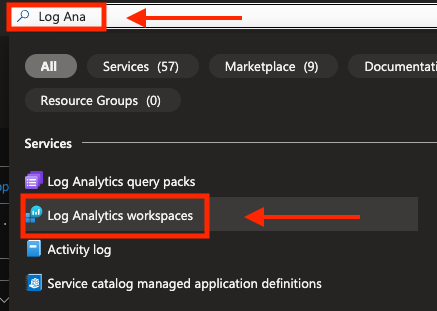
Create a Log Analytics Workspace
-
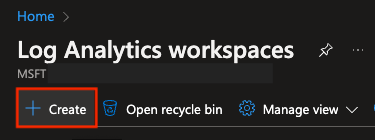
If you don’t already have one ready, navigate to Log Analytics Workspace in Azure Portal:
-
Select +Create
-
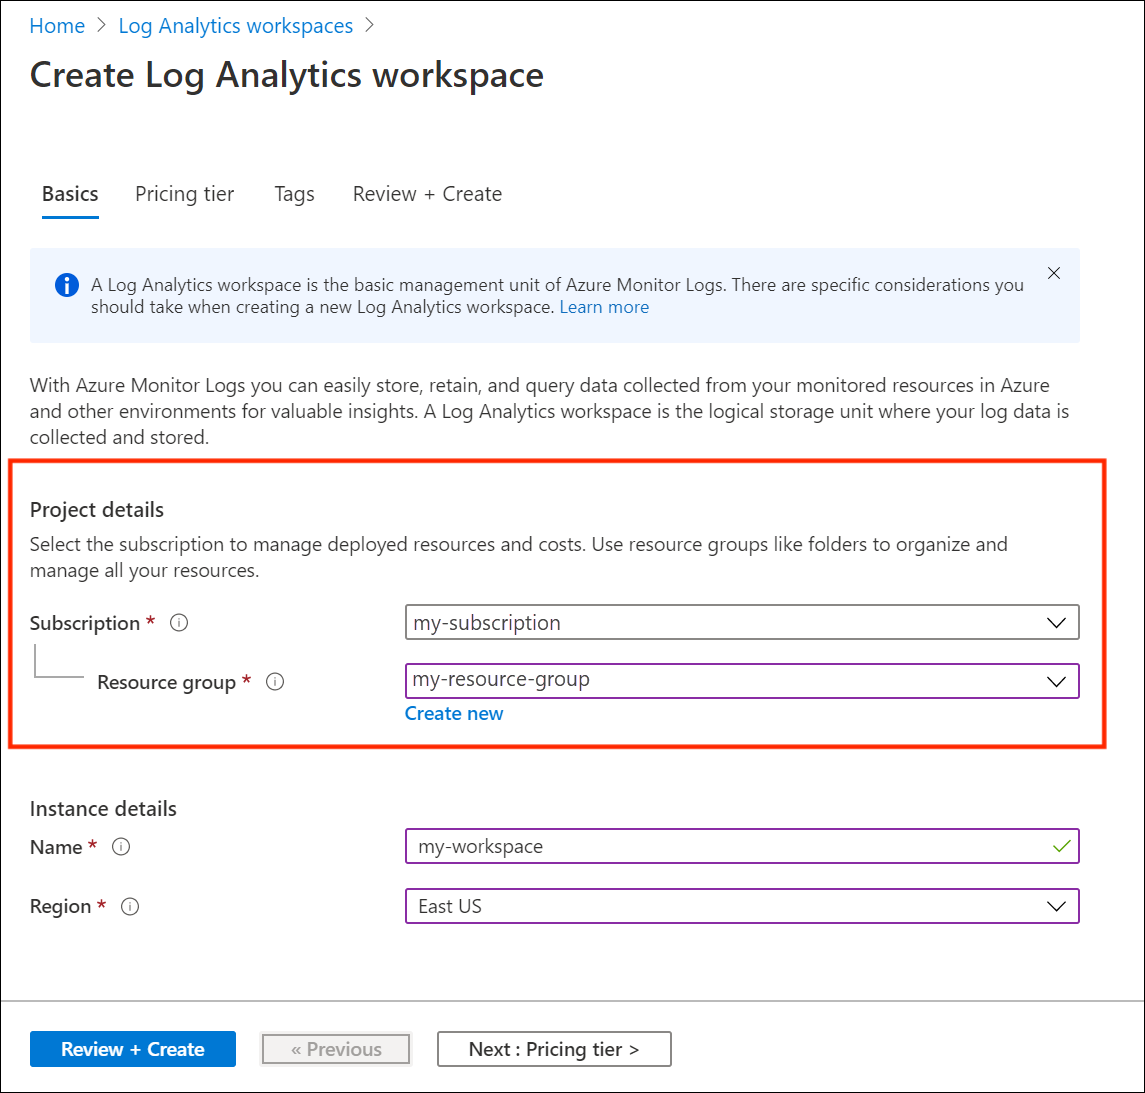
Select Subscription and Resource Group:
-
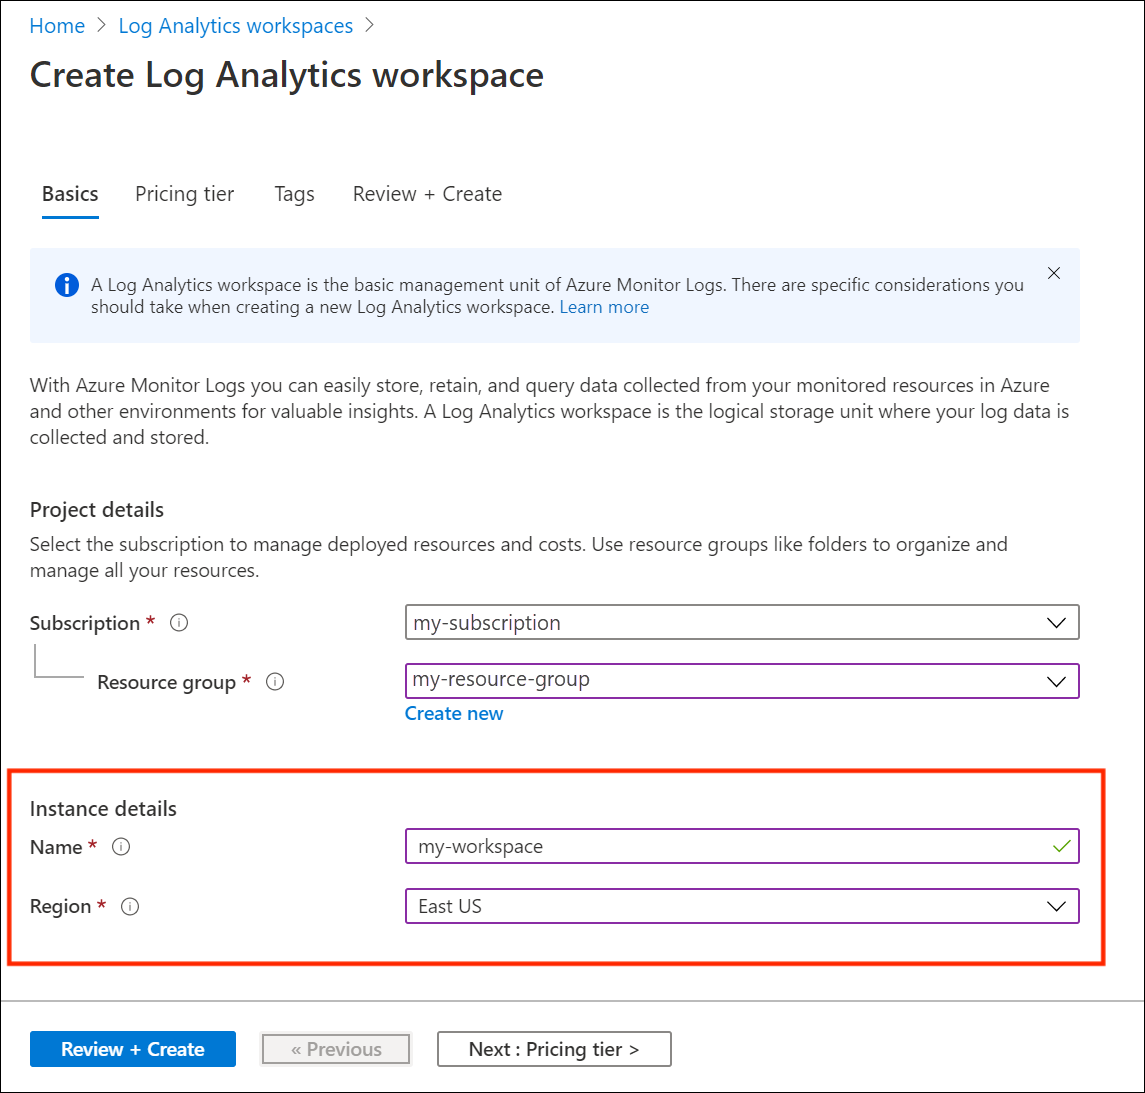
Select Instance Name and Region:
Commitment / Pricing Tiers
- Choose the appropriate commitment tier given your expected daily ingest volume.
💡 It makes sense to bump up to the 100GB/day commitment tier even when you hit as little as 50GB/day because of the 50% discount afforded at 100GB/day, for example.
👉 Check out my prior Sentinel Cost Optimization Part 1 and 2 articles at hanley.cloud, complete with use-cases and exercises. While you’re at it, don’t forget to peruse my GitHub repository for KQL breakdowns and ready-made queries for all kinds of complicated situations that you can simply copy and paste.
- Click Review & Create …to Finish Setting up a New Log Analytics Workspace
Connect to Workspace:
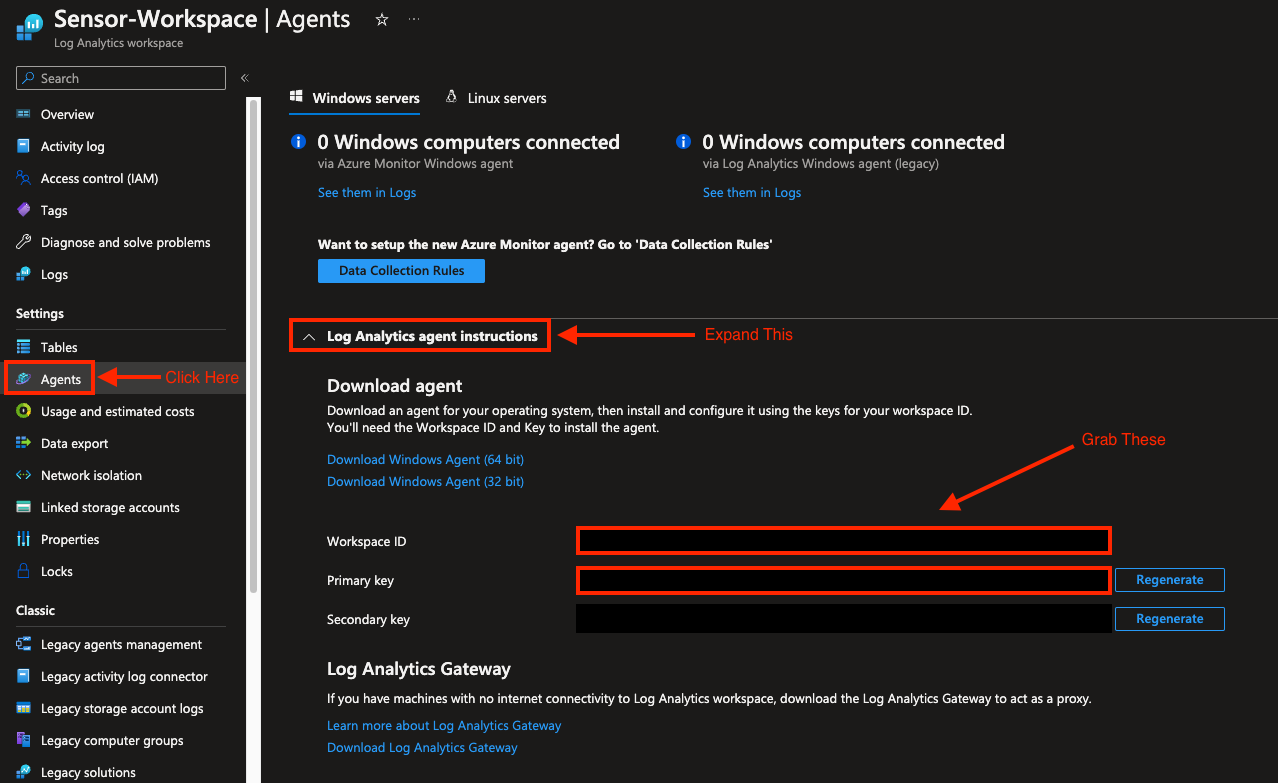
- Grab WorkspaceID and Primary Key:
- Plug ID and Key into your fluent.conf file Template located here: fluent.conf
- Launch the sensor application
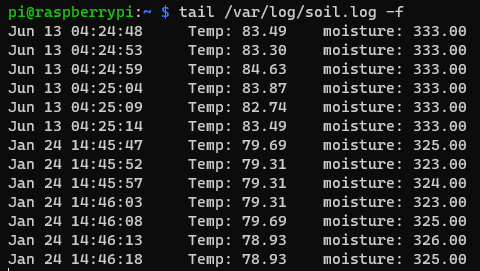
sudo python3 main.py & - Confirm logs are working locally
tail /var/log/soil.log -f
- Launch FluentD
sudo fluentd -c /etc/fluent.conf --log /var/log/td-agent/fluent.log &
💡Pro-Tip: Create a bash file to launch FluentD with the appropriate parameters so you don’t have to type it out every time:
sudo nano Start_FluentD.bash
Paste the following into nano, save and close:sudo fluentd -c /etc/fluent.conf --log /var/log/td-agent/fluent.log &
👉 Now you can start FluentD with the following command:sudo bash Start_FluentD.bash &
- Confirm FluentD is forwarding to Log Analytics Workspace
tail /var/log/td-agent/fluent.log -f

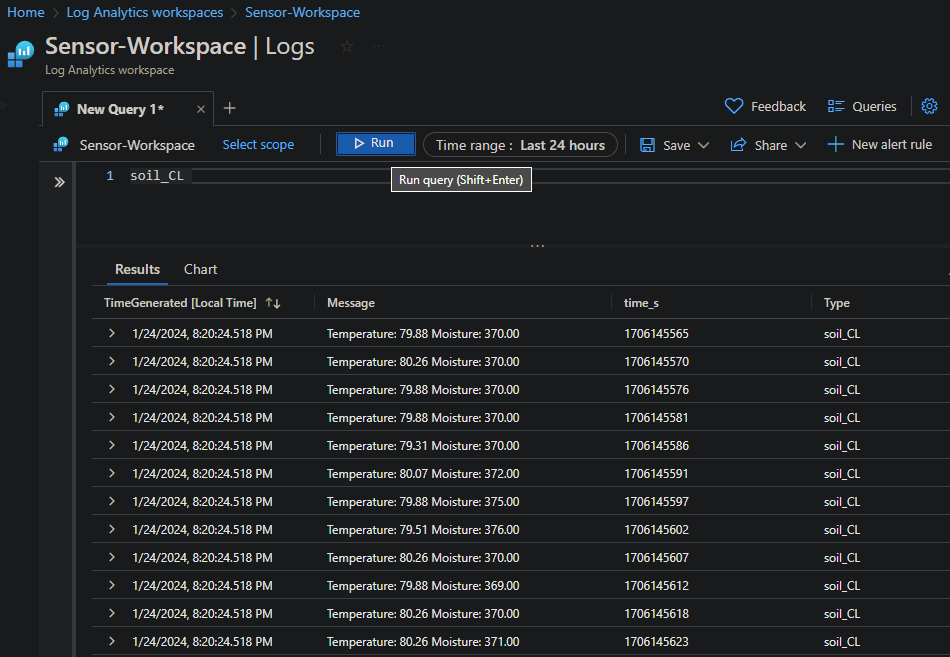
- Navigate to your Log Analytics Workspace to query the logs coming into your workspace.
Query Auth and Syslog Tables
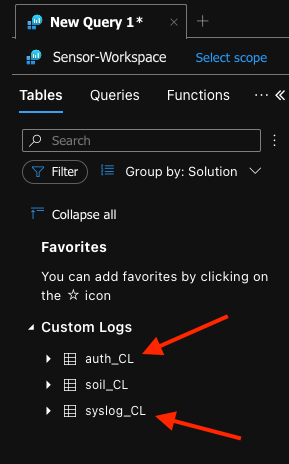
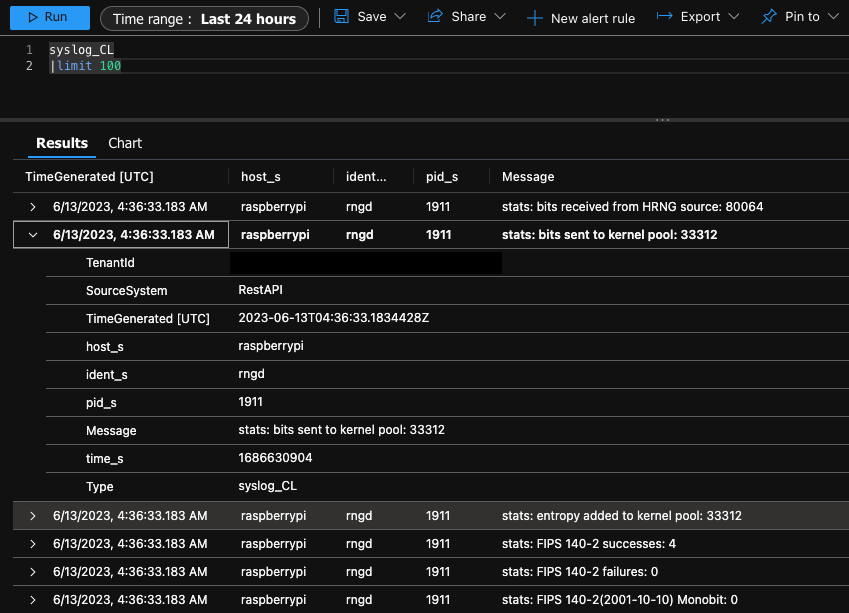
If you’ve setup your FluentD config file correctly, you’ve got Auth and Syslogs coming into Sentinel as Custom Logs (_CL) as well as your Soil data. Logs ingested this way show up under ‘Custom Logs’ and have ‘_CL’ appended to their name when they hit the workspace. You can Query the Auth Logs for failed sign-in attempts etc., illustrated below…
Navigate to your Log Analytics Workspace and you should see your custom logs :
Added Security
💡 Once FluentD is cooking without issue on your Pi, try logging in with an incorrect password to trigger an entry in the new custom log ‘auth_cl’ then query the table 👇
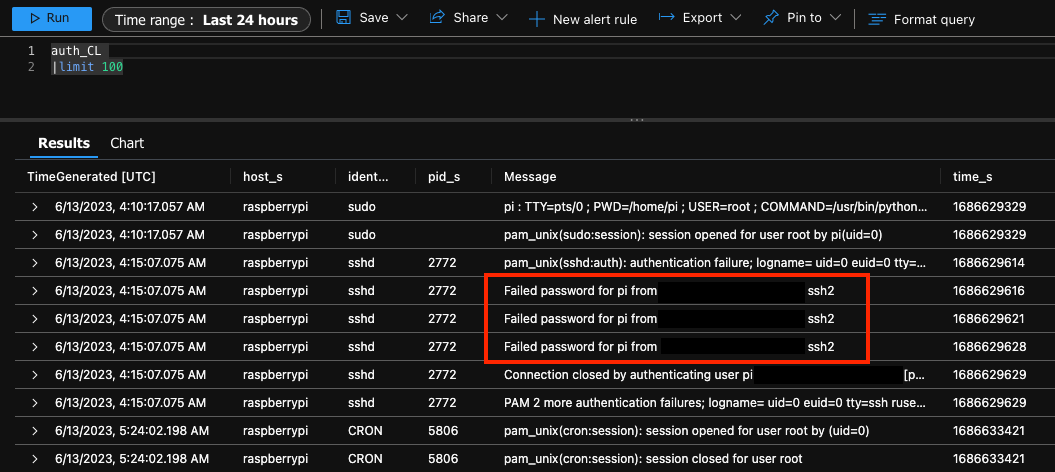
The syslog table (syslog_cl) is populating too 👇
Start on Boot:
- Append the above command to /etc/rc.local to start on boot:
sudo nano /etc/rc.local
	sudo python3 main.py && sudo Start_FluentD.bash
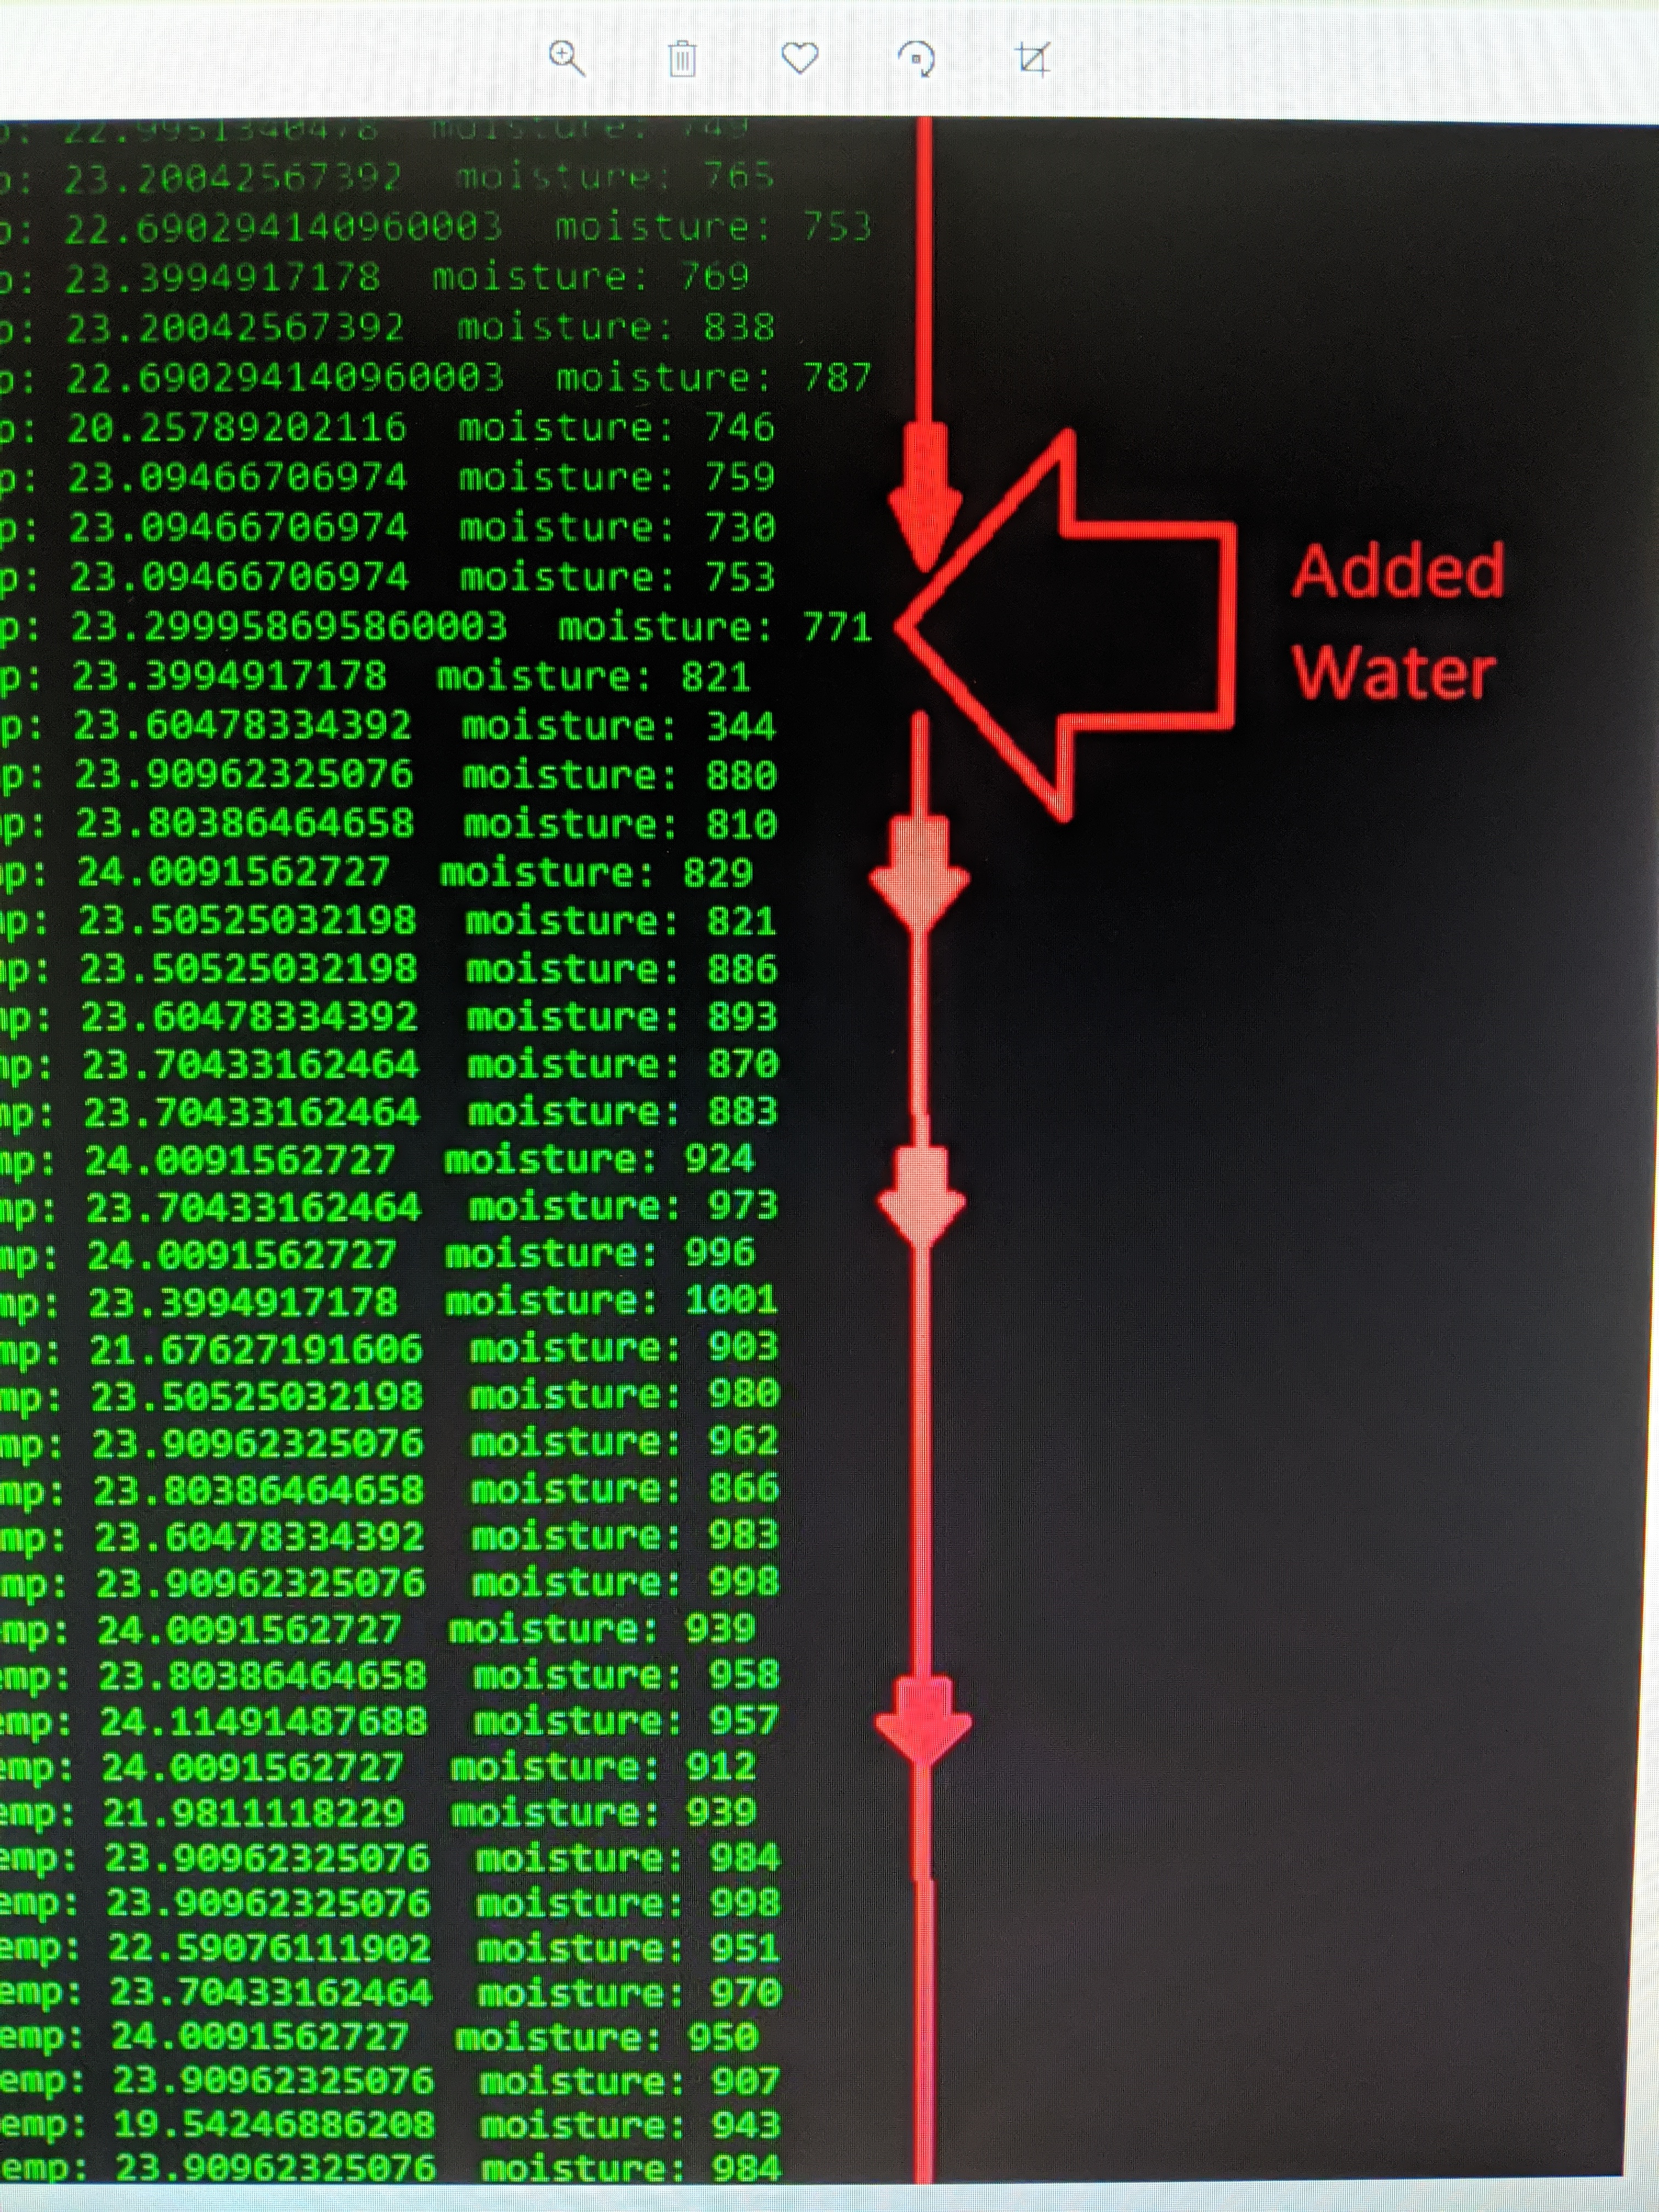
Add Water…
When I add moisture to my soil sample, I can see the moisture reading adjust:
In this Post We:
- 👉 Reviewed Hardware and Pre-Requisites
- 👉 Performed a “Headless” Raspberry Pi Setup
- 👉 Configured an I2C Capacitive STEMMA Soil Sensor
- 👉 Configured an OLED Display to Output Sensor Readings in Real Time
- 👉 Tested and Confirmed Hardware
- 👉 Created a Log Analytics Workspace
- 👉 Sent Sensor Data to Microsoft Sentinel
- 👉 Queried custom logs for operations, security, and soil data
- 👉 Automated/Configured Start on Boot
- 👉 Accomplished something AWESOME 😎
📚 Want to go deeper?
My Toolbox books turn real Microsoft security telemetry into defensible operations:
🧰 PowerShell Toolbox Hands-On Automation for Auditing and Defense
🛠️ KQL Toolbox: Turning Logs into Decisions in Microsoft Sentinel

📖 Ultimate Microsoft XDR for Full Spectrum Cyber Defense
Real-world detections, Sentinel, Defender XDR, and Entra ID — end to end.

